Module document
Picking and distribution from store
Version 1.5, 02.02.2022
Customer/Internal
Content
| Anchor | ||||
|---|---|---|---|---|
|
2 Overall solution
3 Routine description - Dispatch orders
3.1 Order details
3.1.1 Cancel order
3.2 Print shipping papers
3.3 Dispatch orders: Service center
3.3.1 Edit order line
3.3.2 Reassign
3.3.3 Reassign order line
3.3.4 Automatic reassign
3.3.5 Replace item
3.3.6 Remove item
3.4 Web order: Central warehouse
3.4.1 Package of dispatch orders
3.4.2 Return items
3.4.3 See orders for all stores
4 Dispatch rules
4.1.1 Delete dispatch rule
4.1.2 View /change dispatch rule details
4.2 Create new dispatch rule
4.2.1 Overview
4.2.2 Delivery rules
4.2.3 Item availability
4.2.4 Confirmation messages
Change log
...
Version
...
Date
...
Change
...
Changed by
...
Approved by
...
1.0
...
05.06.2018-
...
Document created
...
Lise Berntsen
...
Lars Rambech
...
1.1
...
04.07.2018
...
Described chapter 1 and 2
...
Lars Rambech
...
...
1.2
...
31.07.2018
...
Updated screenshots
...
Lise Berntsen
...
...
1.3
...
17.01.2019
...
Updated screenshots
...
Lise Berntsen
...
Lars Rambech
...
1.4
...
11.11.2019
...
Updated screenshots and descriptions
...
Lise Berntsen
...
Lars Rambech
...
1.5
...
02.02.2022
...
Updated screenshots and descriptions
...
Lise Berntsen
...
.2 Delivery rules
4.2.3 Item availability
4.2.4 Confirmation messages
| Anchor | ||||
|---|---|---|---|---|
|
| Anchor | ||||
|---|---|---|---|---|
|
| Anchor | ||||
|---|---|---|---|---|
|
| Anchor | ||||
|---|---|---|---|---|
|
...
Click on Order confirmation to display the order confirmation.
Order confirmation opens in a new screen. You have following options: Print, Get PDF or Send confirmation on e-mail or SMS.
Print – Select Print to print the order confirmation. A printer dialog opens. Select how to print the order. |
Get PDF – Select Get PDF to download a PDF-file with the order confirmation. |
Send confirmation – Click on Send confirmation to send order confirmation. |
8. Send confirmation
Click on Send confirmation to send an order confirmation, e.g. if changes have been made to the order. The "Send confirmation" dialog opens. You will get a question if you are sure you want to send confirmation. Click on Yes to send the order confirmation.
| Anchor | ||||
|---|---|---|---|---|
|
...
Preview Shipping papers example:
Preview Delivery note example:
Print Shipping paper and delivery note
Select the order line you want to print shipping paper for. Click on the "printer icon" to the right on the line or click on Print selected rows at the bottom of the screen.
The Shipping paper opens in a printer dialog, select print to print the Shipping papers.
Click on the "eye-icon" and open a preview of the Delivery note. You can click on the Print button if you want to print the Delivery note.
View rows for all stores
If you are a HK-user, you can choose to display rows for all stores. Then all orders that have been processed are displayed. |
| Anchor | ||||
|---|---|---|---|---|
|
| Anchor | ||||
|---|---|---|---|---|
|
| Anchor | ||||
|---|---|---|---|---|
|
...
| Anchor | ||||
|---|---|---|---|---|
|
Click on the Reassign button if you should reassign the complete order to another store. |
"Reassign" dialog opens. |
| Anchor | ||||
|---|---|---|---|---|
|
| Anchor | ||||
|---|---|---|---|---|
|
| Anchor | ||||
|---|---|---|---|---|
|
...
It is possible to replace item.
Mark the item line that should be replaced. Click on the (…) "more button" at the right, and select "Replace item". |
"Replace item" dialog opens. | |
| |
The new item gets line discount if the price on the new item is higher than the old. |
| Anchor | ||||
|---|---|---|---|---|
|
| Anchor | ||||
|---|---|---|---|---|
|
...
In the Overview tab you configure general dispatch rules for the web shop. See description in the table.
Edit store type
In top of the view you see an overview over number of stores that is a part of the different store types.
Click on the Edit button. An new view with a list of stores opens, there are one line per store. In this view you see an overview of which store types that is configured for each store, and you can select the store types that the stores should be a part of.
Select/remove store types for one store
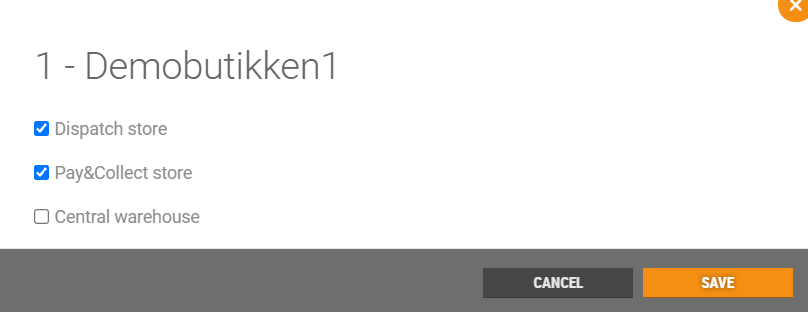
You can select store types for one store by marking the line for the relevant store, and click on the "pencil icon".
A dialog displaying the stores store types opens. Select store types for the store by ticking the relevant store types. You can also remove store types by unticking store types.
Click on Save to save the changes.
Select store types for several stores
Tick the stores you want to select store types for. At the bottom of the view you have buttons to set the different store types.
Click on the buttons for the relevant store types. The selected store types is added to the ticked stores, and displayed in the overview.
Field description in the Overview tab
Field | Description |
OVERVIEW – Click on the Edit button to configure store type for the stores. See Edit store type description. |
Web shop | Store number for the web shop. |
Central warehouse stores | Number of Central warehouse stores. |
Dispatch stores | Number of Dispatch stores. |
Pay&Collect stores | Number of Pay&Collect stores. |
ORDERS AND FREIGHT |
Free shipping | Tick "Free shipping" if free freight should be possible. The "Free shipping from (NOK)" field opens. |
Free shipping from (NOK) | Add the minimum amount the customer must shop for to get free freight. |
Allow splitting a web order to deliver the items from multiple stores | Tick this if it should be allowed for web orders to be split to deliver from different stores. Select max number of stores a web order can be delivered from. |
Allow splitting line in web order | Tick this if splitting order line in web order should be allowed. |
Preferred stock location | Specify the percentage share of the dispatch to be sent from the central warehouse. |
MAXIMUM NUMBER OF OPEN ORDER PER STORE |
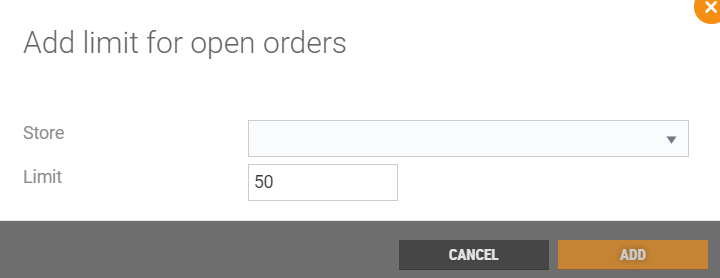
Default limit | Specify default limit for maximum number of open orders per store (possible to override on store level). |
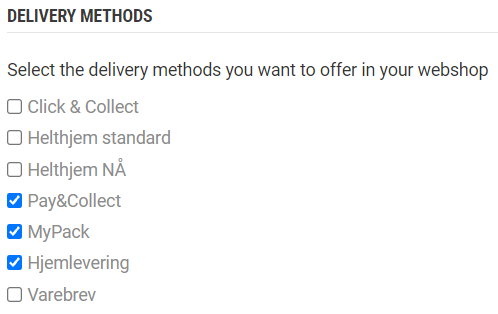
DELIVERY METHODS | Select the delivery methods you want to offer in your web shop. |
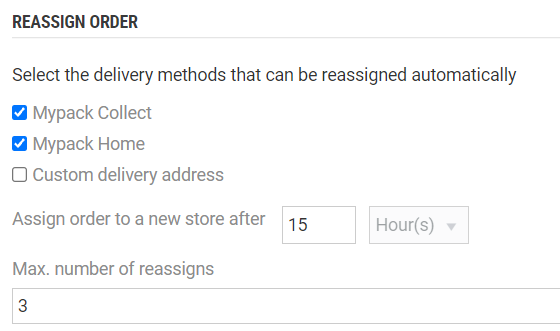
REASSIGN ORDER | The dispatch orders can be reassigned automatically if no picking store is available or maximum number of automatic reassigns has exceeded the set value. The Reassign order configuration includes:
|
Save | Click on the Save button to publish changes to Dispatch Service. |
View history | Click on the View history button to show historical updates of the dispatch rules. The "History" dialog opens, it shows change history. |
Activate configuration | When the dispatch rule is created or changed, the configuration must be activated. Click on Activate configuration after the dispatch rules are saved, to activate the configuration. |
| Anchor | ||||
|---|---|---|---|---|
|
| Anchor | ||||
|---|---|---|---|---|
|
...
Some of the rules is configured by selecting item lists or item group lists, containing the wanted items.
Add item list/item group list
Click on Edit to add item lists/item group lists. A dialog to select item list/item group list opens (heading in the dialog show the selected rule). | |
Selected Item lists/item group lists is displayed in the delivery rules screen. |
Delete item list/item group list
Item lists/item group lists can be deleted. Click on the Edit button, the dialog opens.
Click on the list you want to delete, and click on the "bin icon" to delete the list.
Click on the Update button to delete the list from the rule.
Items that must be sent from specific store
You can select items that must be sent from specific store. |
Items that are preferred to be sent from specific stores
You can select items that are preferred to be sent from specific stores. |
| Anchor | ||||
|---|---|---|---|---|
|
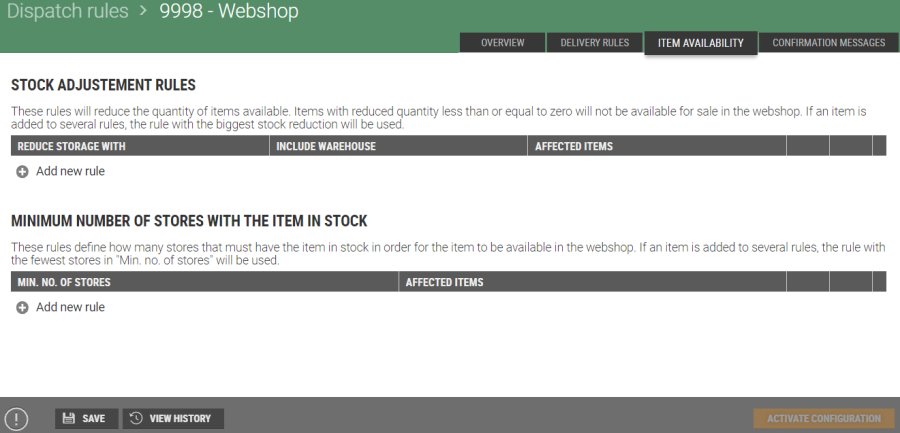
In the Item availability tab you can configure rules that determine whether an item is available in the web shop, and reduce the quantity of available items in the web shop.
The screen is divided in two parts; "Stock adjustment rules" and "Minimum number of stores with the item in stock". You can define rules for stock adjustment, and minimum number of stores that has the item in stock for the item to be available in the web shop.
Stock adjustment rules
This rules will reduce the quantity of items available. Item with reduced quantity less than or equal to zero will not be available in the web shop. If an item is added to several rules, the rule with the biggest reduction will be used.
Add new rule |
Reduce storage with | Enter the quantity that the stock should be reduced with when selling an item. |
Include warehouse | Tick this if the rule also should include warehouse. |
Applies to – Select if the rule should apply to all items or selected items. |
All items | Tick this if the rule applies to all items. |
Selected items | Tick this if the rule should be applied to selected items. If you select "Selected items" fields to select item lists or item group lists opens. |
Update | Click on Update to update the configuration. The rule is added to the list of rules for stock adjustment. |
Cancel | Or click on Cancel to cancel registration. |
Change rule
You can change the conditions to the rules. Click on the relevant rule, and click on the "pencil icon". |
|
Minimum number of stores with the item in stock
These rules define how many stores that must have the item in stock in order for the item to be available in the webshop. If an item is added to several rules, the rule with the fewest stores in "Min.no. of stores" will be used.
Add new rule |
Minimum number of stores | Enter the minimum number of stores that must have the item in stock, for the item to be available in stock in the web shop. |
Applies to – Select if the rule should be applied to all items or selected items. |
All items | Tick this if the rule applies to all items. |
Selected items | Tick this if the rule should be applied to selected items. If you select "Selected items" fields to select item lists or item group lists opens. |
Update | Click on Update to update the configuration. The rule is added to the list of rules for stock adjustment. |
Cancel | Or click on Cancel to cancel registration. |
Click on Save to save the configuration.
...


