Purpose
To show the process of adding new billing to a new company and/or for a new user; or a billing for a new service they have started to use. This article will not show what do to in case a bill needs to be removed or edited.
Scope
Applicable for whenever a new company starts using Timma or have started with a new service with us and we have to add it to the billing, for current customers there is a separate view to add new products for users which we won’t show in this article.
Definitions/Acronyms
- Payer: To whom the invoice will be sent to as the responsible individual for the payment. Usually the company.
- Payee: For which user the Payer pays for and for which services the Payee uses.
An example would be: Payer = company and Payee = user Payer receives the invoice for Payee’s Calendar, Payee’s SMS-reminder, etc.
- Bill: Invoice
- Billing: Product which will be billed
Step-by-step guide
Step 1: Navigating in Hallinta
- Log into Hallinta and navigate to the Companies-page.
- Step 1.1: Search for either company name, company businessID number, company email, company phone or company adress in order to find the right account.
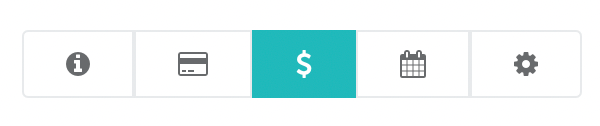
- Step 1.2: Once you’ve navigated to the correct company, and landed on their page you’ll see in Hallinta an icon that’s a dollar sign. This is the billing page.
Step 2: Check current billings
- Step 2.1: At first glance we can see all the current Product the company has added to their account.
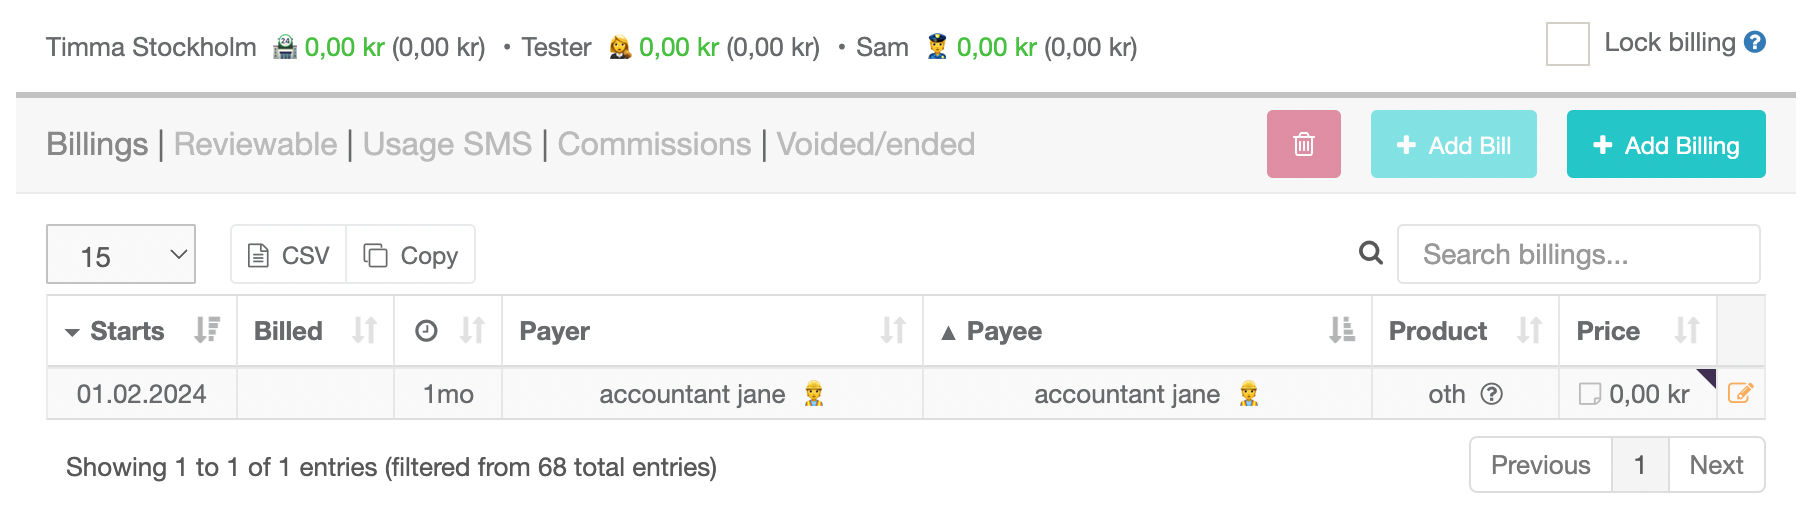
If we look at the image above, we can see an overview of all current billings this company has assigned. We can see, from left to right, when the billing started, most recently billed date, the time interval which is normally 1 or 2 months. The Payer (whom the invoice will be sent to), the Payee (which user the bill will be for), which product, and finally price.
Step 3: Adding a new billing
- Step 3.1: In order to add a new billing, simply click on the “Add billing” button.
- Step 3.2 Start by choosing the product in the ‘Product*’ window. In the image below I’ve chosen Kalender.
- Step 3.3 Choose Payer, whom the invoice will be sent to, and lastly Payee. Which user and product the bill is meant for. Choose a start date, either the 1st of 15th (some companies like to have all their bills to have their due date the 30th, in this case you can chose a start date the 15th) Note: The reason for this is our due date is always n+15 where n= Startdate
- Step 3.4 Click on ‘Add to billing’ and voila! You’ll be able to then see the billing has been added in the overview as the image in step 2 showed, and depending on if the start date for the bill has passed or not, it will either be black or green. Green simply means it’s an upcoming bill.
Bills are then sent out automatically by the system, but if you’d like to sent it straight away and also check its’ delivery status go to step 4.
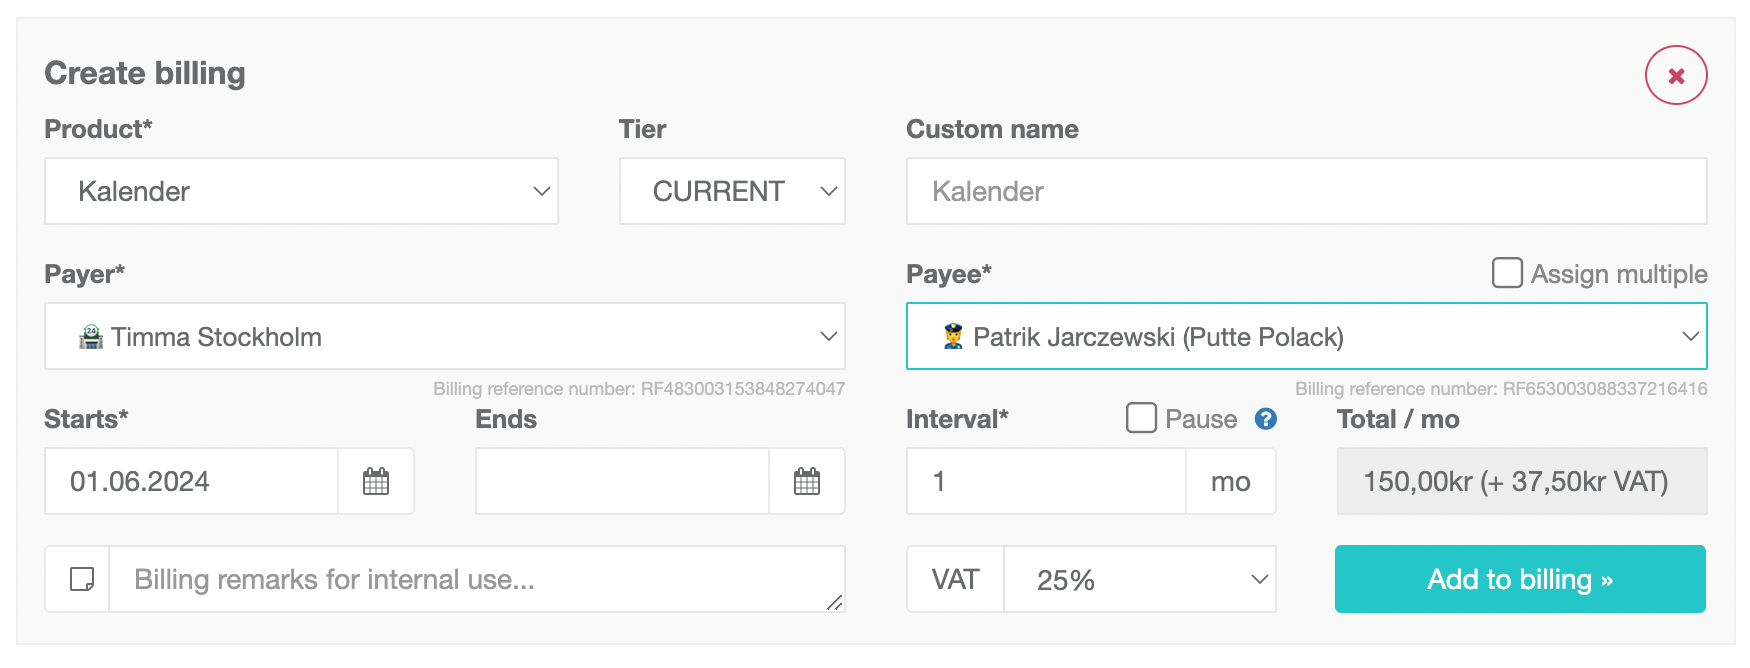
Note: The product window contains all of the products Timma offers, some recurring and some one-time. There are also custom products you can create, both recurring and one-time where you then can add what the bill is for in the “custom name” window. Discounts are also created in this way for the salon.
Step 4: Manually sending out a bill
- Step 4.1
In the image below we can see next to the “Add Billing” button we have a “Add Bill” button that is currently greyed out. In order to be able to create a bill you have to have a billing, which we have for Accountant Jane. The next step would be to click on the Billing in the list, which will make it change color which means it’s been selected, and only then can we click on “Add Bill”.
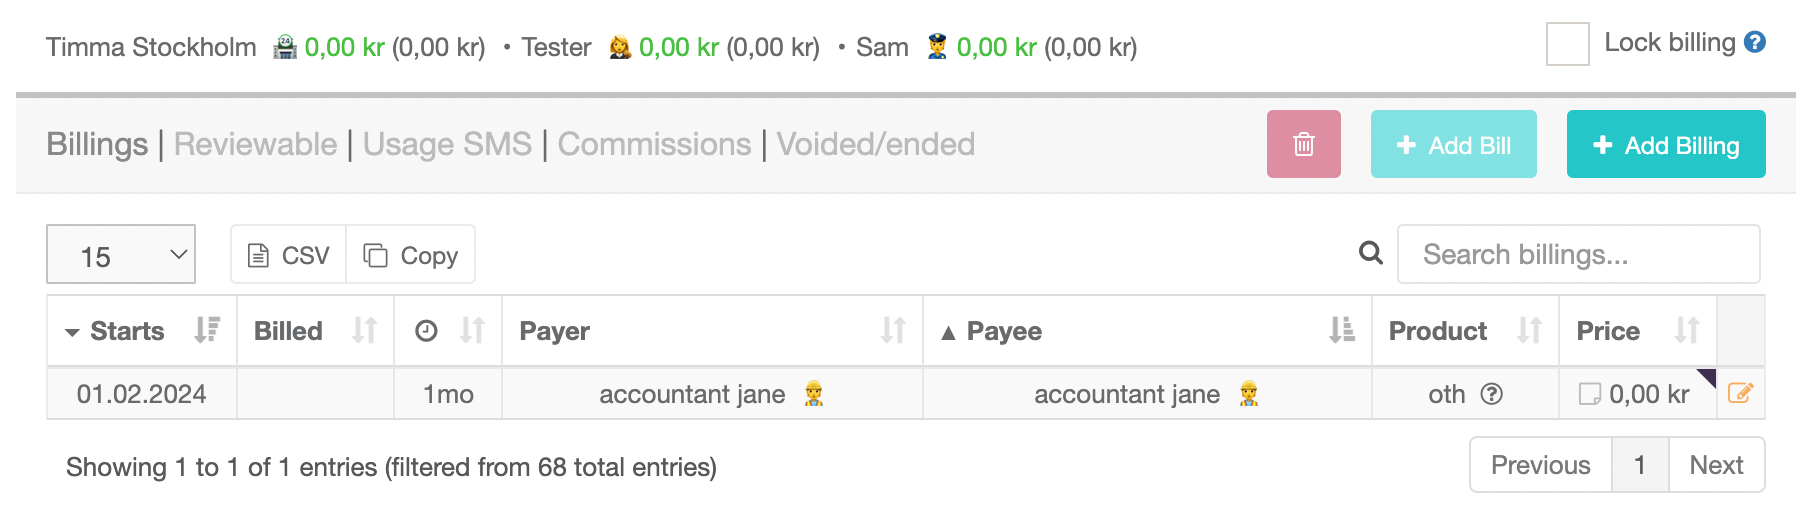
Here we have the billing selected for which we want to create a bill for.
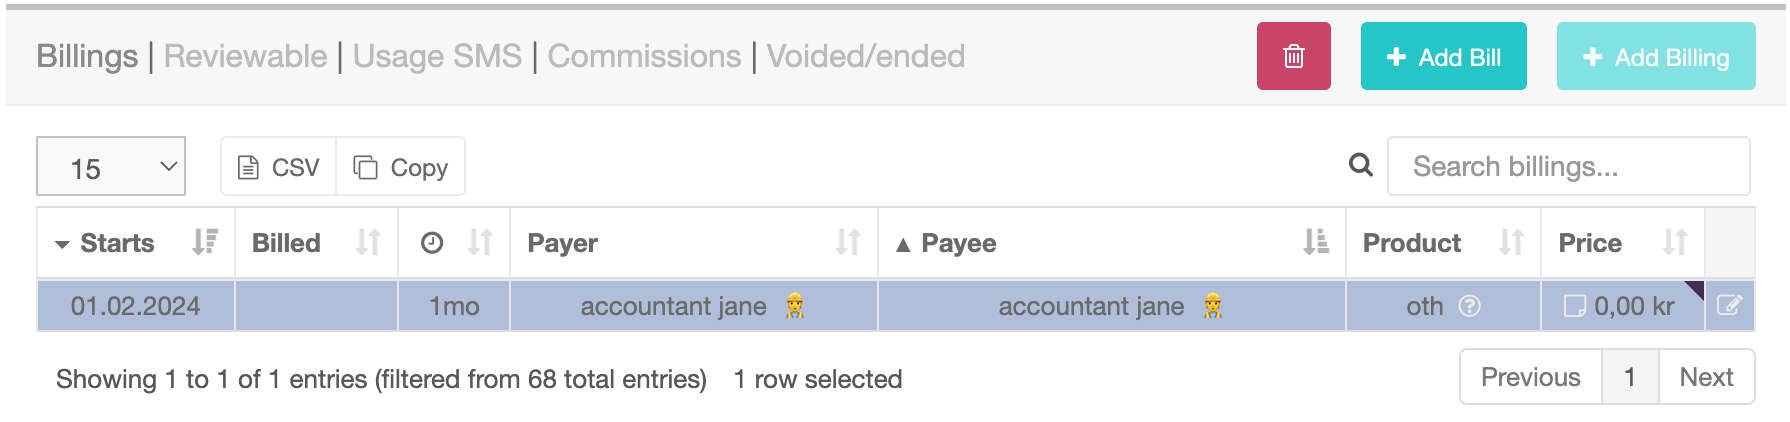
Note: You can select multiple Billings to create a Bill for by holding down ctrl and then click on each respective Billing you want to select.
- Step 4.2
Once you’ve selected the Billings and clicked on “Add Bill”; a new window will appear asking if you’d like to create a Bill for the selected products.
Step 5: Checking the status of a Bill
- Step 5.1: In order to preview a Bill that have been created we click on the folder icon to the far-right as shown in the image below. We can also at a quick glance see if it’s been sent, refunded or paid.
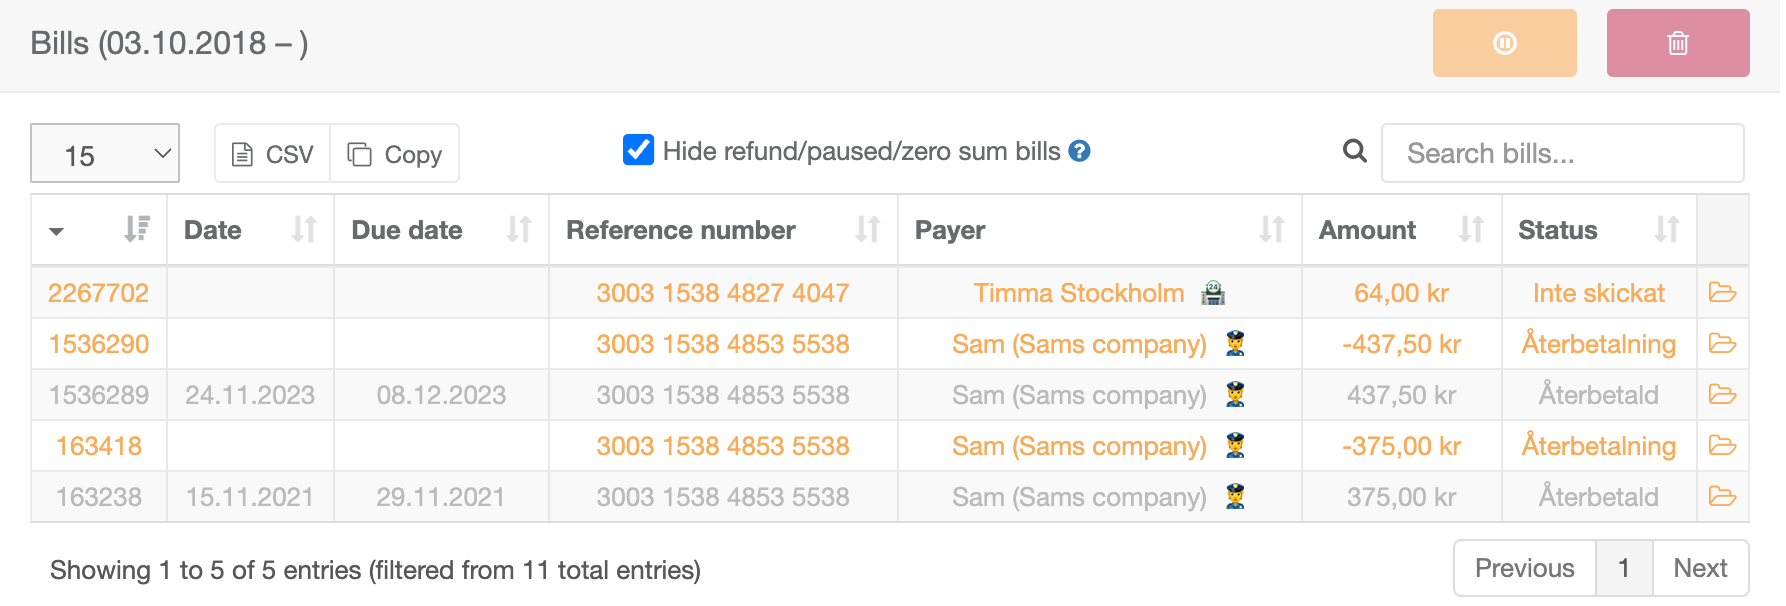
- Step 5.2: Once we click on the folder icon, the Bill will open up and display every product for said Bill and any other relevant information.
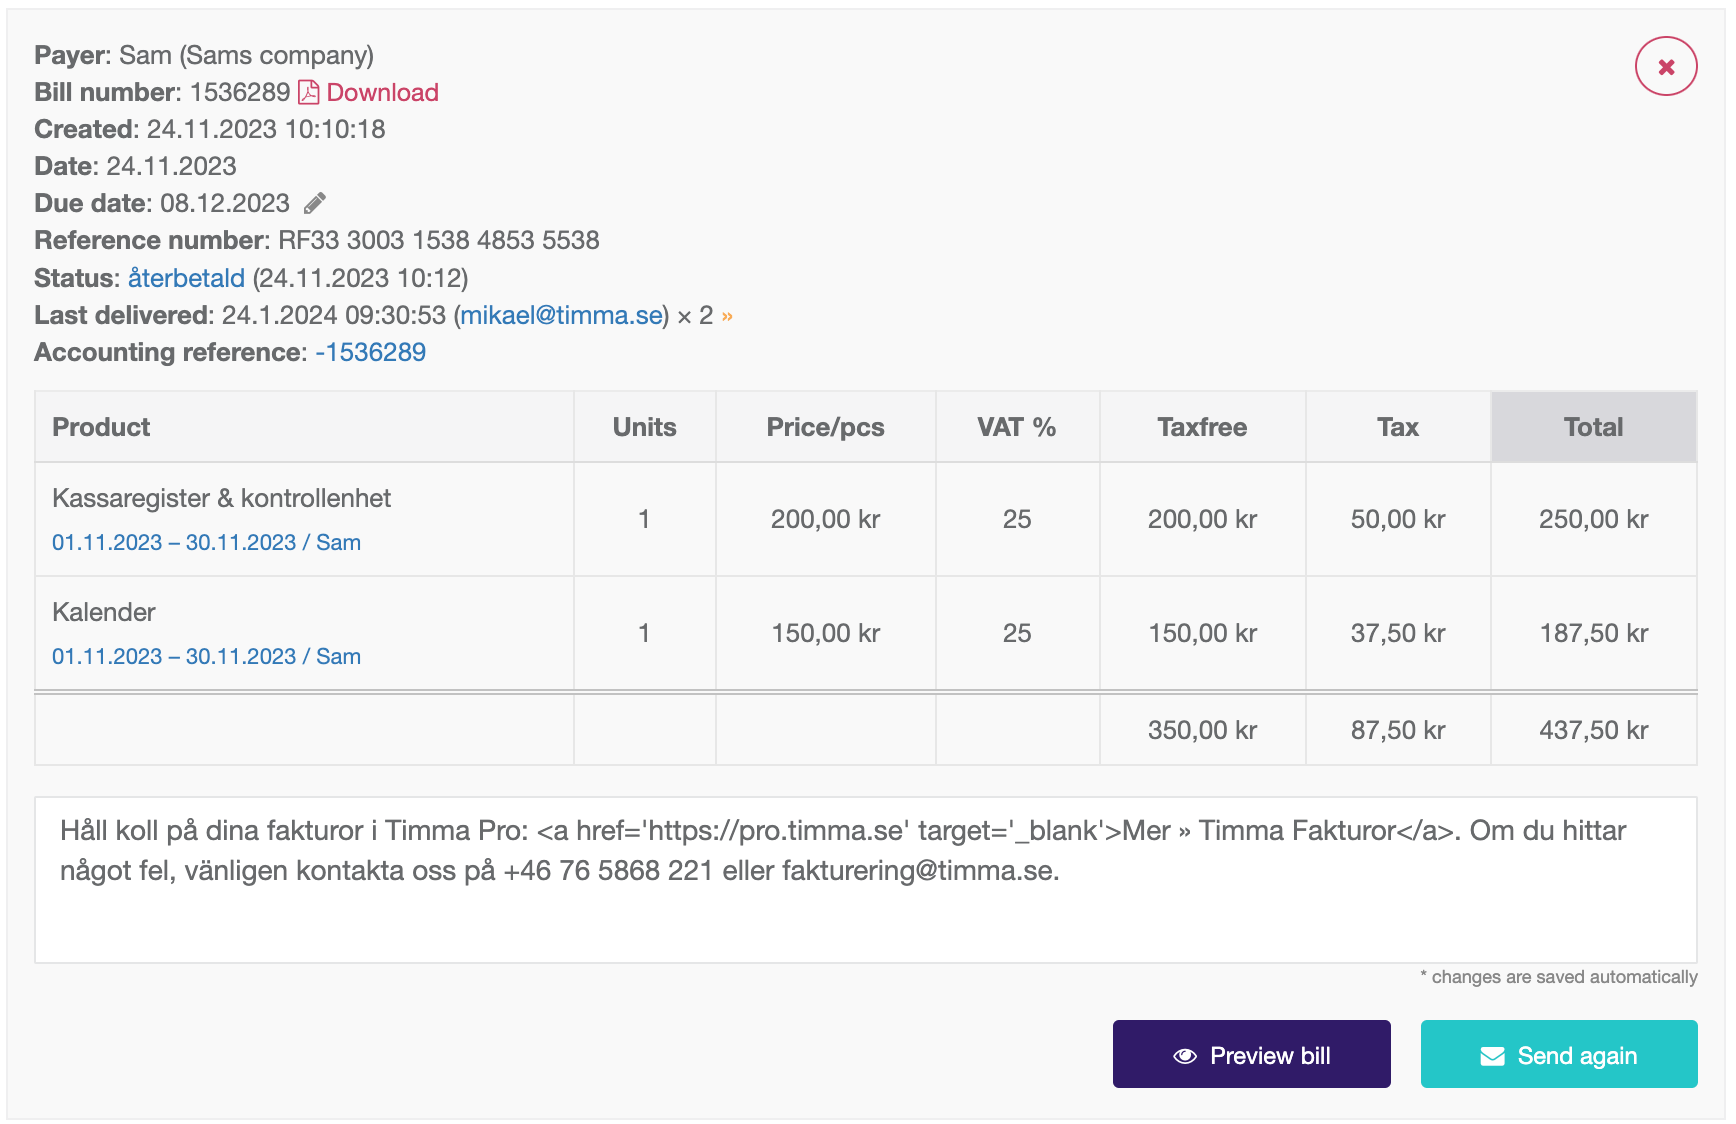
- Step 5.3: In the upper left corner we can see Payer, Bill number, and more. Last delivered allows us to se when it was last sent to the salon but also, when we click on the two orange arrows next to the email adress, we can see a logg for each delivery and the status for it. If it got delivered to the salon or not. The “ x 2 “ after the email signifies that this Bill has been sent out two times.
At the bottom right we can also chose to send the Bill again, but also preview it and see it in its PDF-version, the version our customers receive from us.