A rental area is a concept of Optimaze lease management. A rental area can be connected to spaces with the Space floor plan browser, which brings the surface area of the spaces to the rental agreement.
Opening the view
Open Rental premises → Rental areas. The view shows all rental areas, or the ones selected with filters.
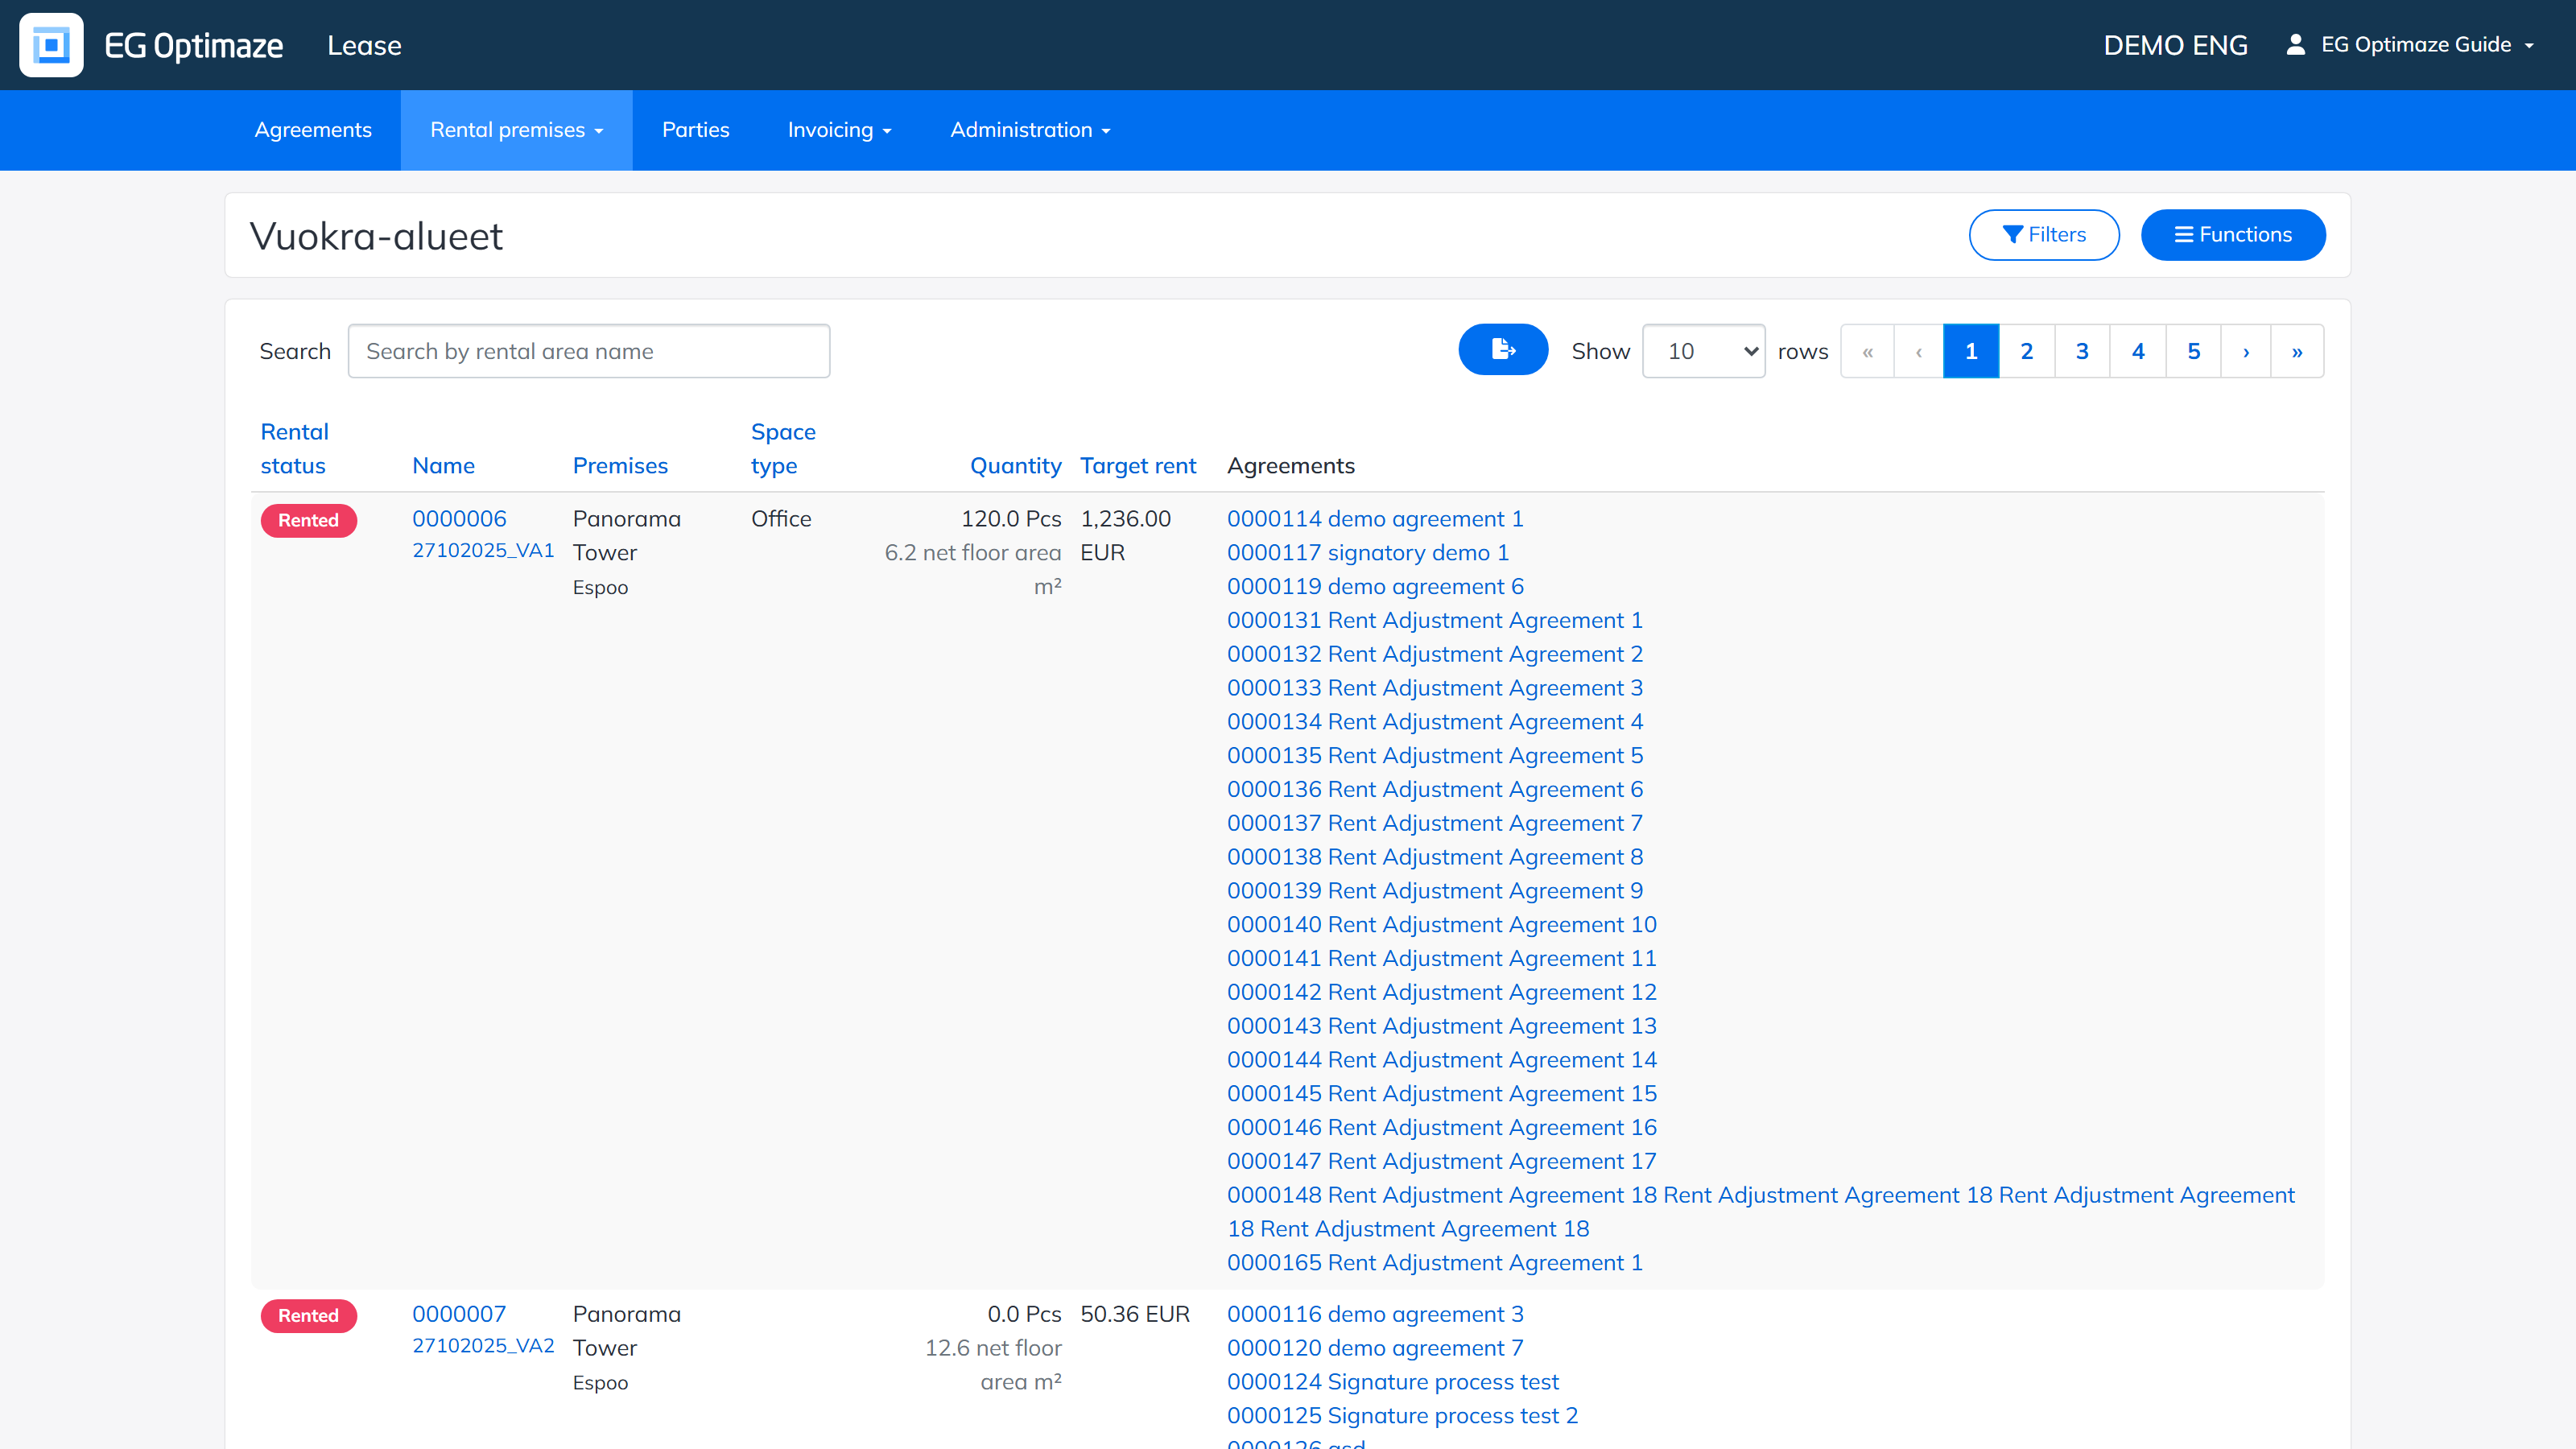
The columns of the list
By default, the list shows these columns:
- Rental status — whether the rental area is available, not rentable, in own use or rented.
- Name — the name given to the rental area. Clicking the name opens the single rental area for closer viewing.
- Premises — the building where the area is located.
- Space type — what kind of space it is, for example an office. Space types are maintained in the Administration section.
- Quantity — the quantity and unit entered for the rental area. The column also shows the surface area of the space link defined with the floor plan browser, if the rental area has been connected to spaces.
- Target rent — an optional target rent set for the rental area, used as the default rent when a rental agreement is created for it.
- Agreements — the rental agreements connected to the premise.
The gear icon button next to the search field opens the column configuration panel, where any of the following columns can also be shown instead:
- Rental area type — a broad classification such as Commercial, Residential or Storage.
- Property type — the property type of the building where the rental area is located, for example Office building or Shopping center.
- Rental area utilities — the utilities selected for the rental area, for example Air conditioning or Elevator access.
- Residence types — the residence type(s) selected for the rental area, for example Studio; applies to residential rental areas.
- Purpose of use — whether the rental area is used for outrent or inrent.
- Rentability — the rentability set for the rental area: rentable, not rentable or in own use. This is the underlying setting behind the calculated Rental status column above.
- Owner — the party entered as the legal owner of the property, which may differ from the lessor party named on the rental area’s agreements.
Note! Which of the columns above are shown by default, and which additional columns are available to choose from, can vary by organization. Additional columns can be configured by the Optimaze service desk team.
Sorting, filtering and Excel download
The rental areas can be sorted by column by clicking the column header. The Filters button opens the filtering panel, where one or more of the following can be combined:
- Rental status — shows only rental areas with the selected status (available, not rentable, in own use or rented). Use this to, for example, find only the currently available areas.
- Purpose of use — shows only rental areas used for outrent, or only those used for inrent. Useful for separating the areas being leased out to tenants from the ones the organization itself rents in.
- Name — shows the rental area with the selected name. Useful when you already know which rental area you are looking for.
- Premises — shows only rental areas located in the selected building. Useful when reviewing everything available in one specific property.
- Cost center — shows only rental areas linked to the selected cost center. Useful for financial reporting scoped to a specific cost center.
- Rental area type — shows only rental areas of the selected rental area type, for example only Commercial areas.
- Space type — shows only rental areas of the selected space type, for example only Office space. Combine it with the Rental status filter to search for a specific kind of vacant space.
The Show ended checkbox also includes rental areas whose rental period has already ended; these are hidden by default. A single filter is removed by clicking it, and all filters at once with the clear-all option.
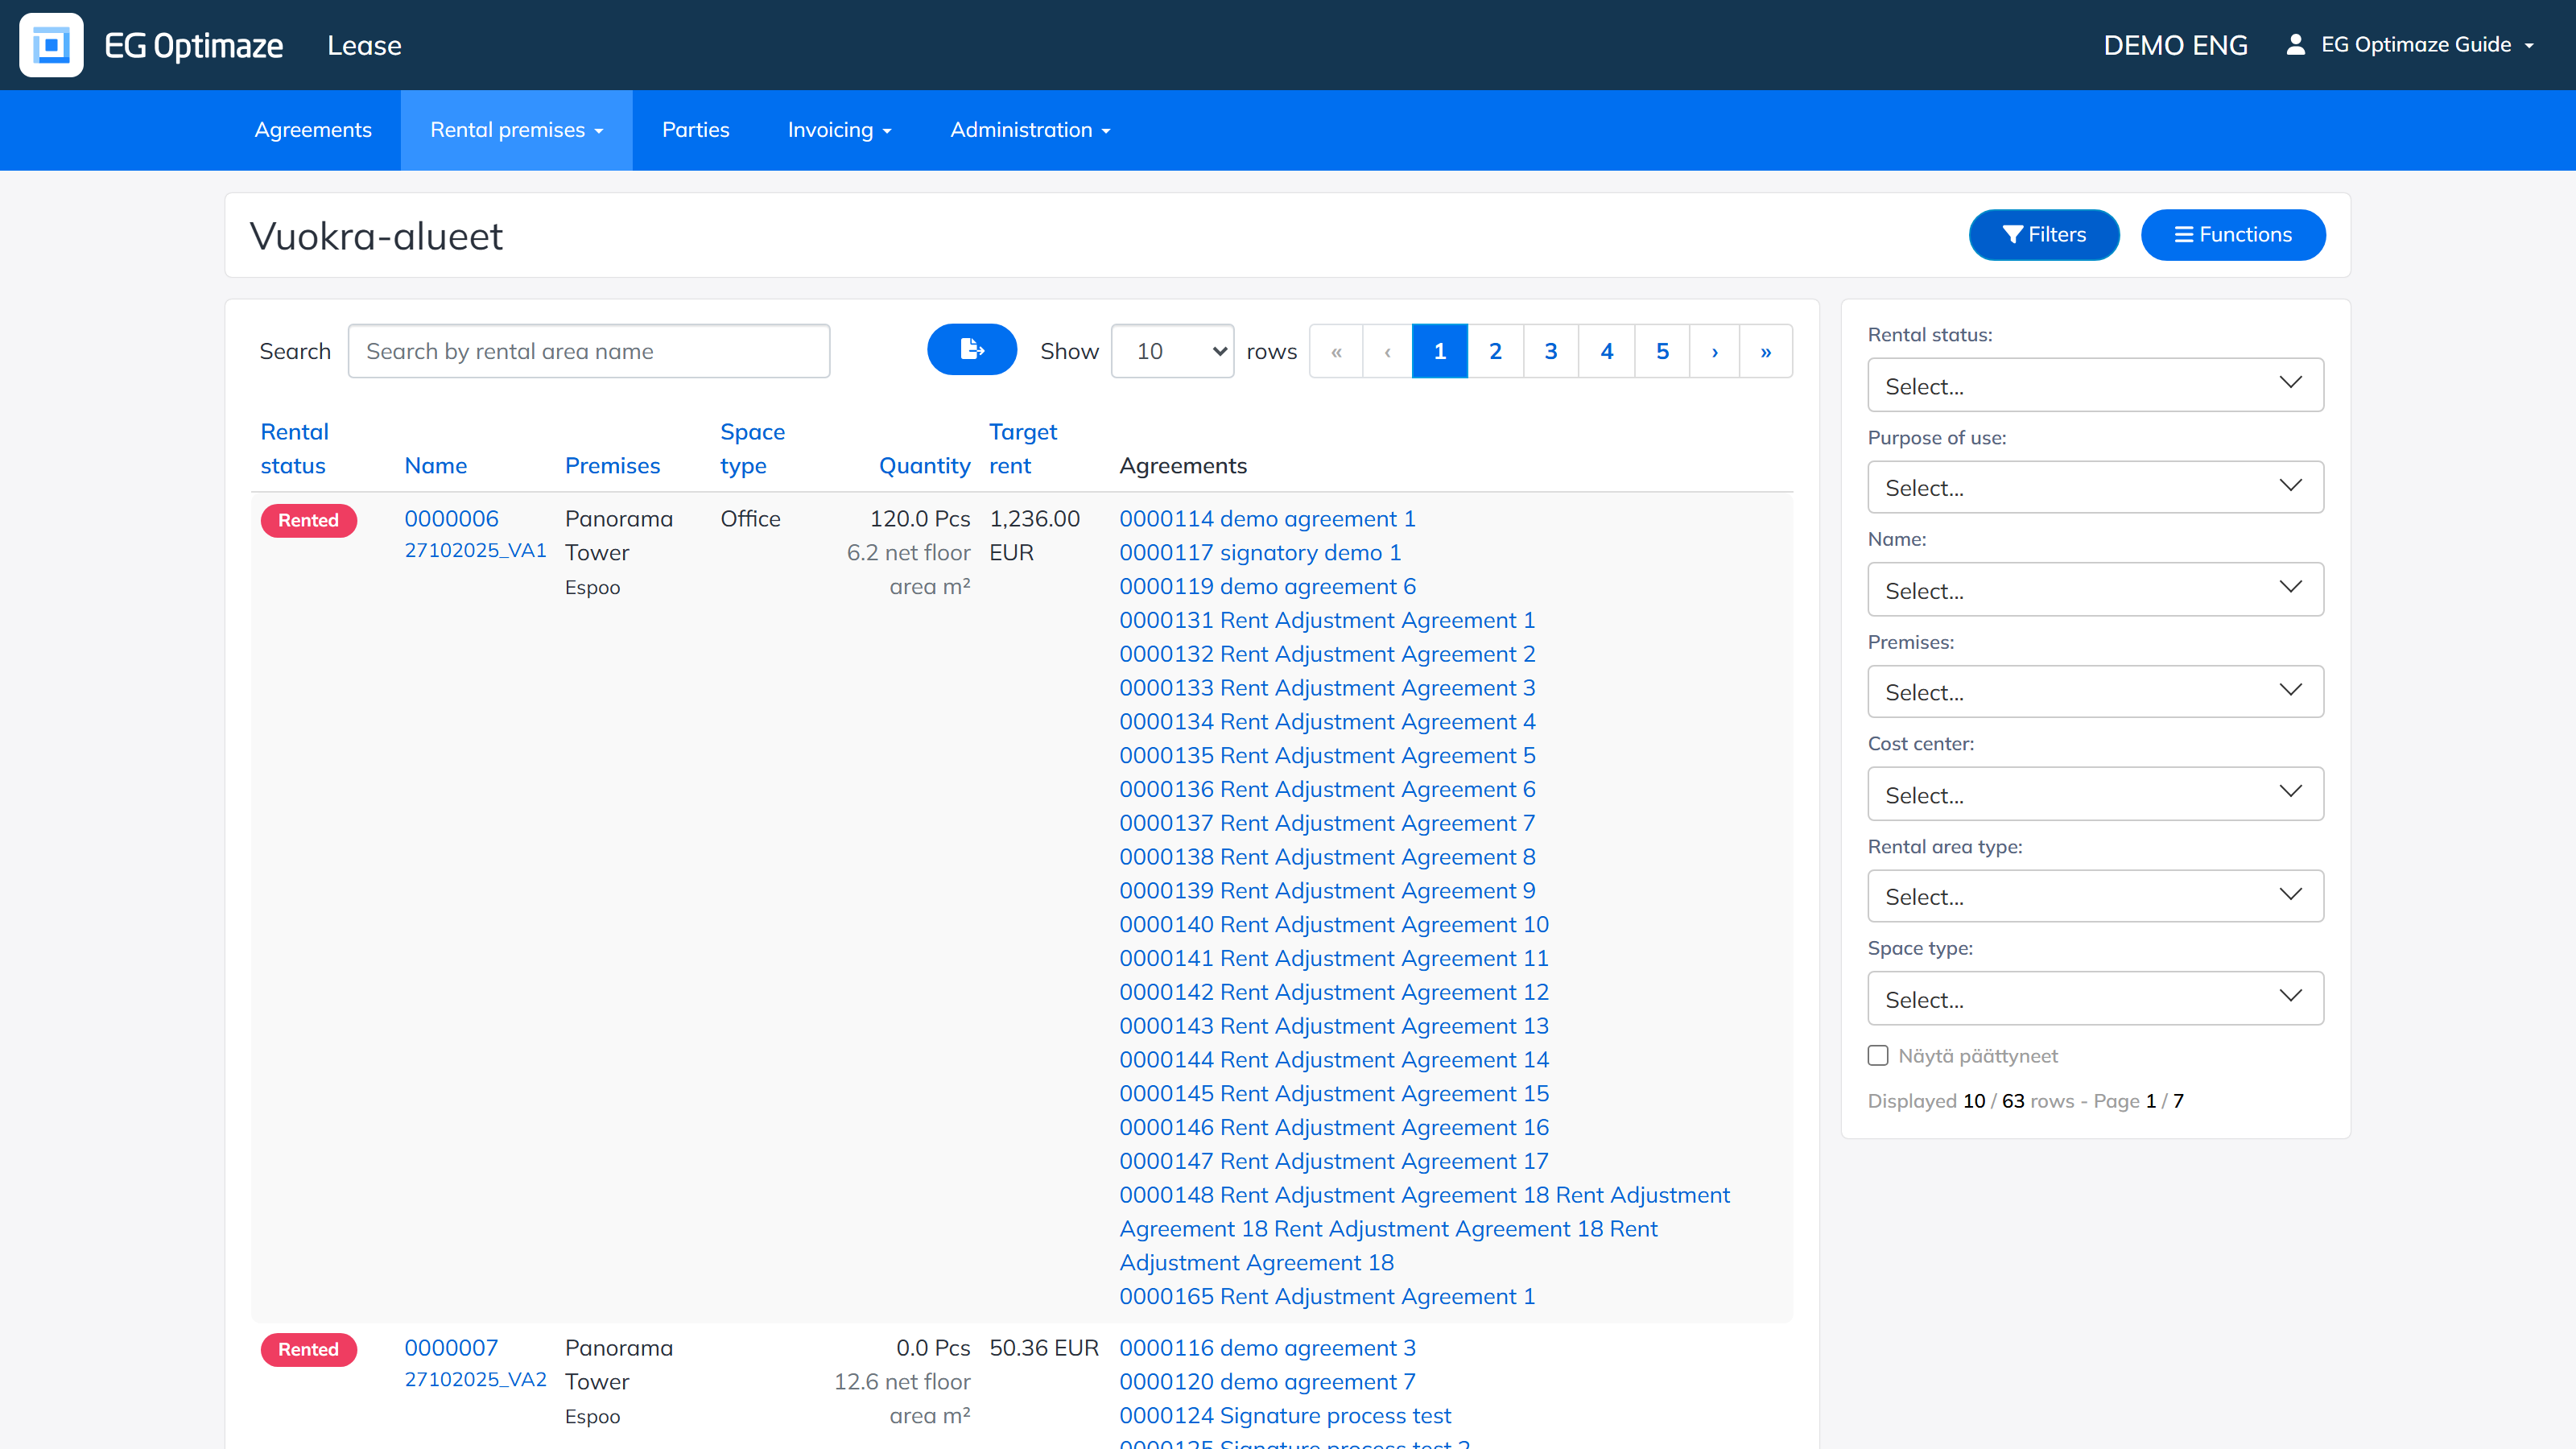
The list view can also be downloaded to Excel with the download button, following the chosen sort order and the selected filters.
Example: finding vacant office space for a new tenant
To find space to offer a prospective tenant looking for office premises: open Filters, set Rental status to Available and Space type to Office, then apply the filters. Sort the filtered list by the Target rent column to compare asking rents, and open a candidate rental area’s name to review its Property details and Rental area utilities (for example, whether it has Air conditioning or Parking included) before proposing it. Once a tenant is chosen, add the rental area to a new or existing agreement (see Adding a rental premise to an agreement) — its rental status then updates automatically and it no longer appears in an Available-filtered search.
Creating a new rental area
A rental area is created via Functions → New rental area.
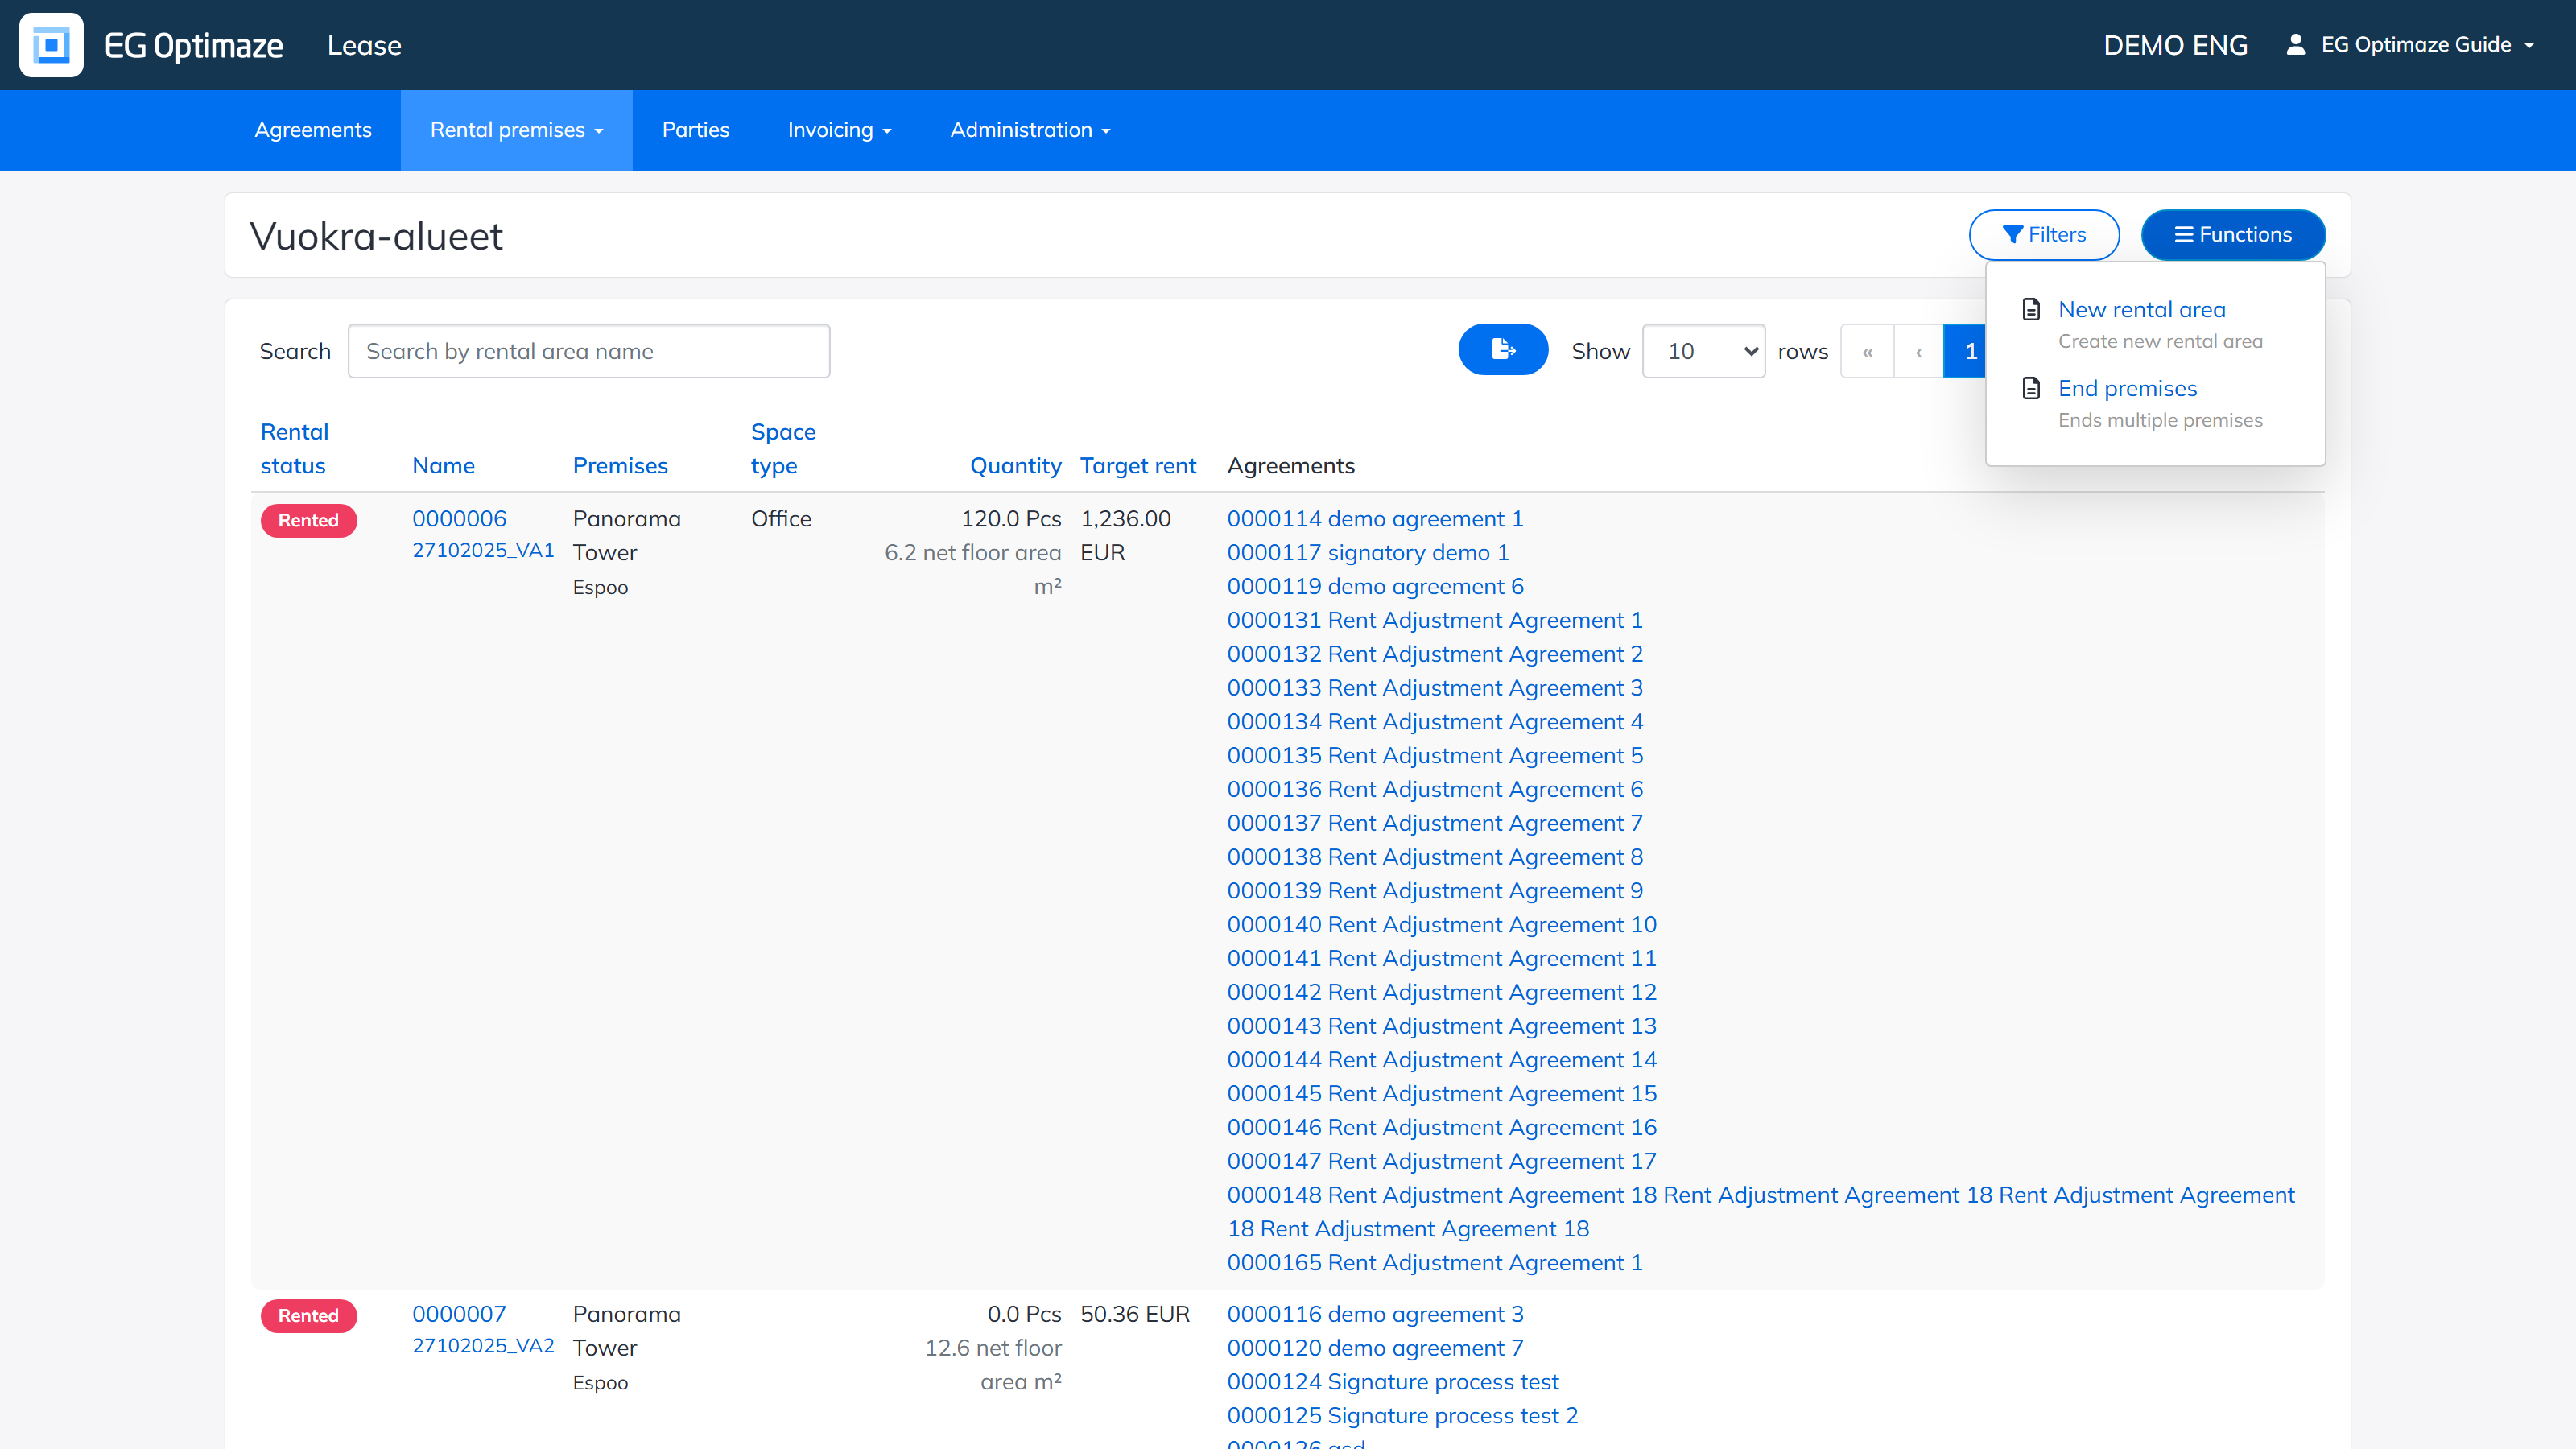
The New rental area view opens:
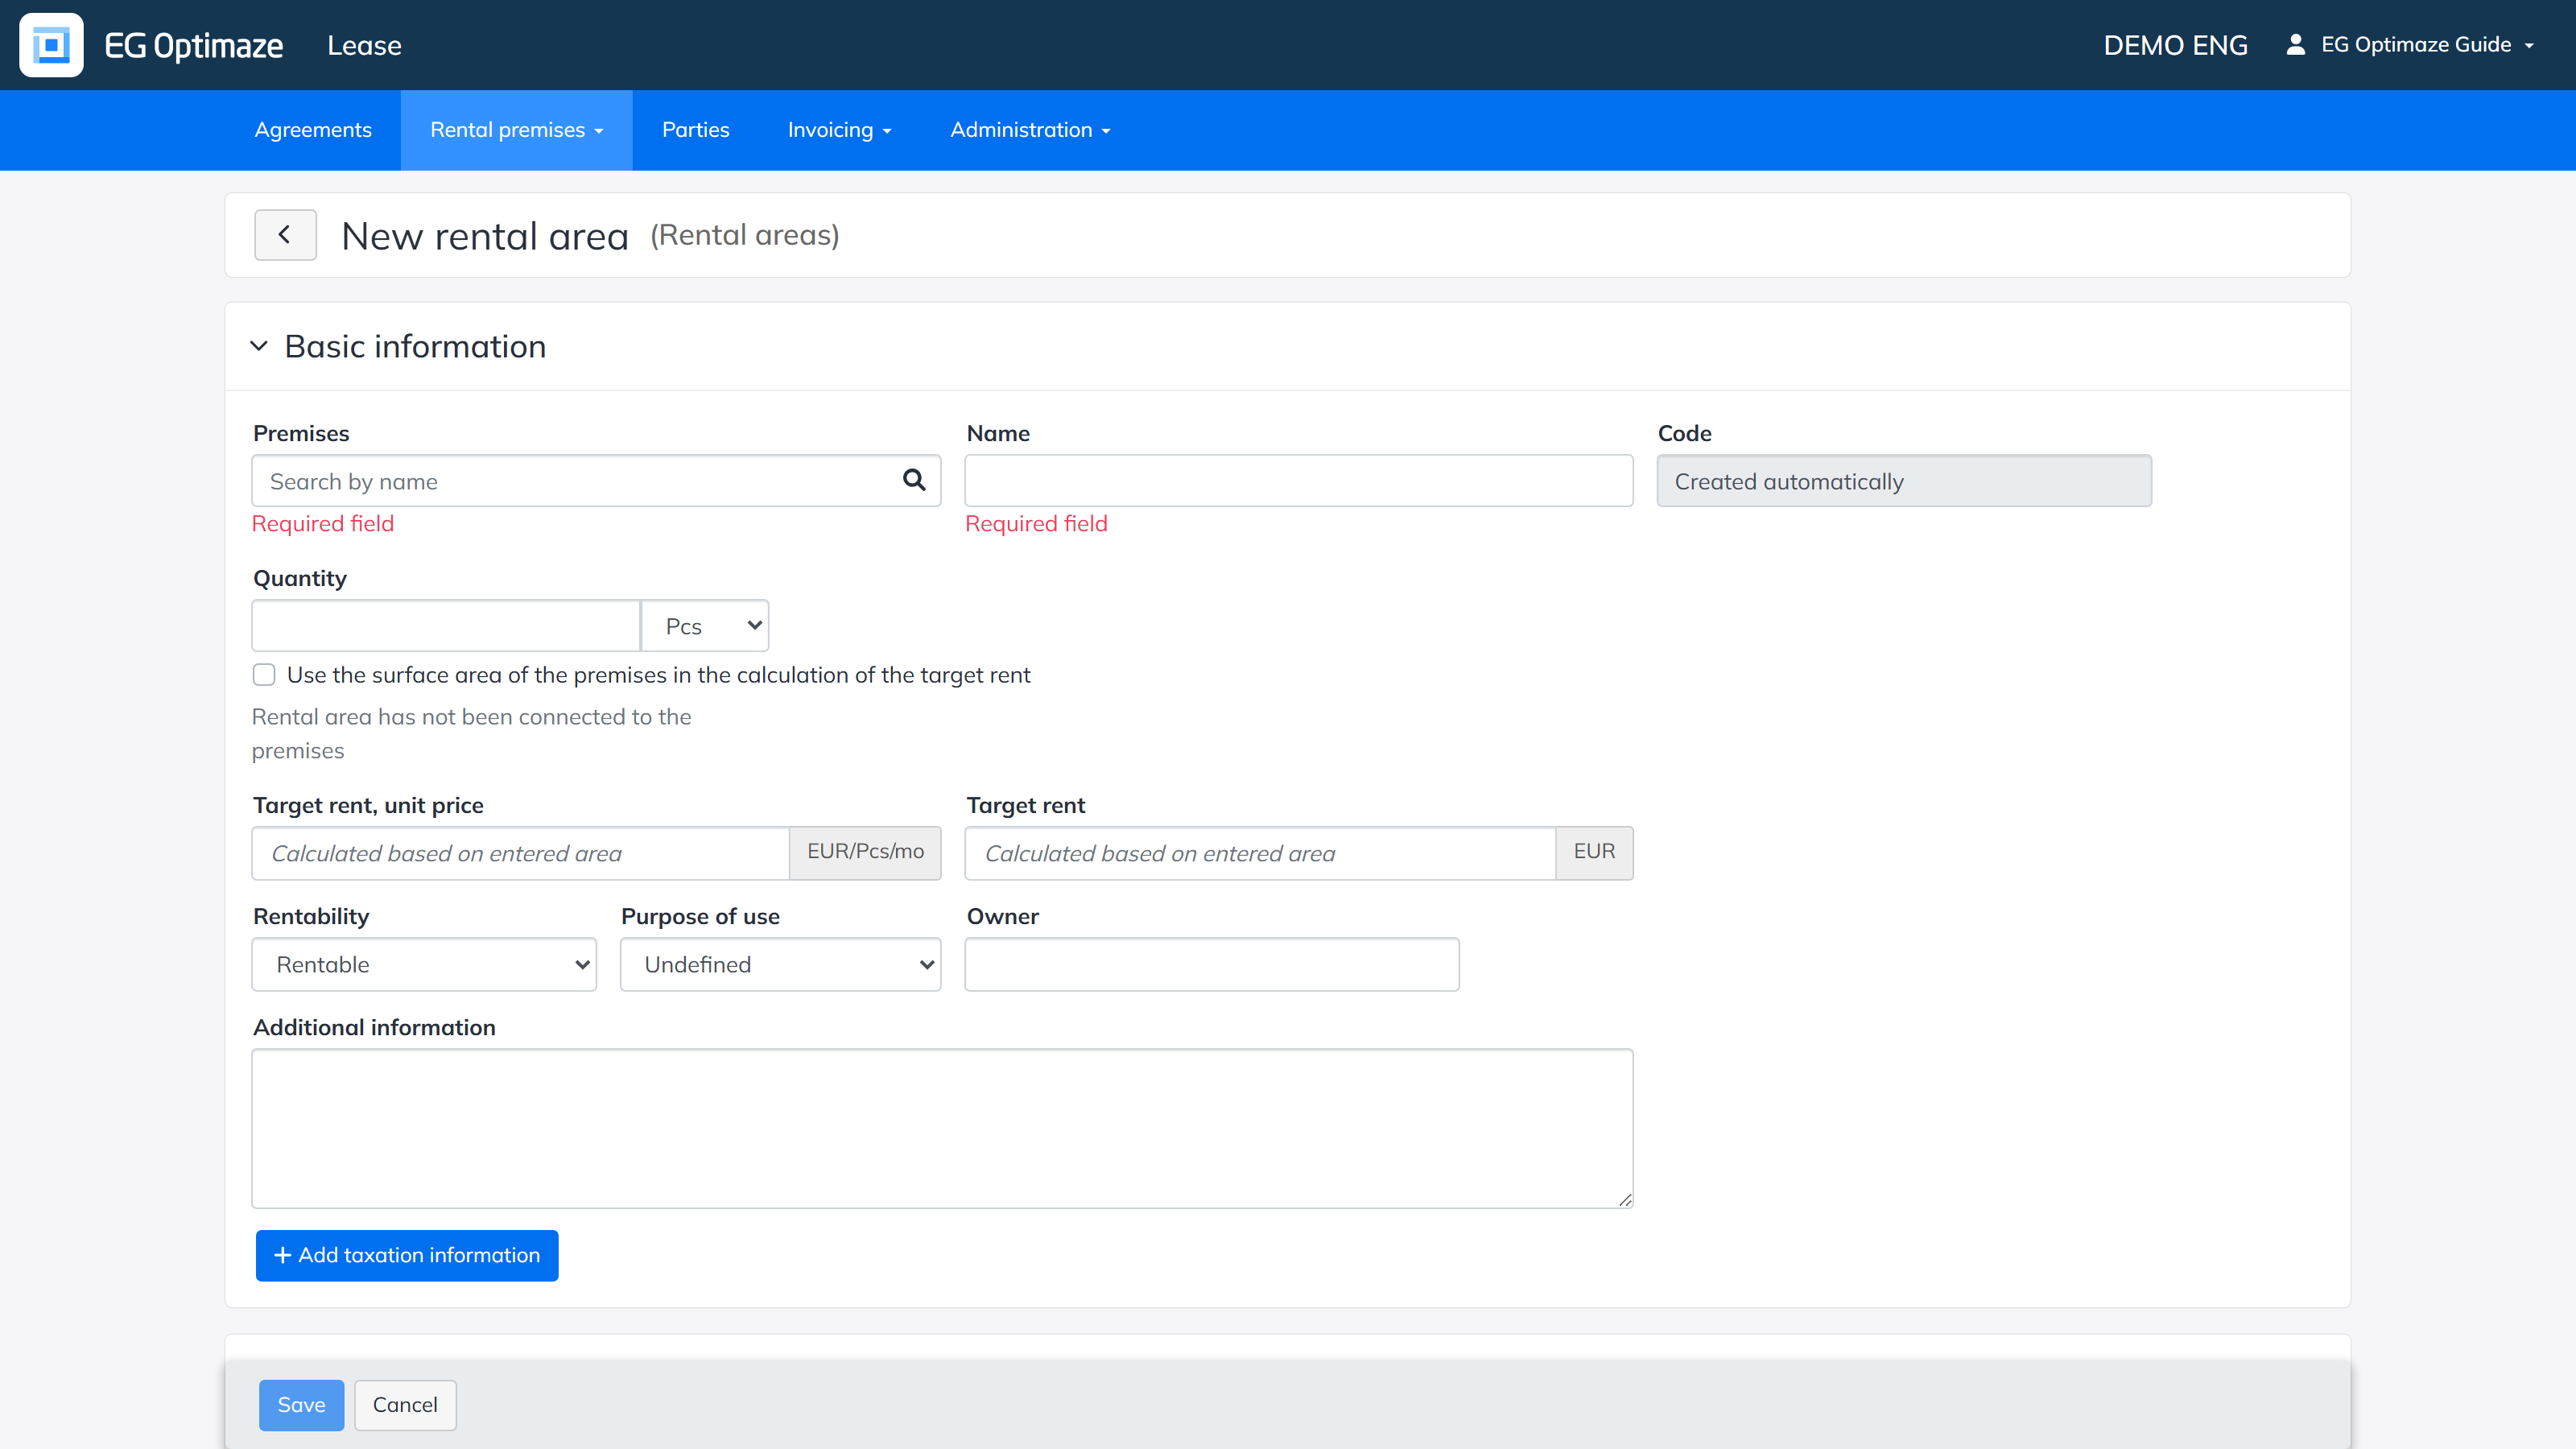
The basic information and property details are entered for the rental area:
- In Premises, enter the building where the rental area is created. The program finds the building with a free text search.
- In Rentability, select whether the rental area is rentable, not rentable or in own use.
- Add taxation information opens the VAT details: the VAT liability of the premise and its effective date.
- The Property details (rental area type, property type, space type, rental area utilities, residence types — for example Commercial, Office building, Office, Air conditioning, or Studio) are used when filtering rental areas and as optional list columns. Options for the drop-down lists are added in the Administration section.
When the details are complete, click Save. The created rental area then appears on the screen and in the rental areas list.
Ending rental areas
This function requires the Lease main user permission. If Functions does not show End premises, request the permission from Optimaze support.
One or more rental areas are ended via Functions → End premises, either across the whole list or a searched/filtered subset. Tick the checkbox of each rental area to end; Search for premises to be ended narrows the rows shown, and the header checkbox selects everything currently listed.
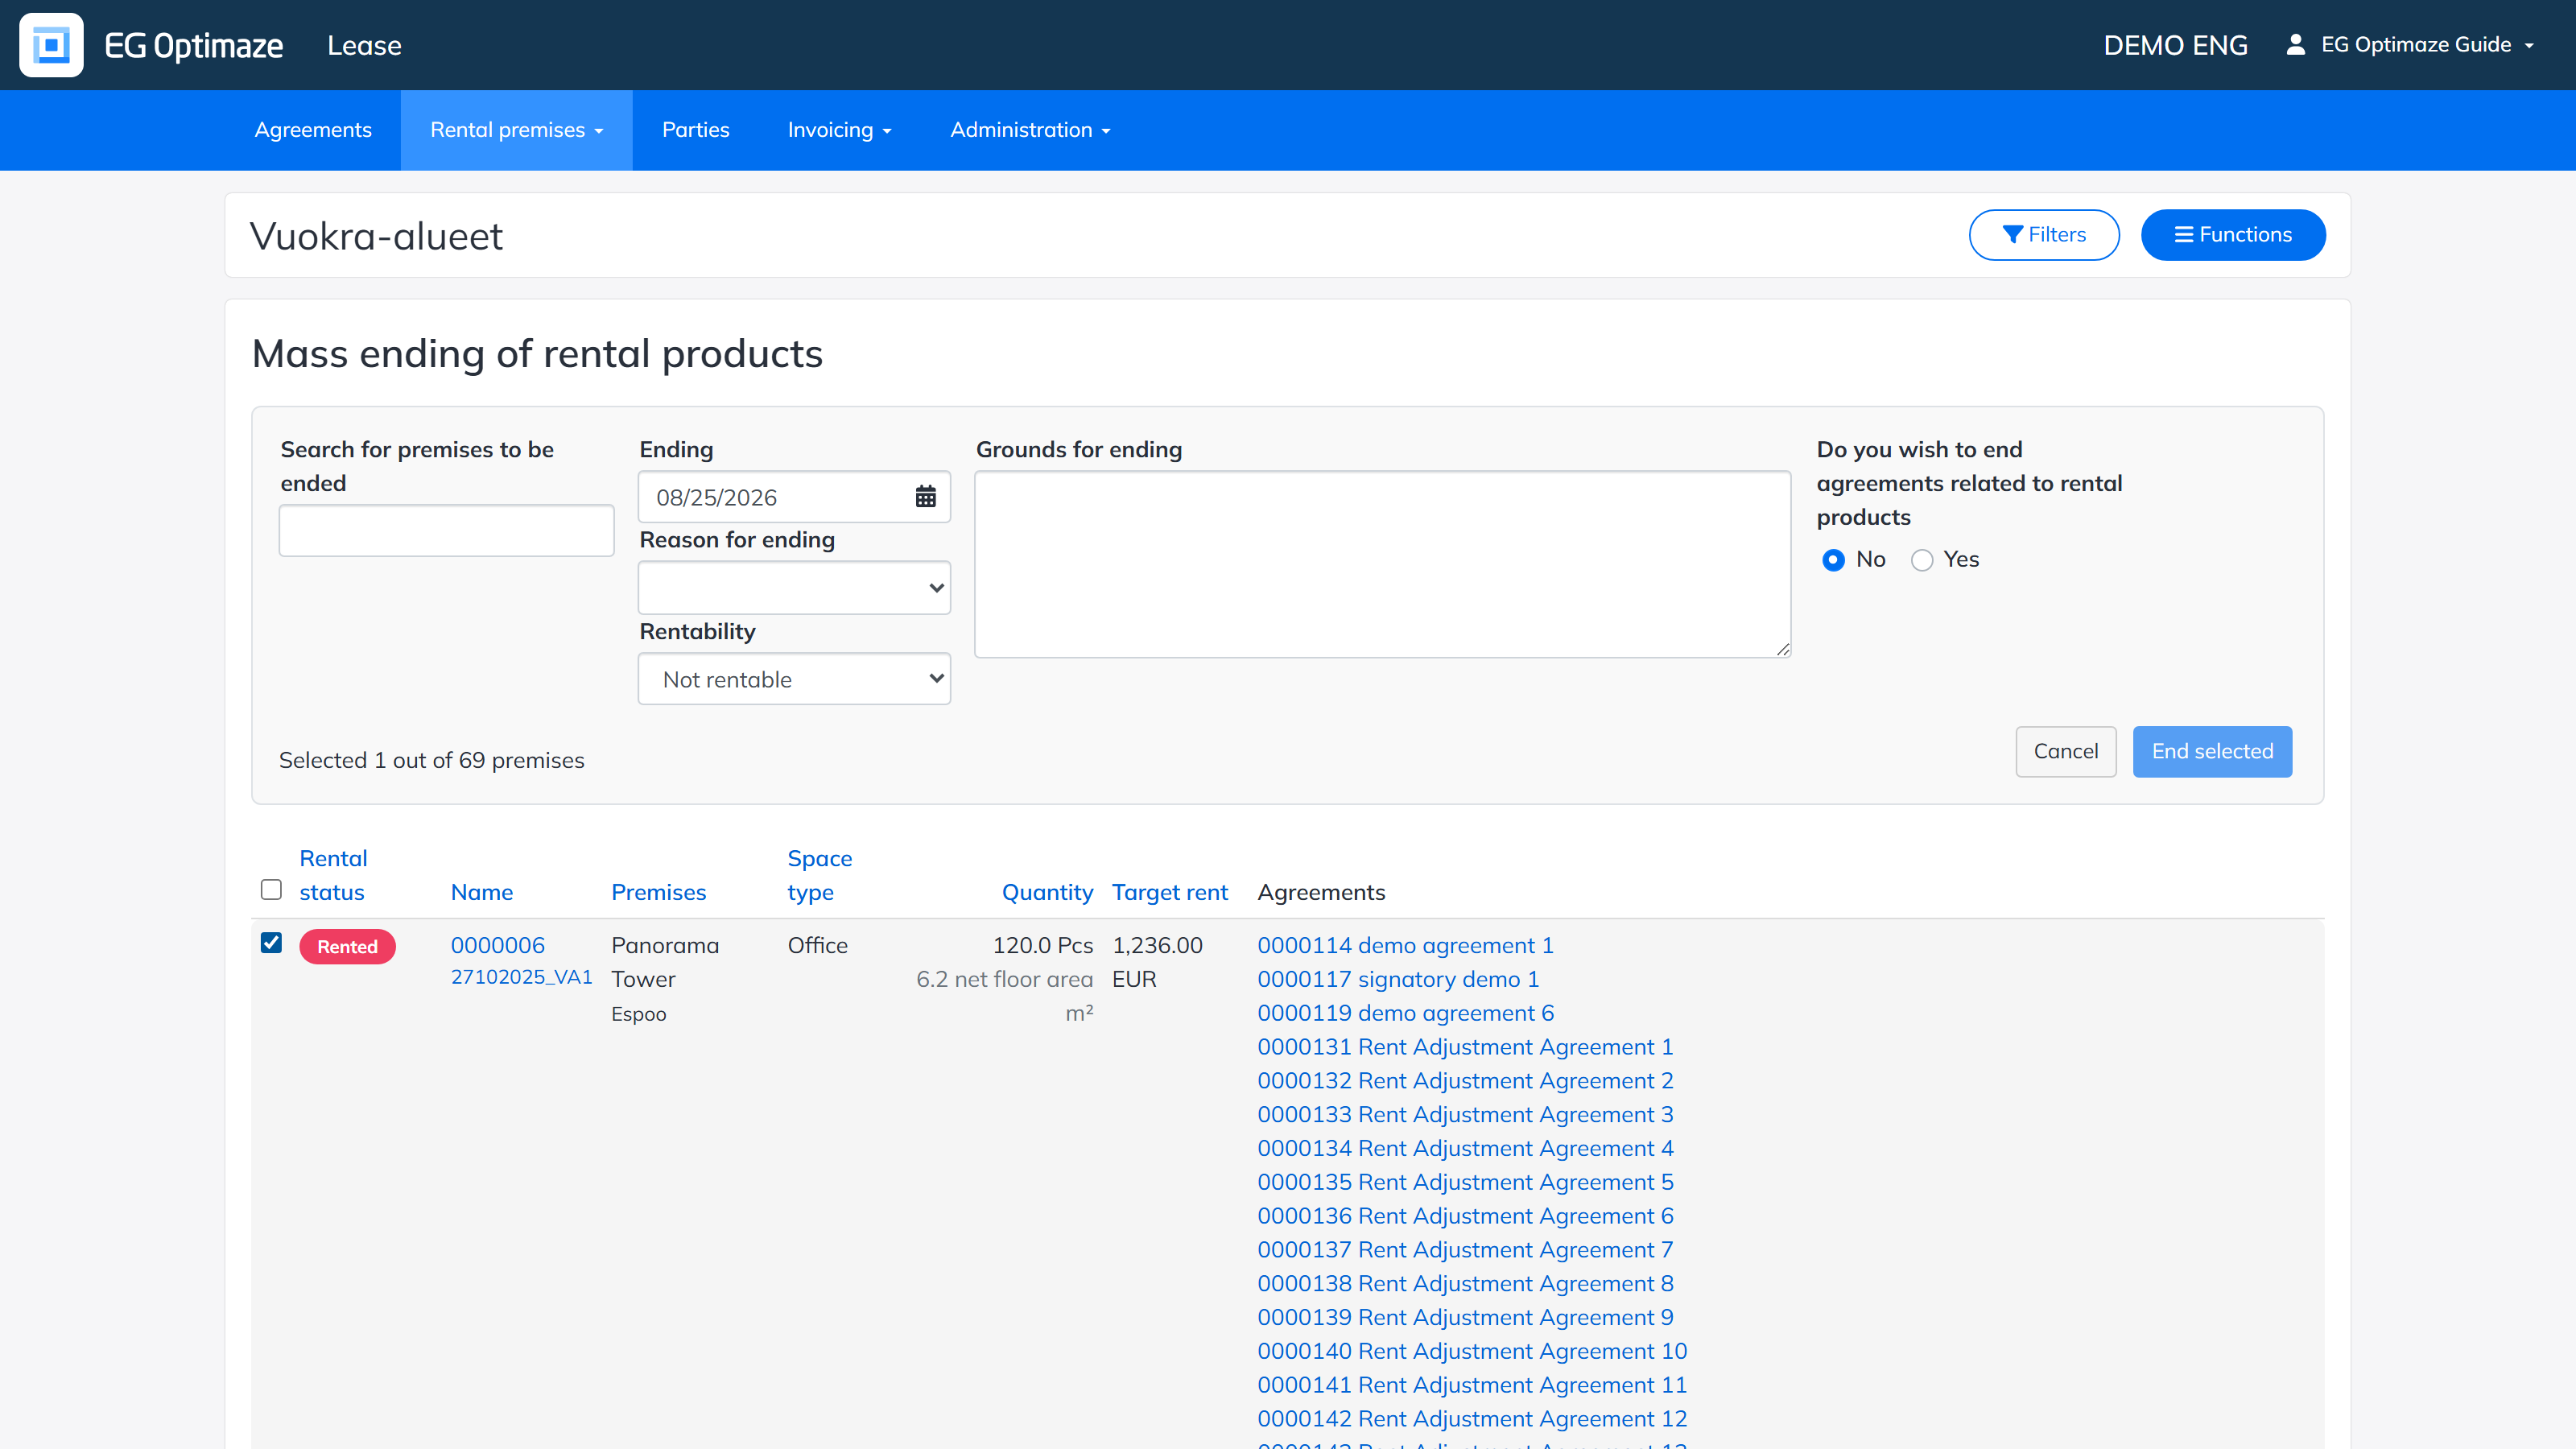
Fill in:
- Ending — the date the rental period ends; defaults to today.
- Reason for ending — for example Sold.
- Rentability — what the ended area’s rentability should become afterwards: rentable, not rentable, in own use, or no changes. Defaults to Not rentable.
- Grounds for ending — a free-text note on why the area is being ended.
- Do you wish to end agreements related to rental products — whether any rental agreement(s) still linked to the selected area(s) should be ended along with it. Defaults to No.
Click End selected to apply.
Important: a rental area can be selected and ended here even while it is still linked to one or more active agreements — the tool does not block that. Leaving the agreements question at its default, “No”, ends only the rental area itself; its agreement(s) are left exactly as they were, so an active agreement can end up still pointing at a rental area whose own rental period has already ended. Answer “Yes” if the linked agreement(s) should be ended in the same action.
Note: if the rental area is connected to spaces via the Space floor plan browser, that space link is ended automatically to the same Ending date as part of this same action — nothing further needs to be done on the space side.