A rental premise is edited by first opening the premise in the rental areas, car parks, land areas or other rental products view (click its name in the list).
The single premise view
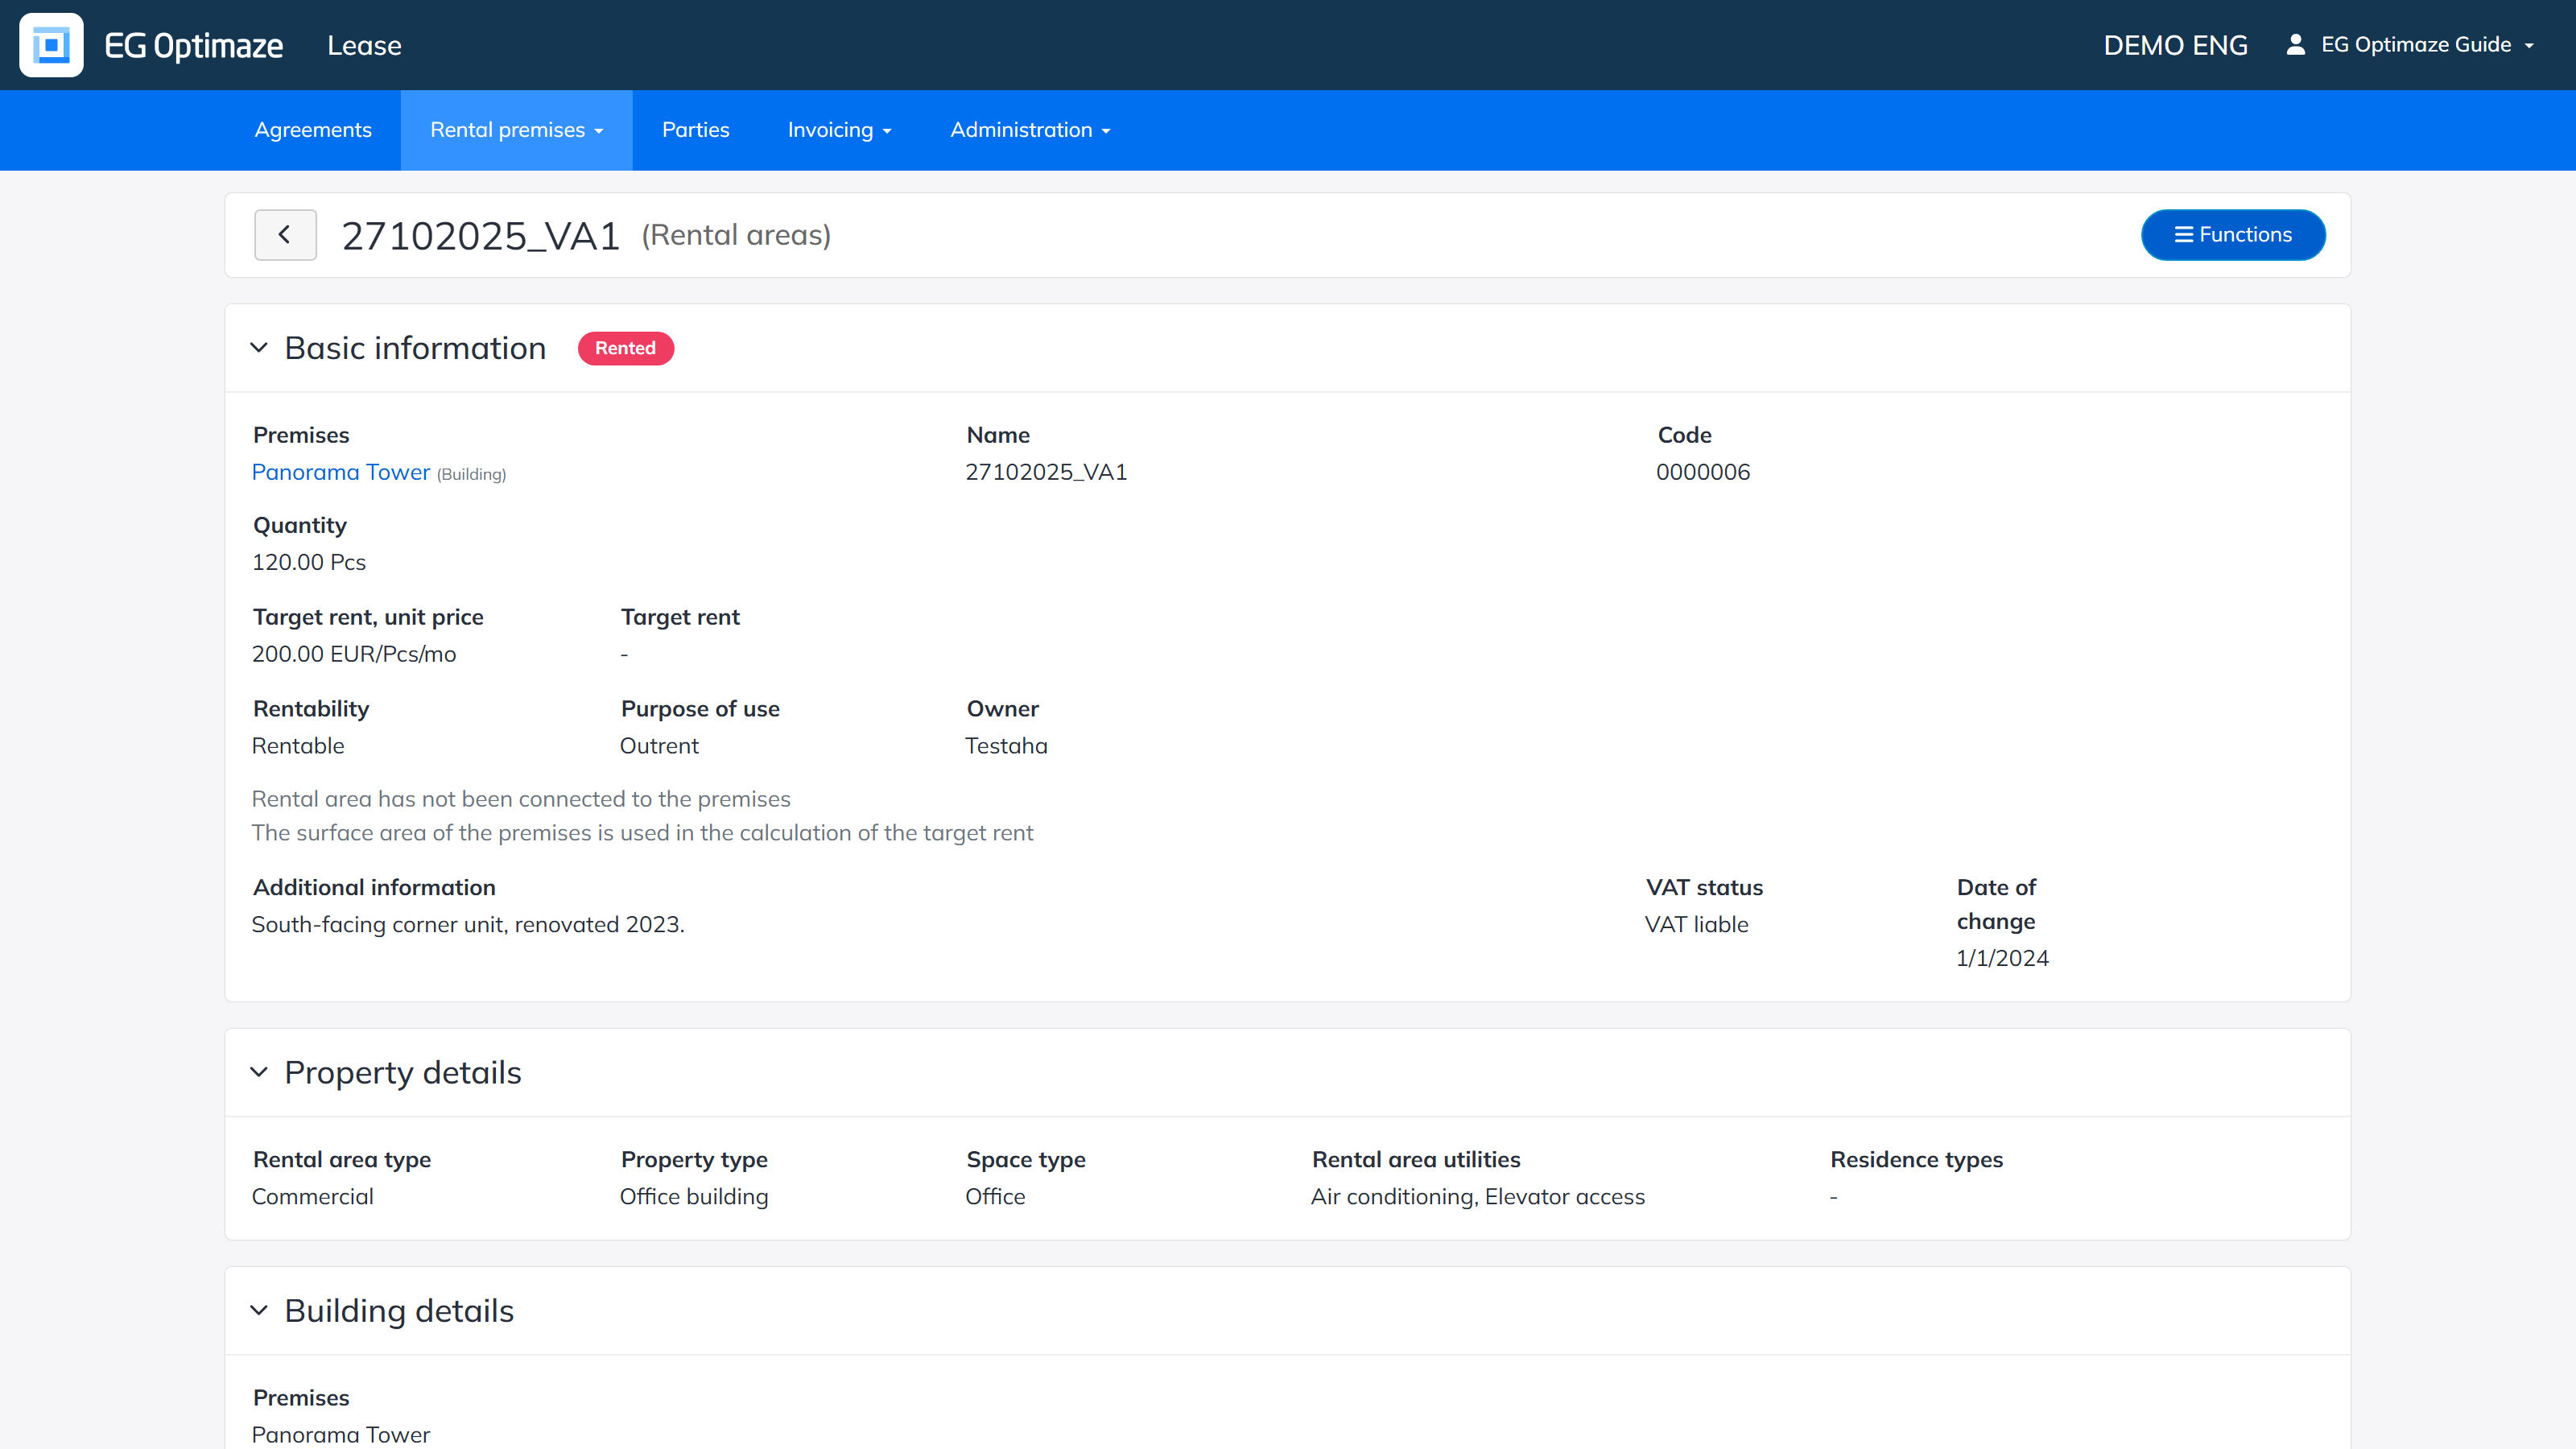
The view is divided into sections:
- Basic information — a status badge showing the rental area’s current rental status, and:
- Premises — the building where the rental area is located, linked to the building’s own view.
- Name and Code — the rental area’s name, and a code assigned automatically when it is created.
- Quantity — the rental area’s total quantity and unit, for example 120.00 Pcs. If the rental area is not connected to spaces, this is a single value entered directly, as in this example. Once it is connected to spaces with the floor plan browser, the edit form splits it into Direct use (the area used exclusively by this rental area) and Allocated (a proportional share of a shared/common area, such as a lobby or corridor, apportioned to it) — the two are added together into the total Quantity.
- Target rent, unit price and Target rent — calculated from each other and the quantity, when either one is entered (in this example, 200.00 EUR/Pcs/mo). The target rent is used as the default rent when a rental agreement is created for the rental area — useful both as the asking rent shown on the list while the area is still vacant, and to keep new agreements consistent with the portfolio’s rent-setting policy.
- Rentability — whether the rental area is rentable, not rentable or in own use. Together with Purpose of use (below), this describes what the rental area is for: for example, Rentable + Outrent (as in this example) means an area currently on the market for lease to a tenant.
- Purpose of use — whether the rental area is used for outrent or inrent.
- Owner — the party entered as the legal owner of the property, which may differ from the lessor party named on the rental area’s agreements.
- Additional information — a free-text field for anything not covered elsewhere, for example a note on the unit’s condition or last renovation (as in this example, “South-facing corner unit, renovated 2023.”).
- VAT status and Date of change — the rental area’s current VAT liability and the date it took effect; further taxation periods can be added via Add taxation information in edit mode.
- Property details — the rental area’s classification, used for filtering and reporting across the portfolio (see Rental areas for how these are used as list columns and filters):
- Rental area type — a broad classification such as Commercial, Residential or Storage, independent of the specific space type.
- Property type — classifies the building the rental area is in, for example Office building, Shopping center or Residential building — useful when comparing rents or occupancy across different kinds of buildings in the portfolio.
- Space type — the specific kind of space, for example Office, Retail space, Warehouse or Meeting room. This is the classification most commonly used when searching for or marketing a specific kind of vacant space.
- Rental area utilities — the amenities available in the rental area, for example Air conditioning, Elevator access or Parking included — useful when comparing what is included between similar vacant units.
- Residence types — for example Studio or One-bedroom apartment. This applies to residential rental areas; it is left empty for non-residential ones, as in this office example.
- Building details — the Premises (building) and its Floors.
- Agreements — the rental agreements connected to the rental area, with each agreement’s Status, Name of agreement, Validity and Tenant.
Editing and deleting
Open the edit mode via Functions → Edit rental area. Make the needed changes and click Save. The same menu can also be used to create a new premise or to delete an available one.
A rental premise that is connected to a rental agreement cannot be deleted. To delete an available premise, select the delete action and confirm the deletion; the premise is then removed from the list as well.
Example: preparing a vacant office for a new tenant
A common end-to-end workflow spans this view together with the rental areas list and an agreement:
- Set the rental area’s Property details (Rental area type, Property type, Space type, Rental area utilities) so it can be found later through the list’s filters and compared against similar units.
- Set a Target rent so the area shows an asking rent on the list while it is still vacant (Rentability Rentable, Purpose of use Outrent).
- Once a tenant is found, add the rental area to a new or existing agreement (see Adding a rental premise to an agreement). The target rent becomes the agreement’s default rent row, which can still be adjusted on the agreement.
- The rental area’s Rental status then updates to Rented once the agreement is valid, and it drops out of an “available”-filtered search on the list.