The Optimaze Space floor plan browser integrates with Lease rental management: rental premises can be created and edited and connected to the spaces of floor plans, agreements can be created directly from the floor plan, and the rental situation can be viewed as colorings.
The Lease functions are found in the floor plan browser’s Edit menu: Space data…, Edit rental premises… and Create agreement(Lease)… The items shown depend on your user rights in Lease.
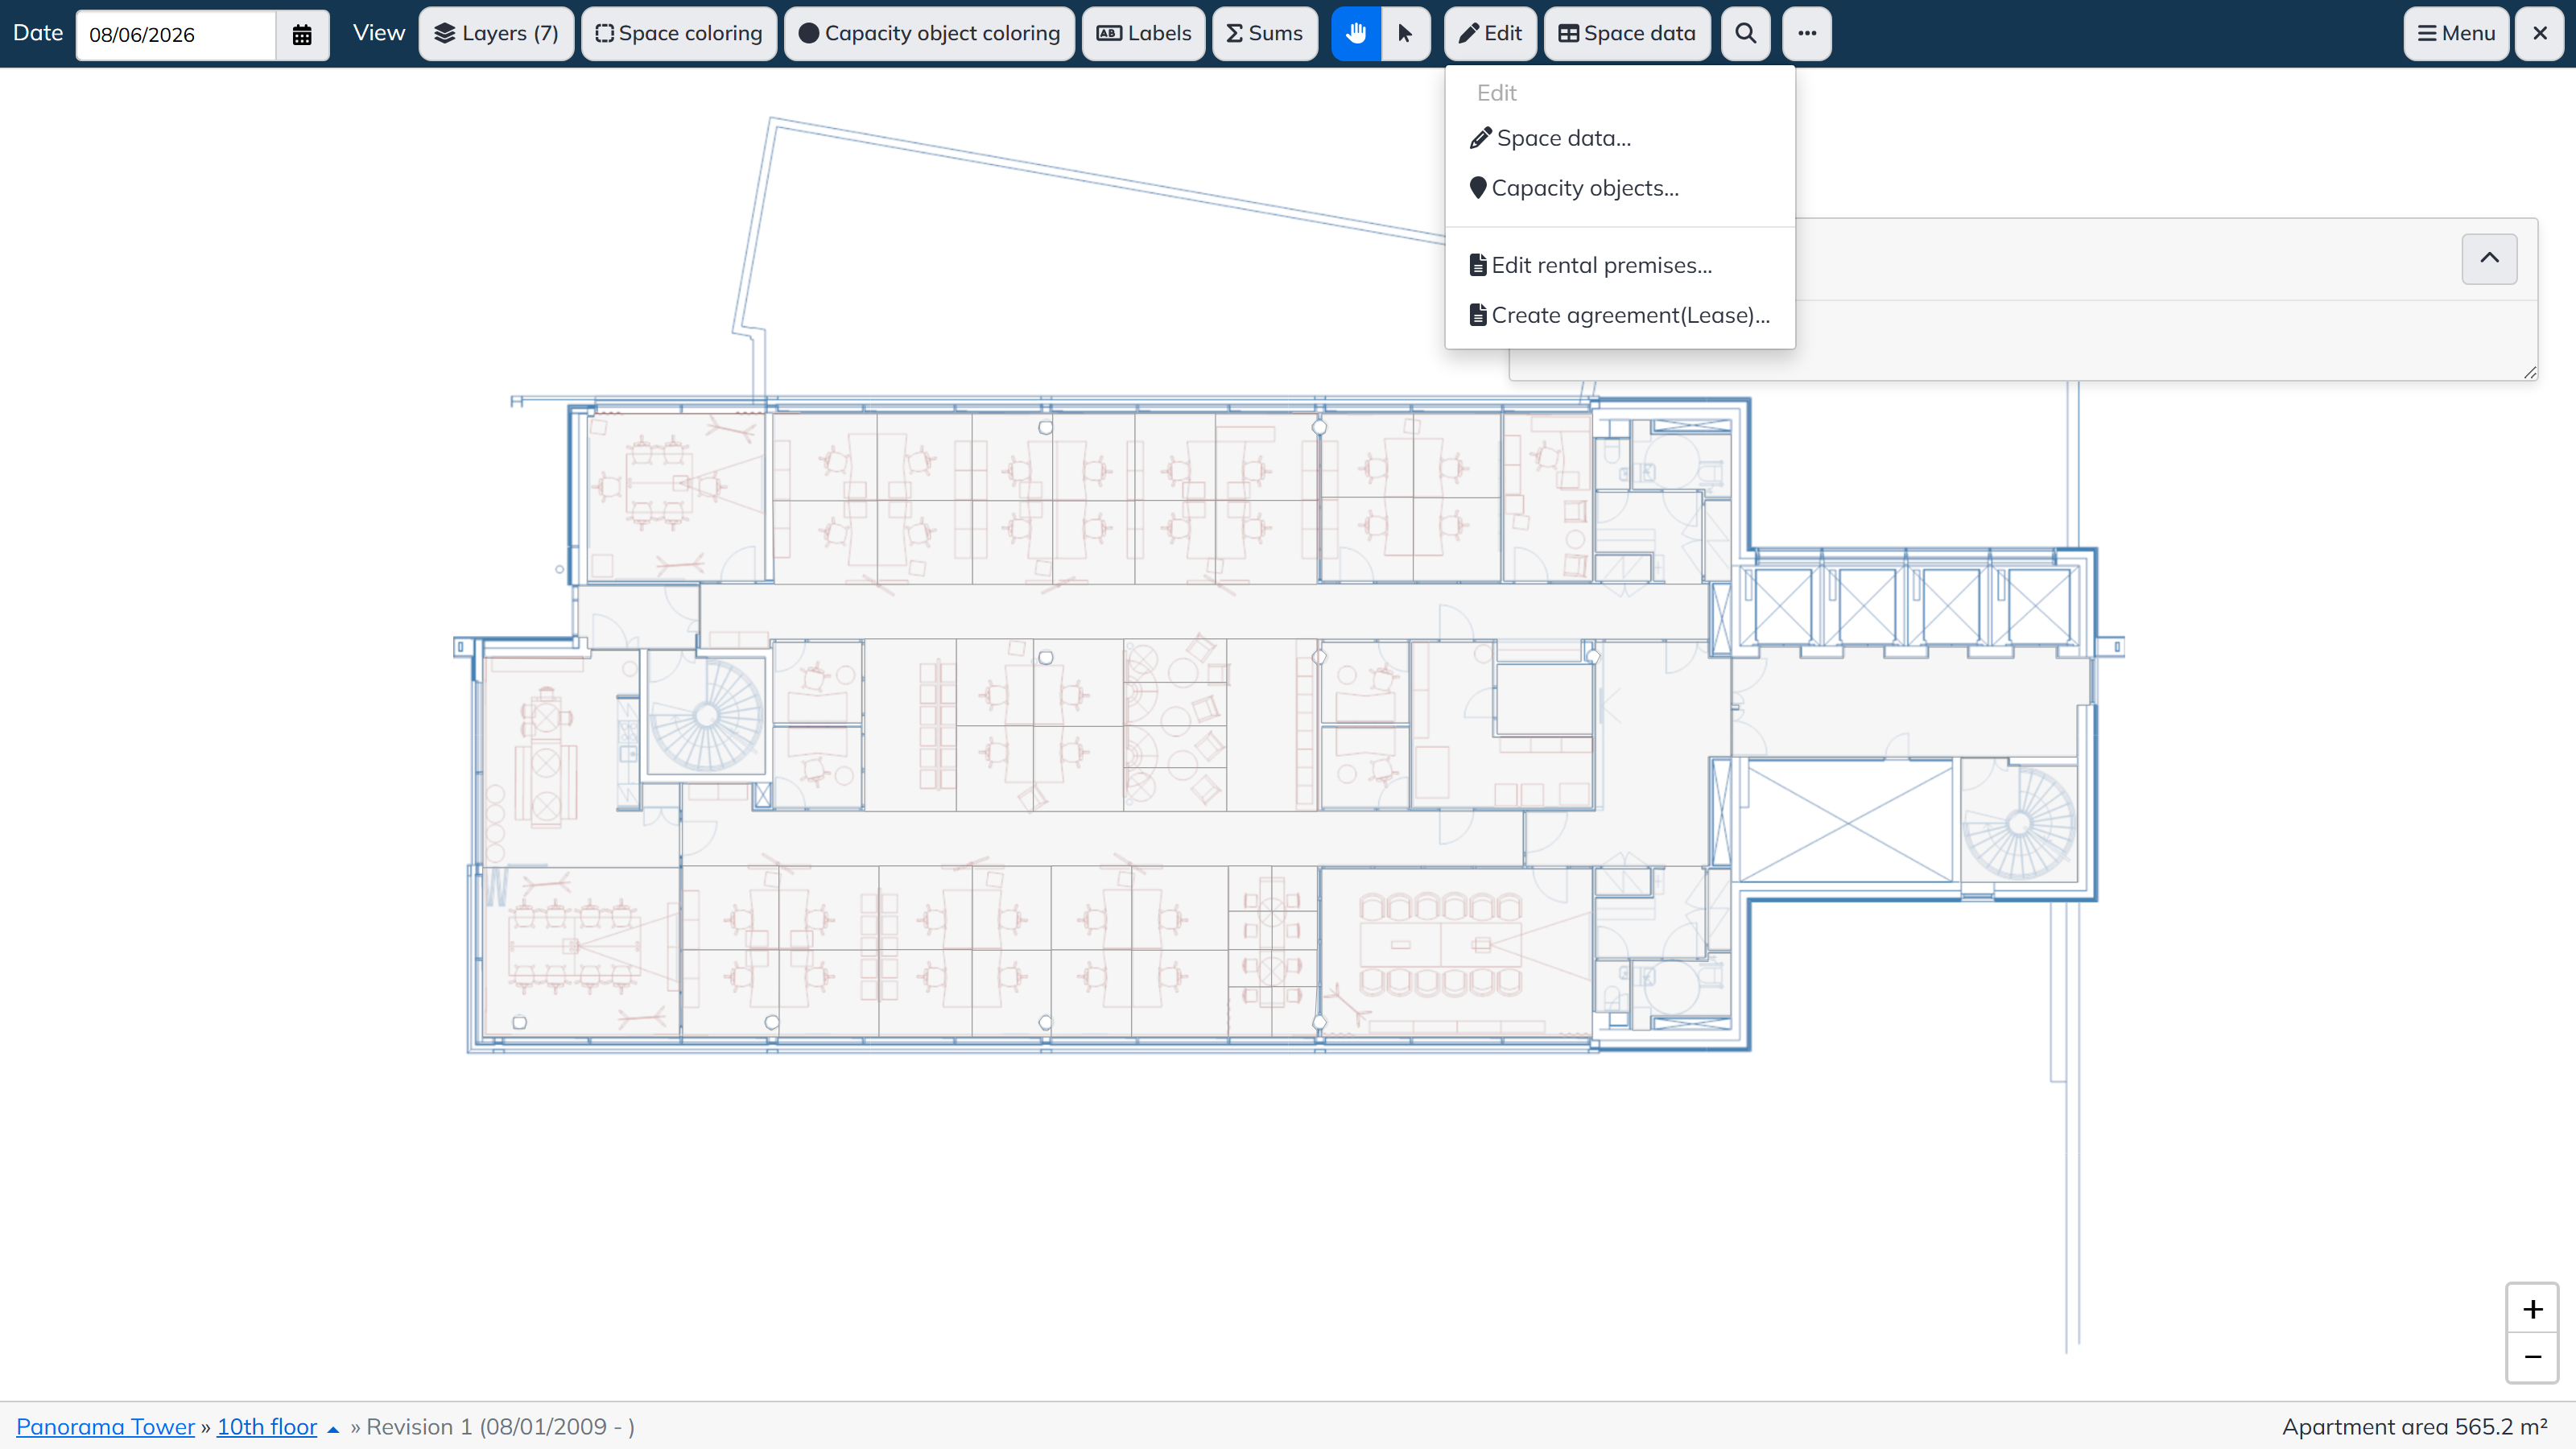
Creating an agreement in the floor plan browser
Select Edit → Create agreement(Lease)… The Create agreement panel lists the rental and parking areas in the selected floor.
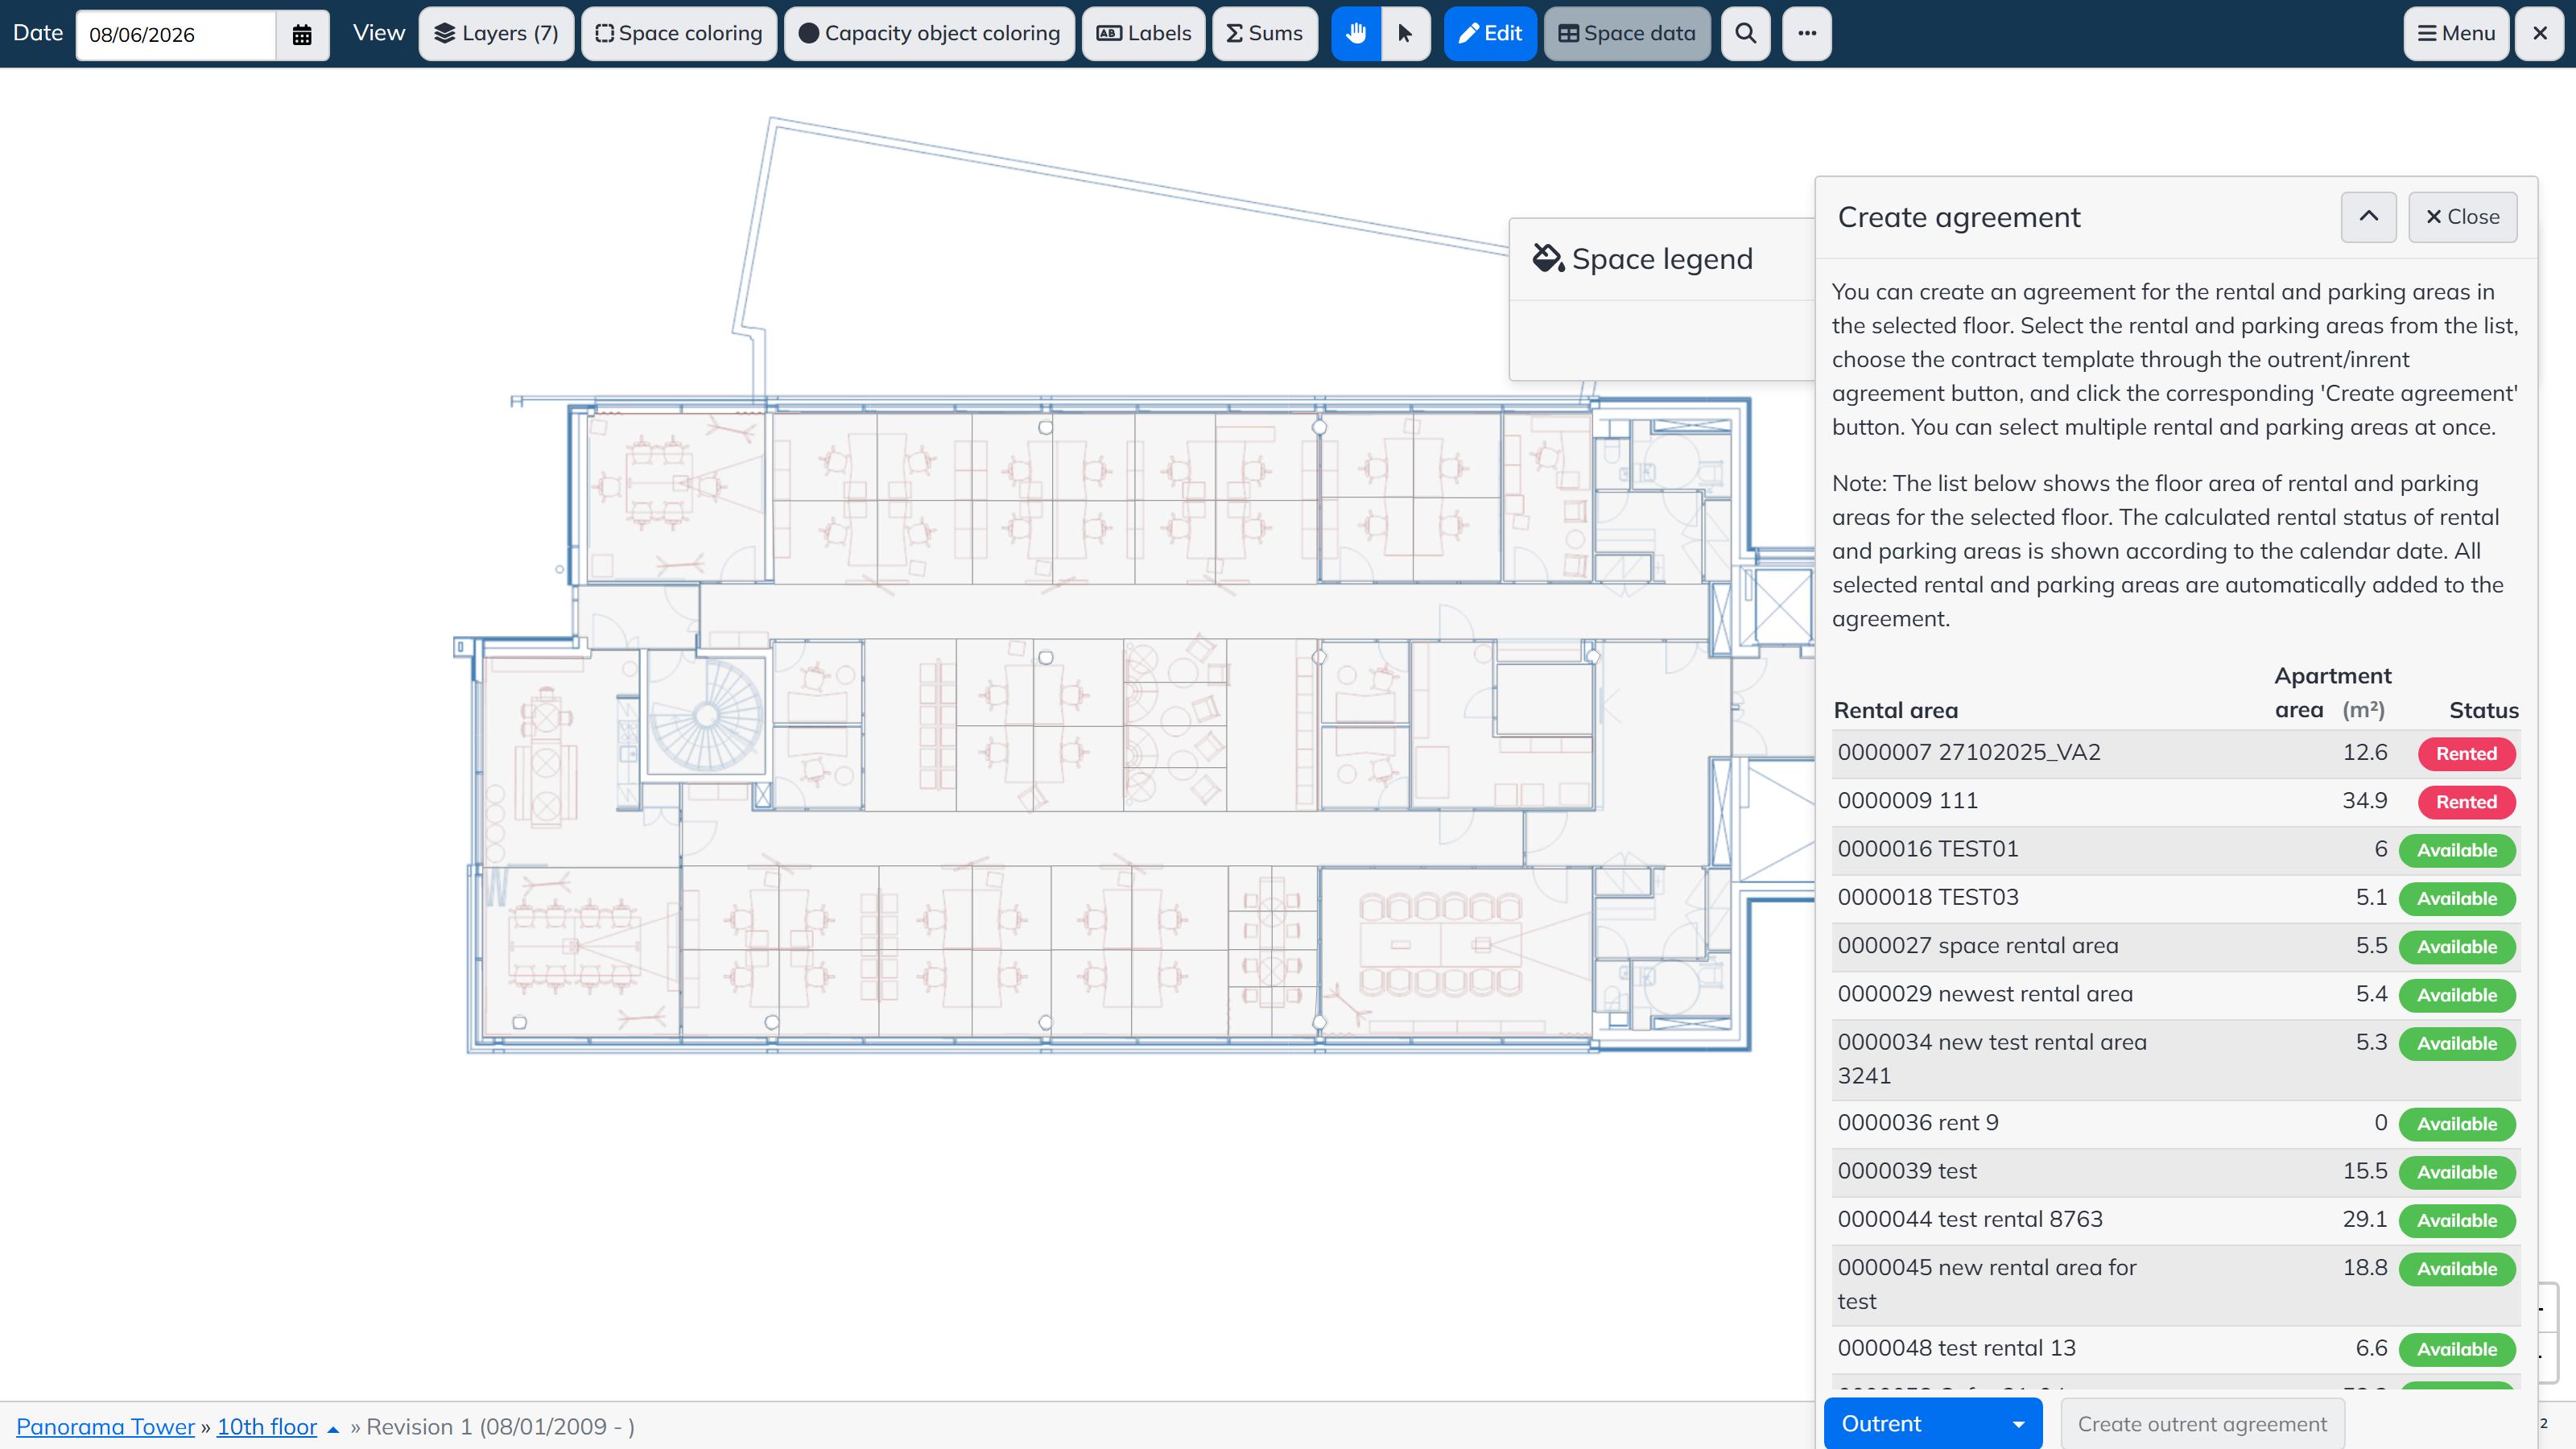
The list shows the floor area of the rental and parking areas for the selected floor, and their calculated rental status according to the calendar date; the rental status is determined with the same logic as on the Lease side. Note that a rental area may have spaces in several floors: all spaces linked to the selected rental and parking areas are automatically added to the agreement.
To create the agreement:
- Select one or more rental and parking areas from the list. You can select multiple at once.
- Choose the contract template through the Outrent / Inrent agreement button. The buttons are shown according to your outrent and inrent rights in Lease, so it is possible that only one of them is available.
- Click the corresponding Create agreement button. You are directed to the agreement creation view on the Lease side, with the selected rental and parking areas filled in on the agreement in advance; the other details have the same defaults as if the creation had been started directly in Lease.
- Review the agreement on the Lease side and complete it as needed.
- Save the agreement. Note! The agreement must be saved for a draft agreement to be created. If the agreement is not saved on the Lease side, the creation started from the floor plan browser is also interrupted and the details are discarded.
Creating and editing rental premises
Select Edit → Edit rental premises… The panel has two tabs: New rental premise and Edit rental premise.
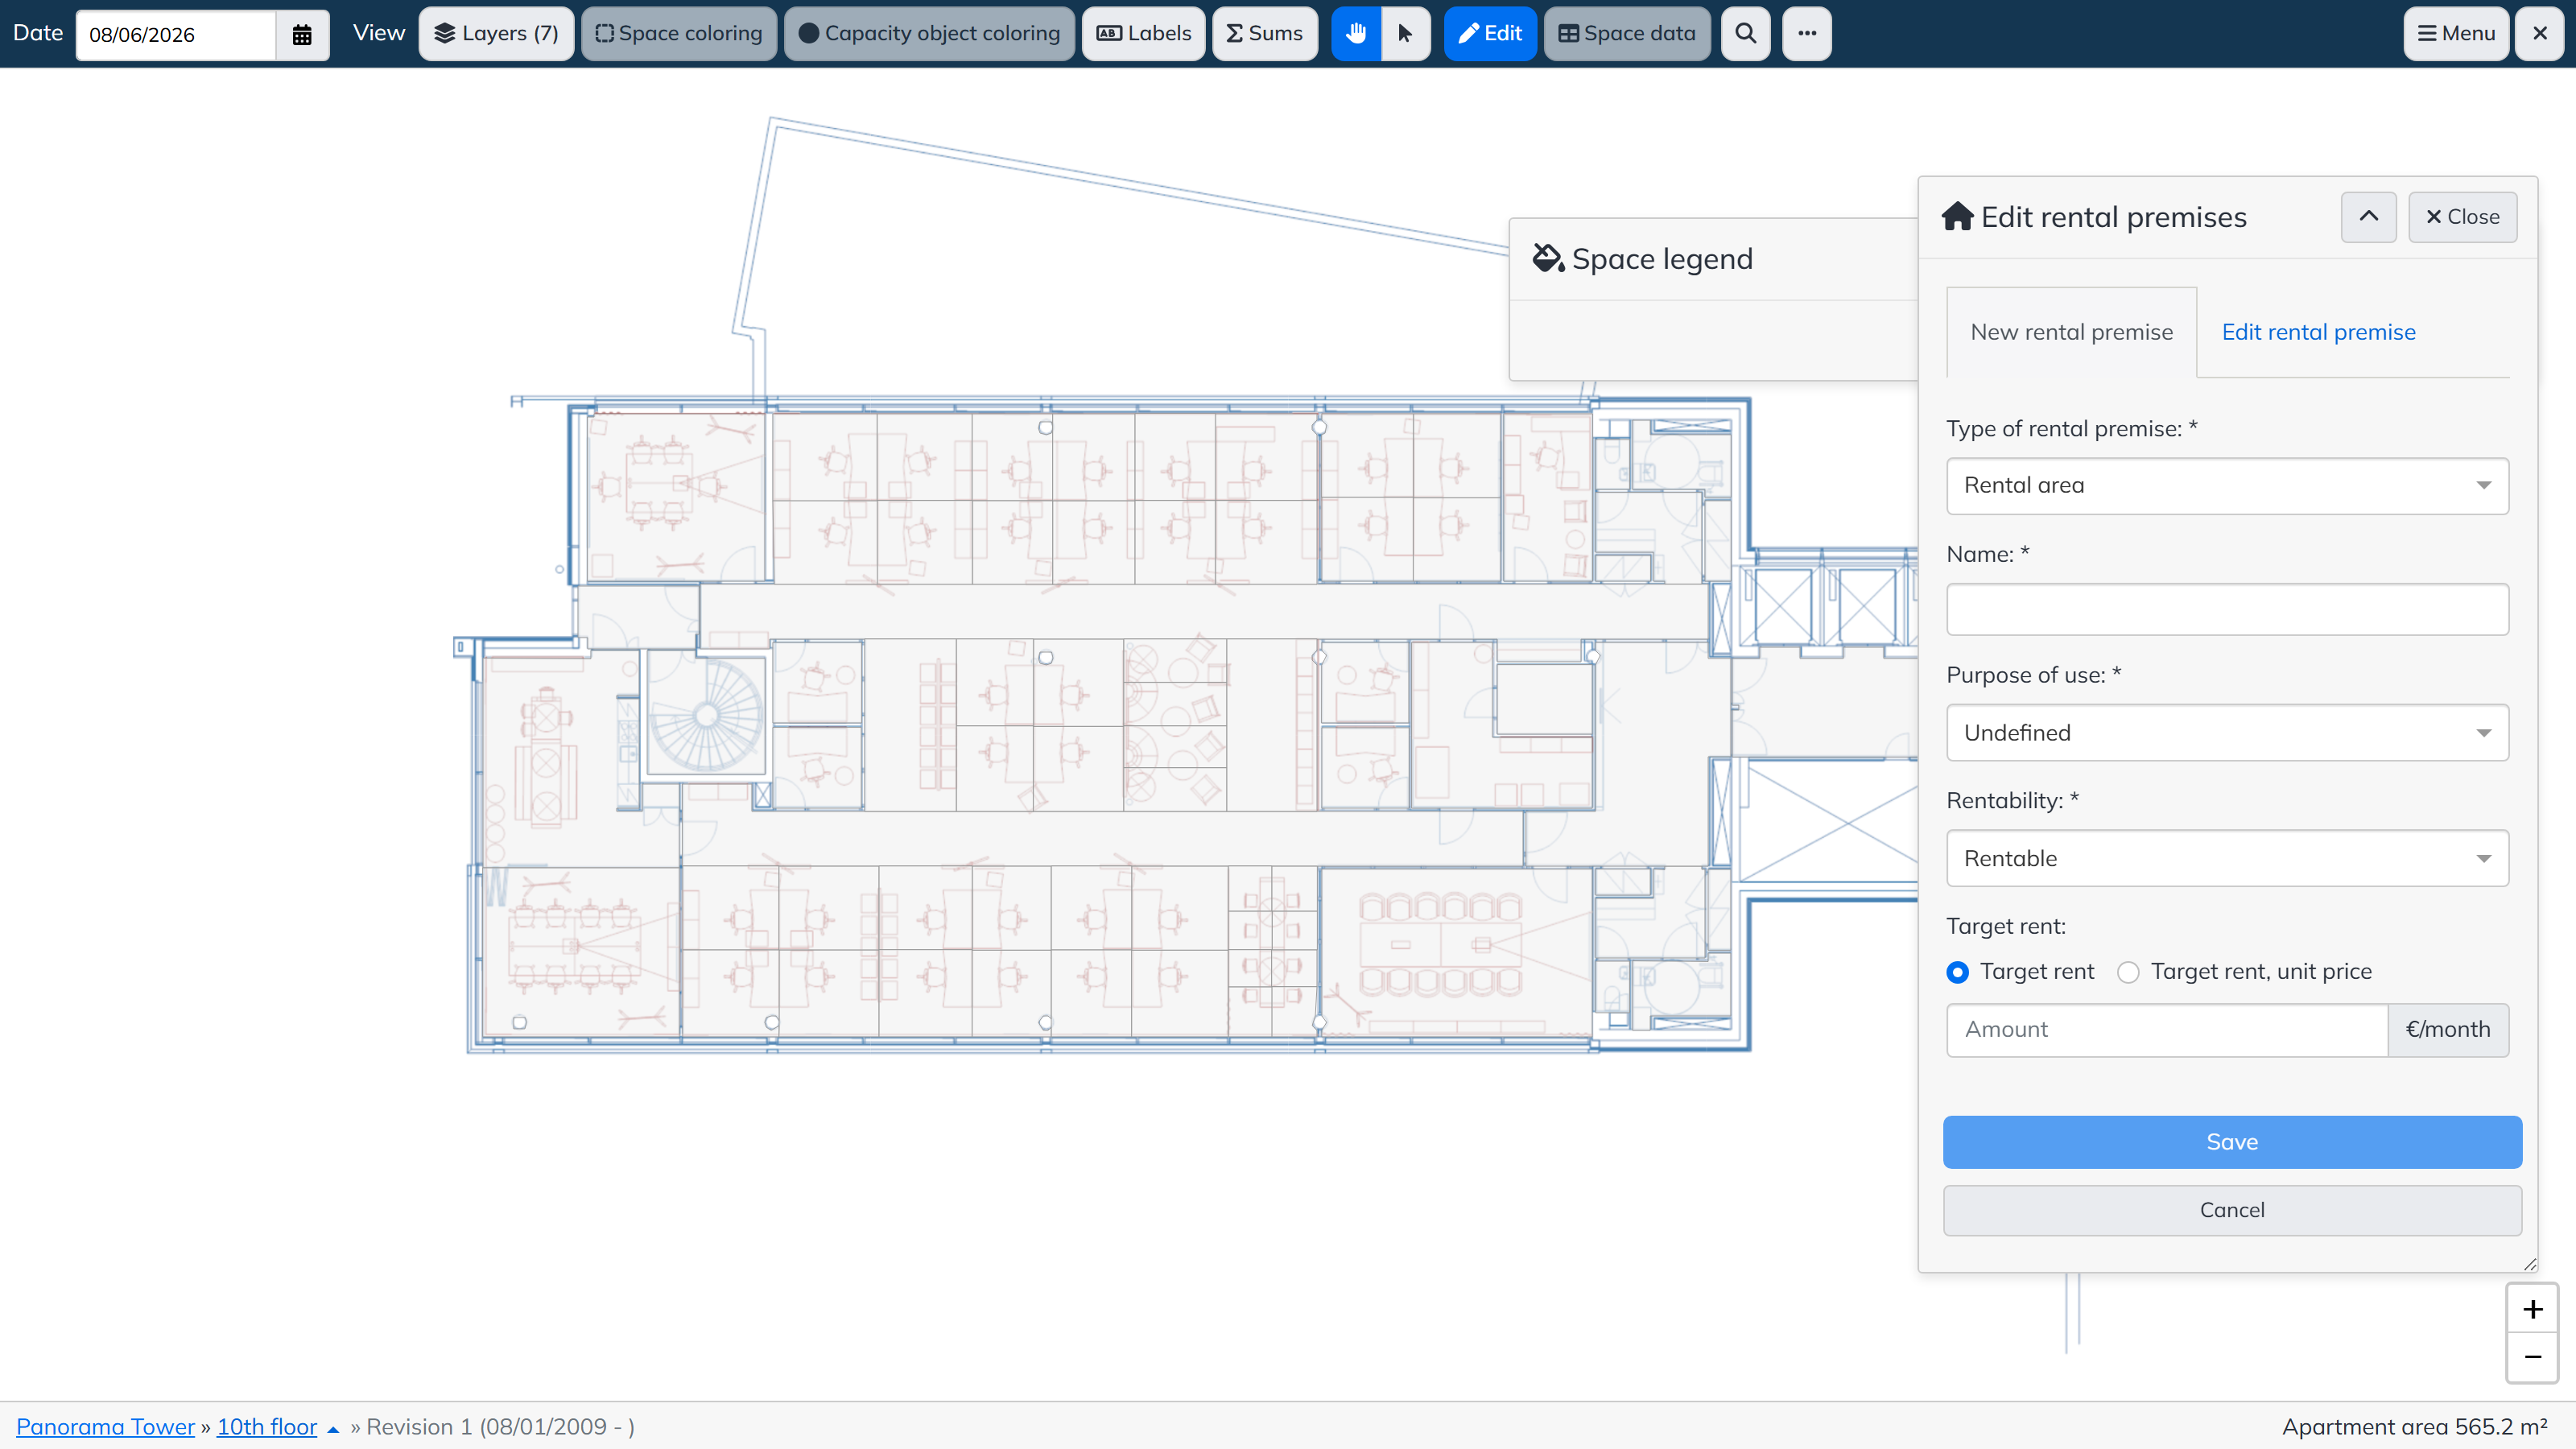
A new rental premise is created by entering the Type of rental premise (for example rental area), Name, Purpose of use, Rentability and optionally a Target rent (as a total amount or a unit price), and saving. On the Edit rental premise tab the same details of an existing premise can be changed.
Rental areas in spaces
Rental areas are connected to spaces with Edit → Space data… by selecting Rental area as the type to edit.
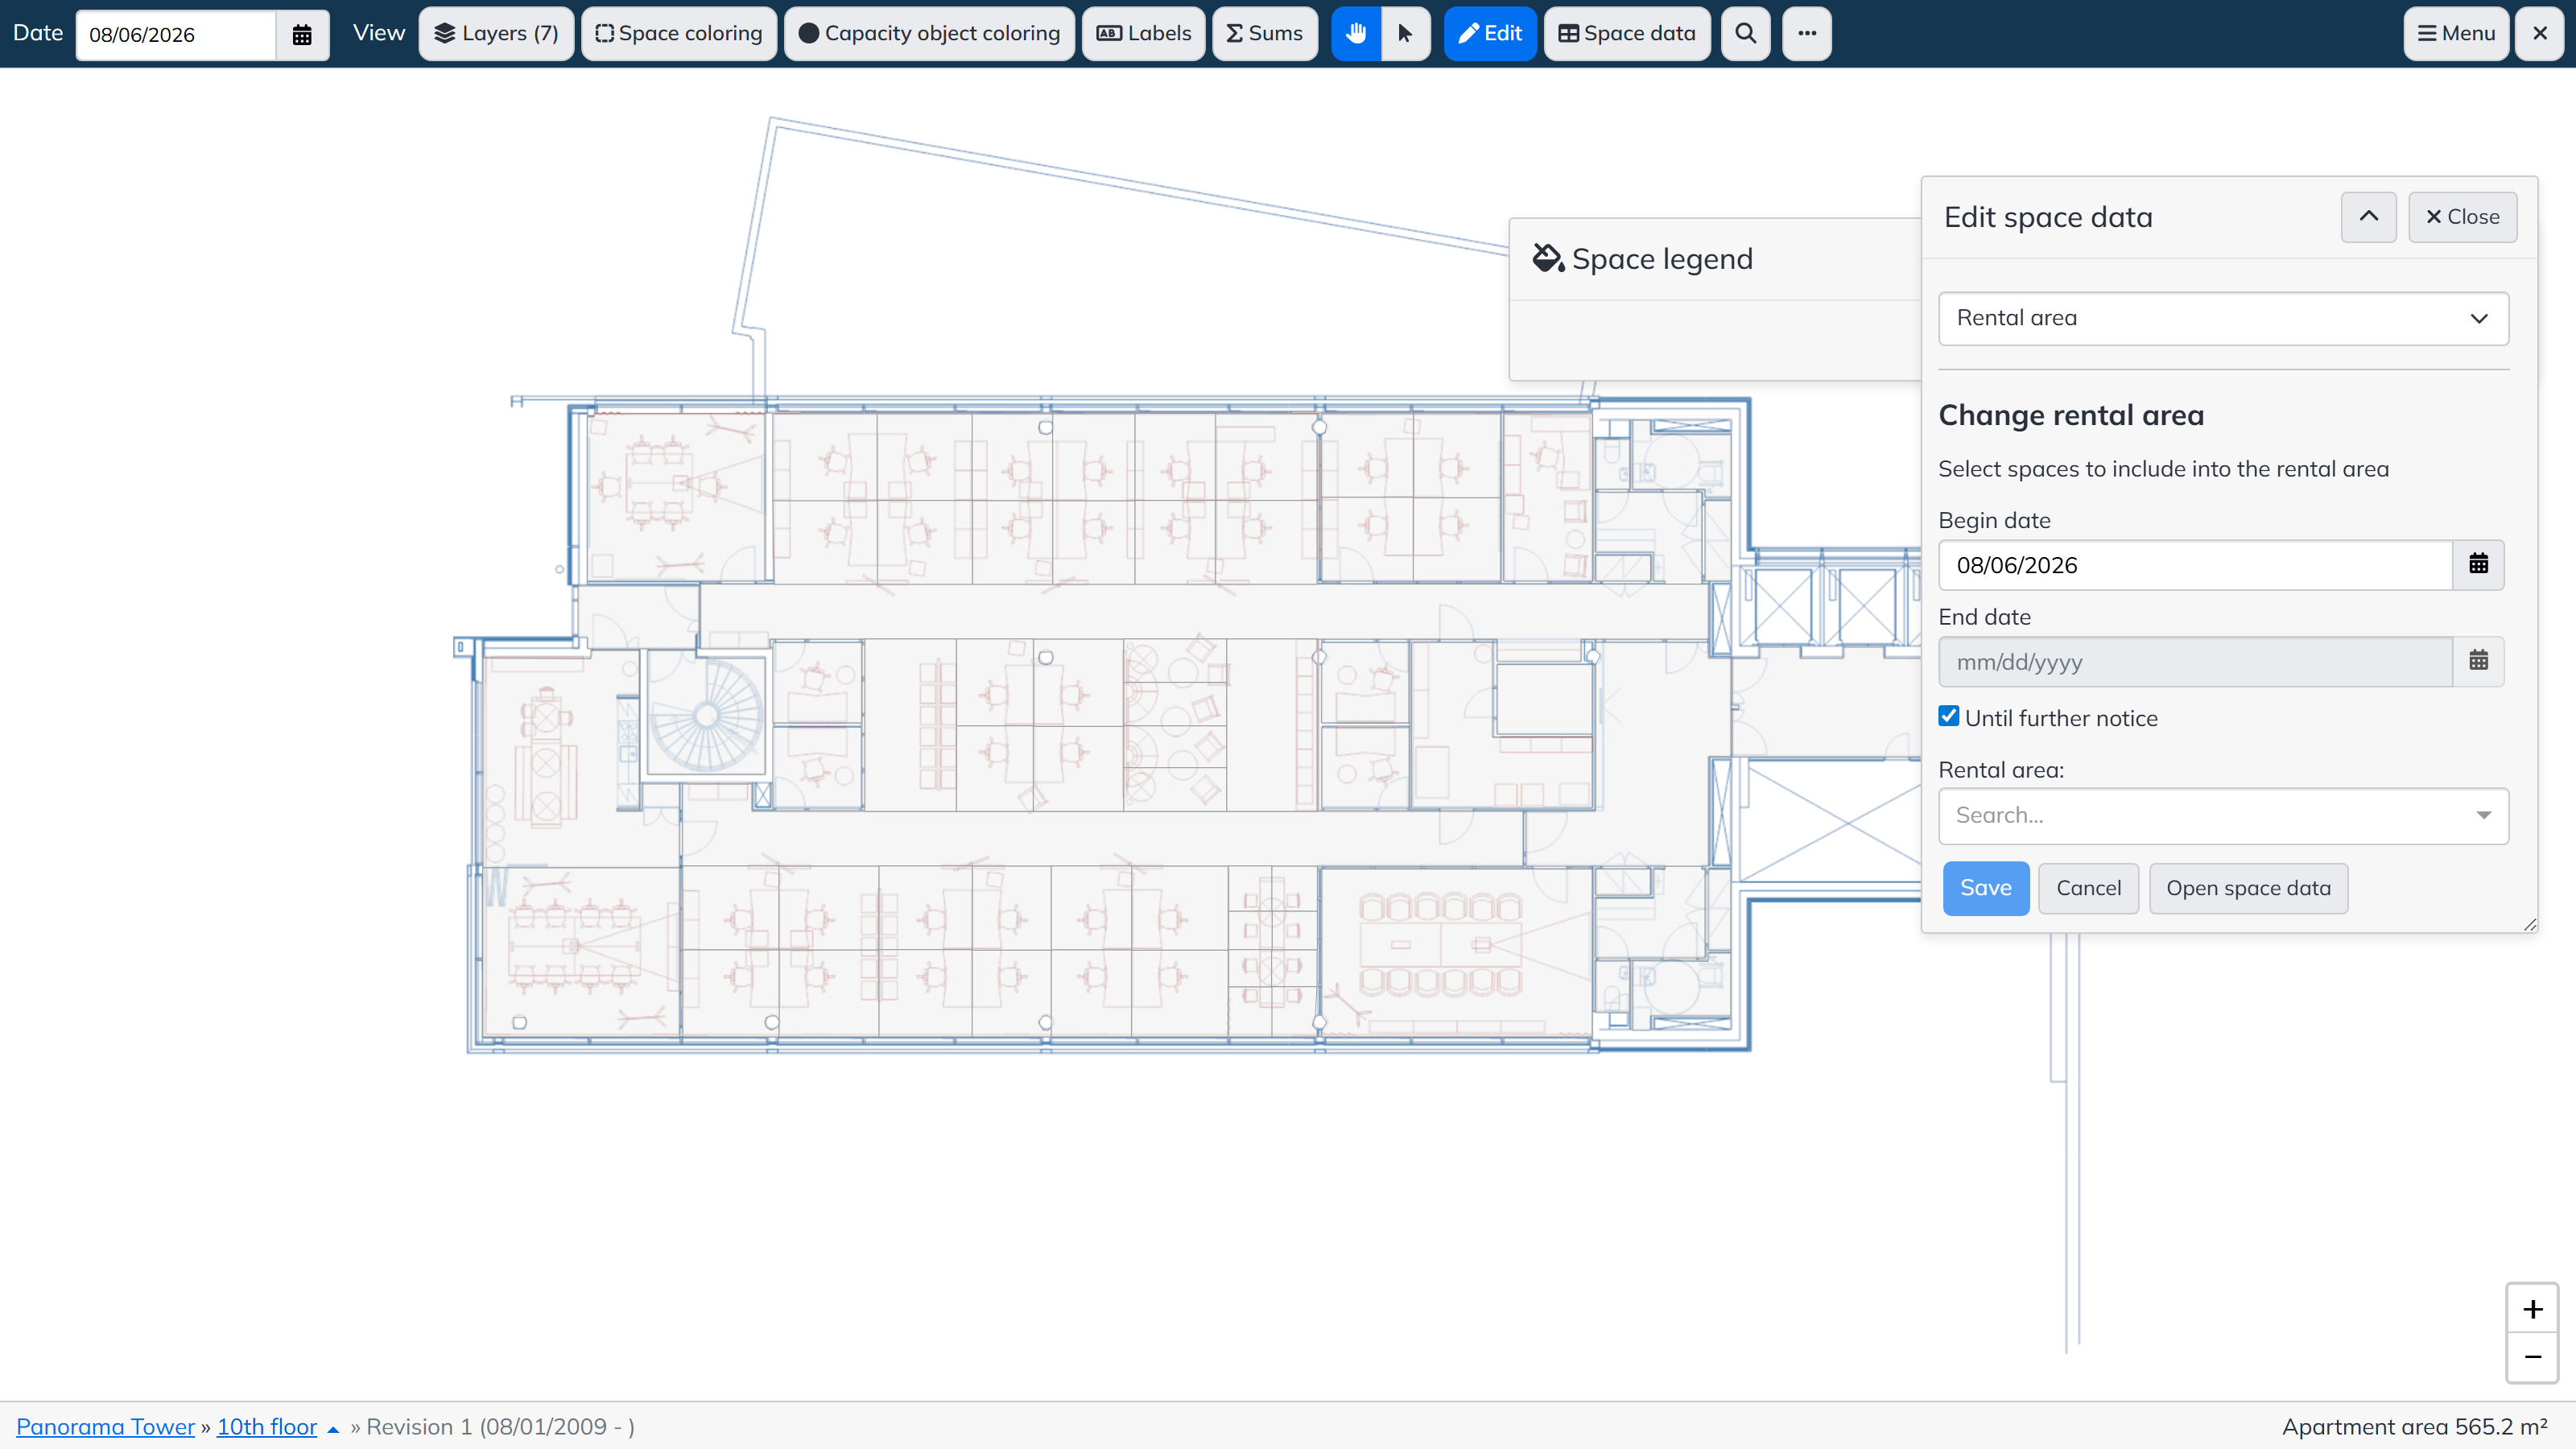
- In the Change rental area form, select the Begin date and the End date — or alternatively tick Until further notice — and search for the rental area created in Lease in the Rental area field.
- Select the spaces in the floor plan that you want to include in the rental area.
- Save. A space link is stored for the rental area for the selected date range. You can view the stored space link via the rental area coloring.
The space link can be edited in the same way: select the rental area to be edited and the new date range, then select the new spaces. After saving, the program applies the changes to the validity and selected spaces for the defined date range. Note! If the start date of the change is set before the end date of the previous definition, the earlier end date is overwritten, and the end date and selected spaces are stored according to the latest definition.
On the Lease side, rental areas show the surface area summed through the space link according to the current day.
Lease colorings
The floor plan browser’s Space coloring menu contains the Lease colorings, for example:
- Outrent agreements — colors the spaces by agreement, where the valid space link of the rental or parking area relates to an outrent agreement.
- Rental area — colors the spaces that have a rental area valid with respect to the selected date.
- VAT status — colors the spaces by the VAT status of the rental area.
More colorings can be created per customer; they are always agreed with the customer separately.
