The agreement details are entered in edit mode, which is opened from the agreement’s Functions menu with Edit agreement. The edit form is divided into the panels described below. Save the agreement with Save at the bottom of the form.
Basic information
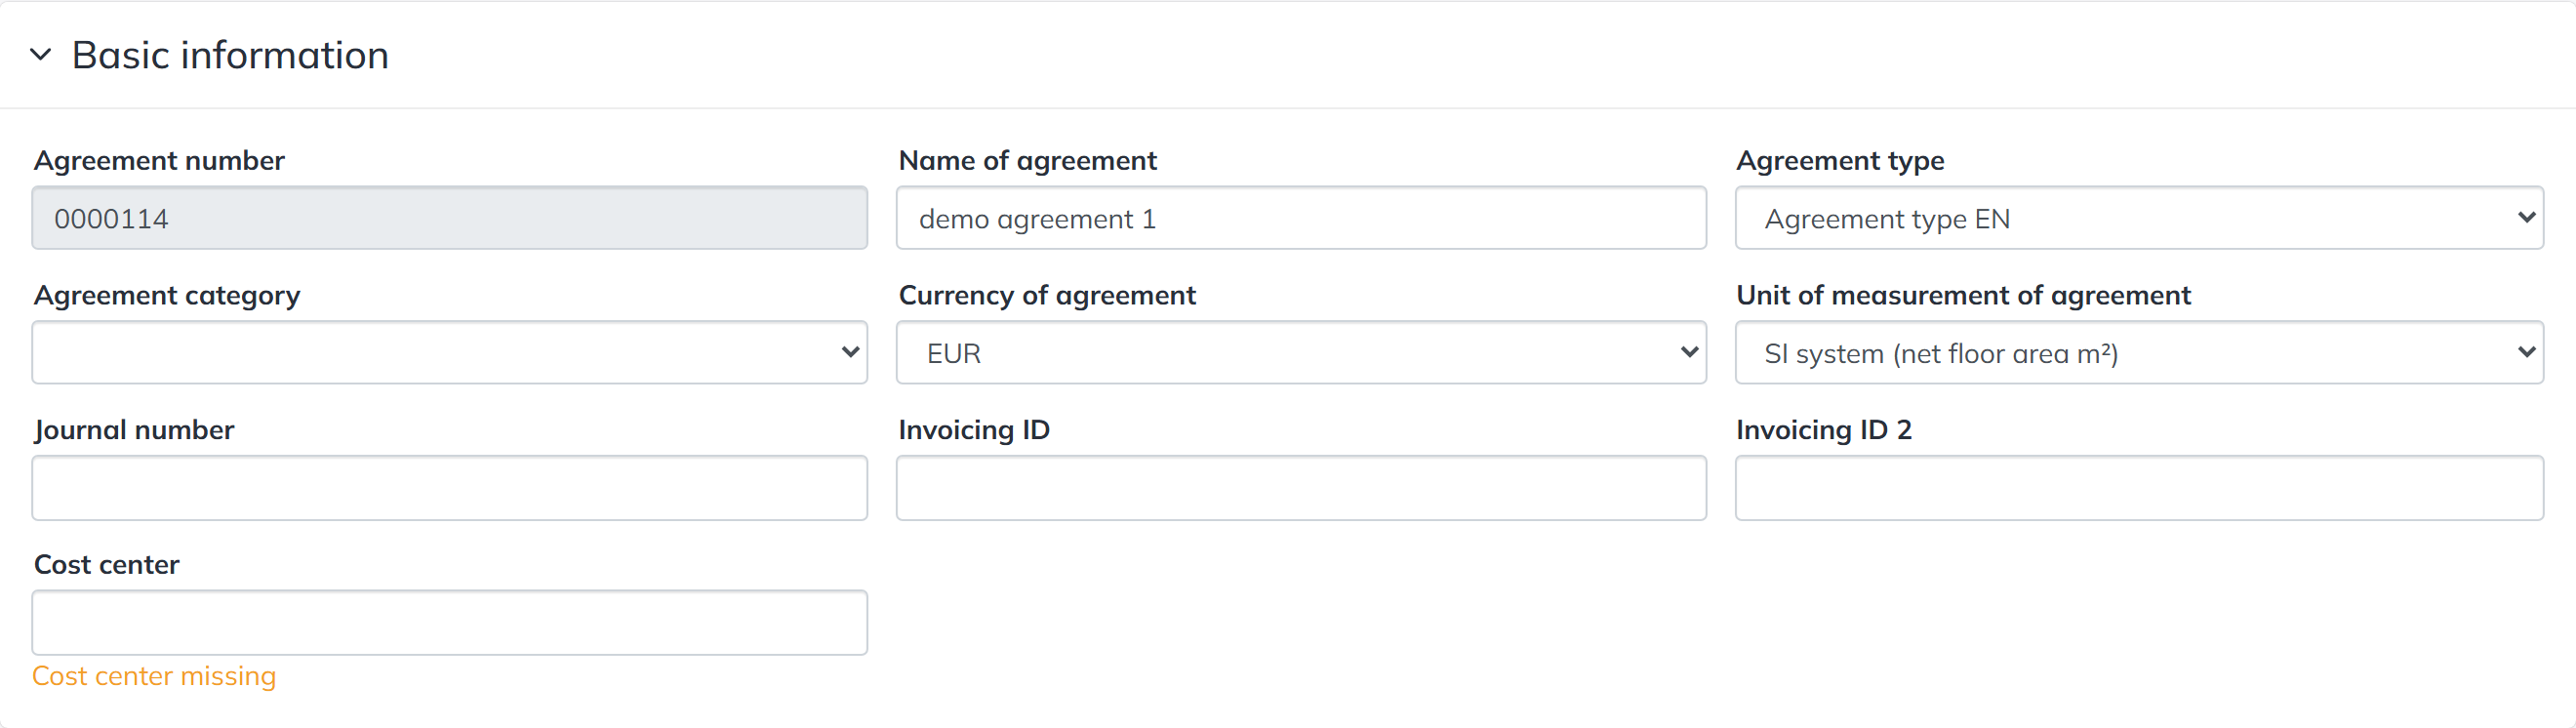
- Agreement number — assigned automatically by the program.
- Name of agreement — name the agreement in a way that makes the premises easy to recognize. The agreements list shows the name, lessor and tenant, so it is worth including the premises in the name, for example “Pharmacy Ltd, Kauppakatu 2, Salo”.
- Agreement type — for example a business or residential premises rental agreement. Options can be added in the Administration section.
- Agreement category — used for classifying agreements if needed. Options can be added in the Administration section.
- Currency of agreement — for example EUR; international agreements can use the currency of the agreement.
- Unit of measurement of agreement — either the SI unit m² or the imperial ft².
- Journal number — a document numbering used by some organizations.
- Invoicing ID and Cost center — these specifications relate to the invoicing integration.
Adjustment

The Adjustment panel records agreement check details: whether the agreement, rent, increase terms and space allocation have been checked, and whether information is missing from the completed check.
Lease term
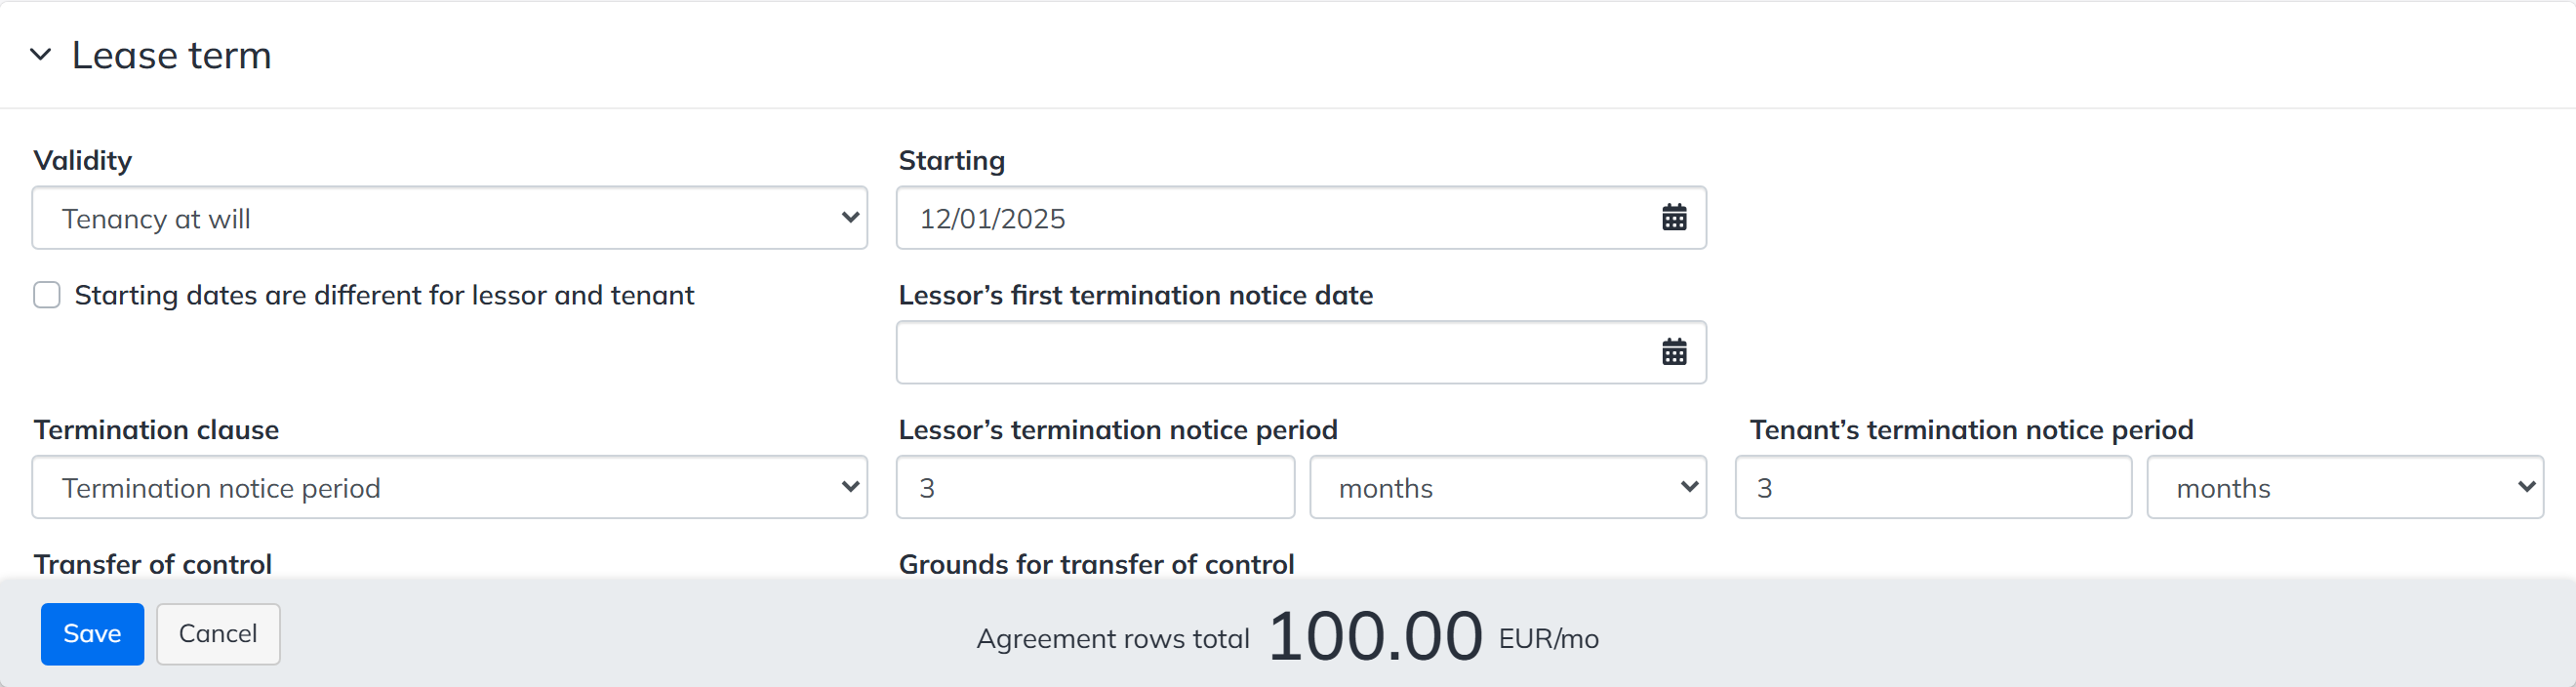
- Validity — the options are tenancy at will (valid until further notice) or fixed term.
- Starting — the starting date of the agreement is mandatory.
- Ending — an ending date is entered for fixed-term agreements. For a fixed-term agreement, renewal options also become available (see Options below).
- First termination notice date — the first possible termination date, if one has been agreed.
- Termination clause — select from the drop-down list, or write the notice periods manually. Options can be added in the Administration section.
- Transfer of control and Grounds for transfer of control — if the control of the premises transfers on a different date than the agreement itself defines, enter the date and preferably also the grounds.
Dates can be typed in or picked from the calendar.
Lessor
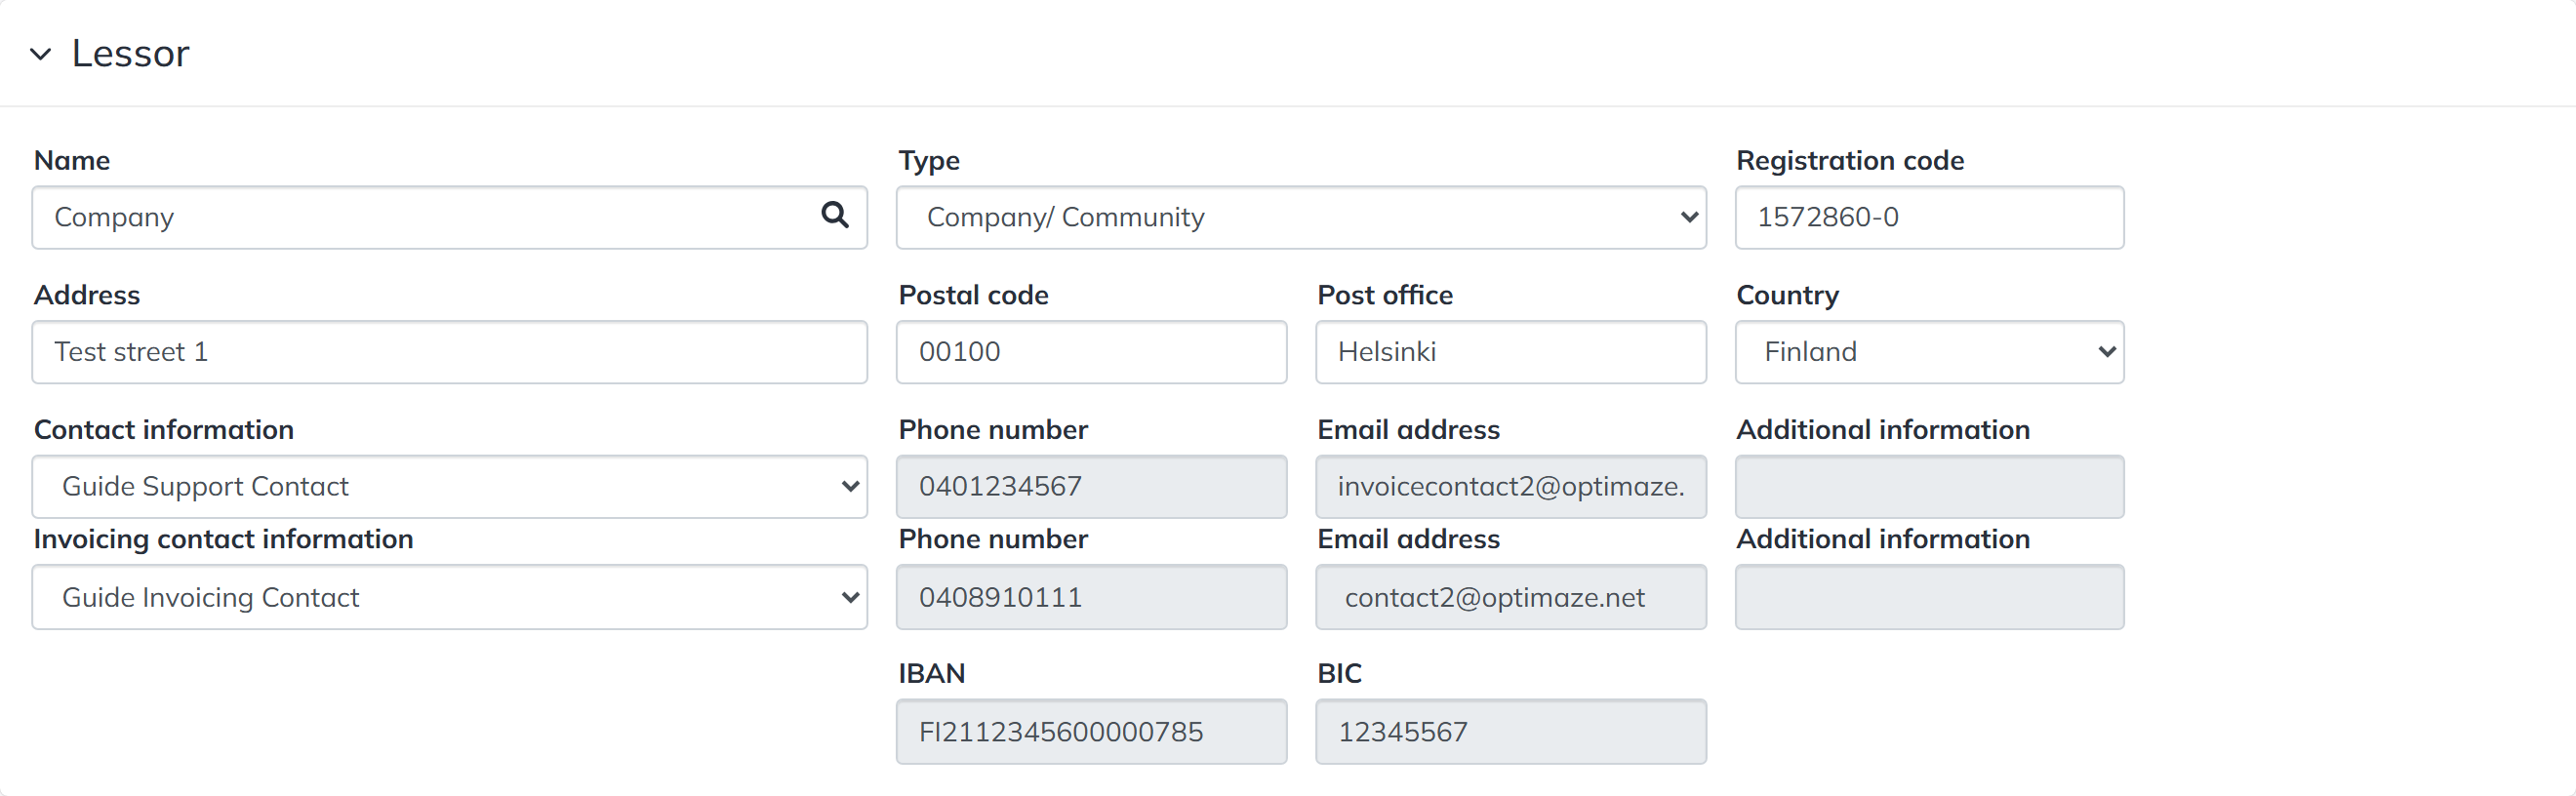
When you select the lessor’s Name, the other details are filled in automatically from the details saved for that party. The Contact information and Invoicing contact information selections are taken from the contact persons created for the lessor. Parties are created and edited in the Parties section; they should be created before the agreement is filled in.
Tenant
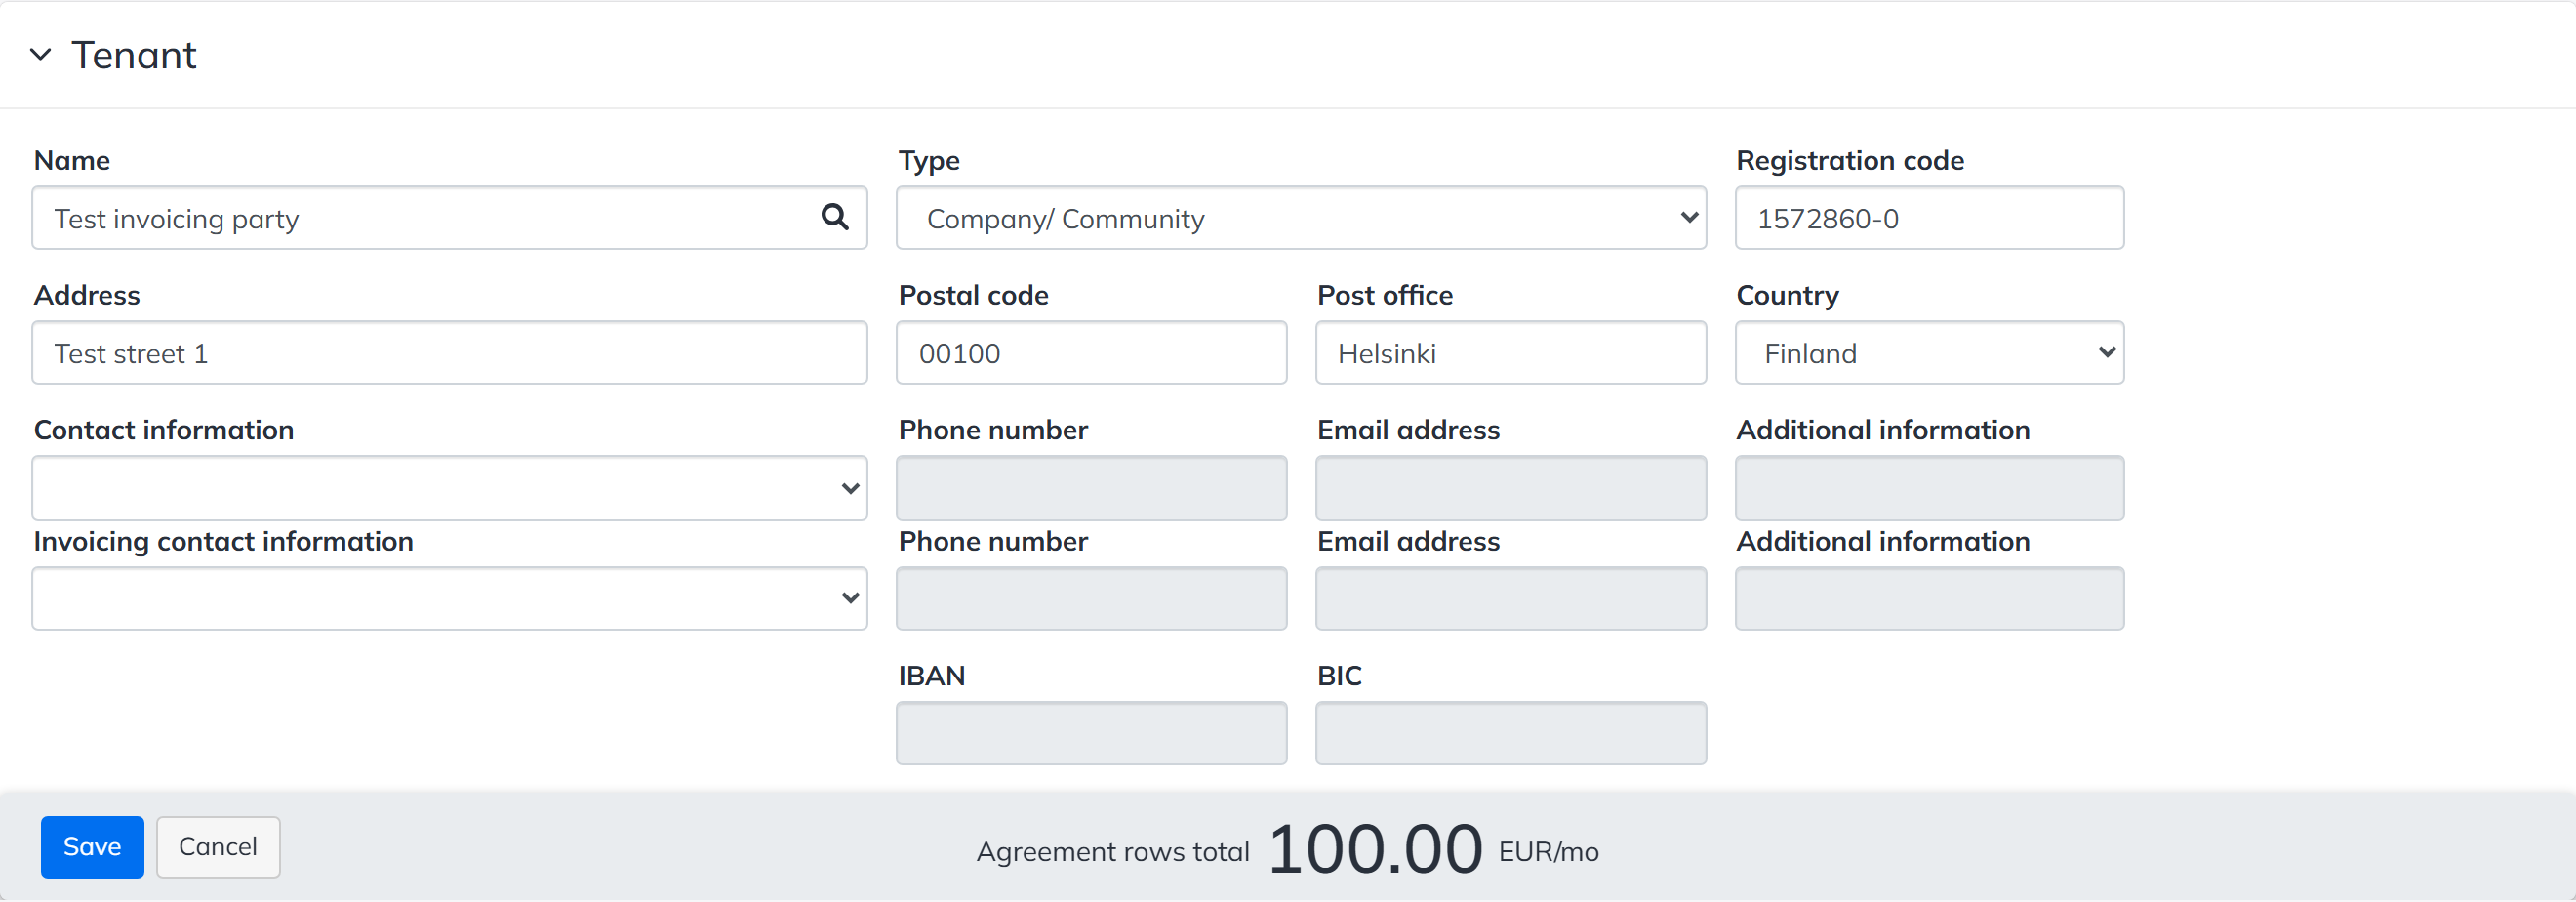
The tenant can be either a company/community or a person; the type is selected from the drop-down list. As with the lessor, selecting the tenant’s Name fills in the other details from the party register. A second tenant can be added with the Add other tenant button; that party should also be created in the Parties section beforehand.
User of leased premises

If the premises have a different user than the tenant, the user’s name can be added with Add user of premises. The user does not need to be created in the party register if the user’s address and other details are not relevant.
Rent
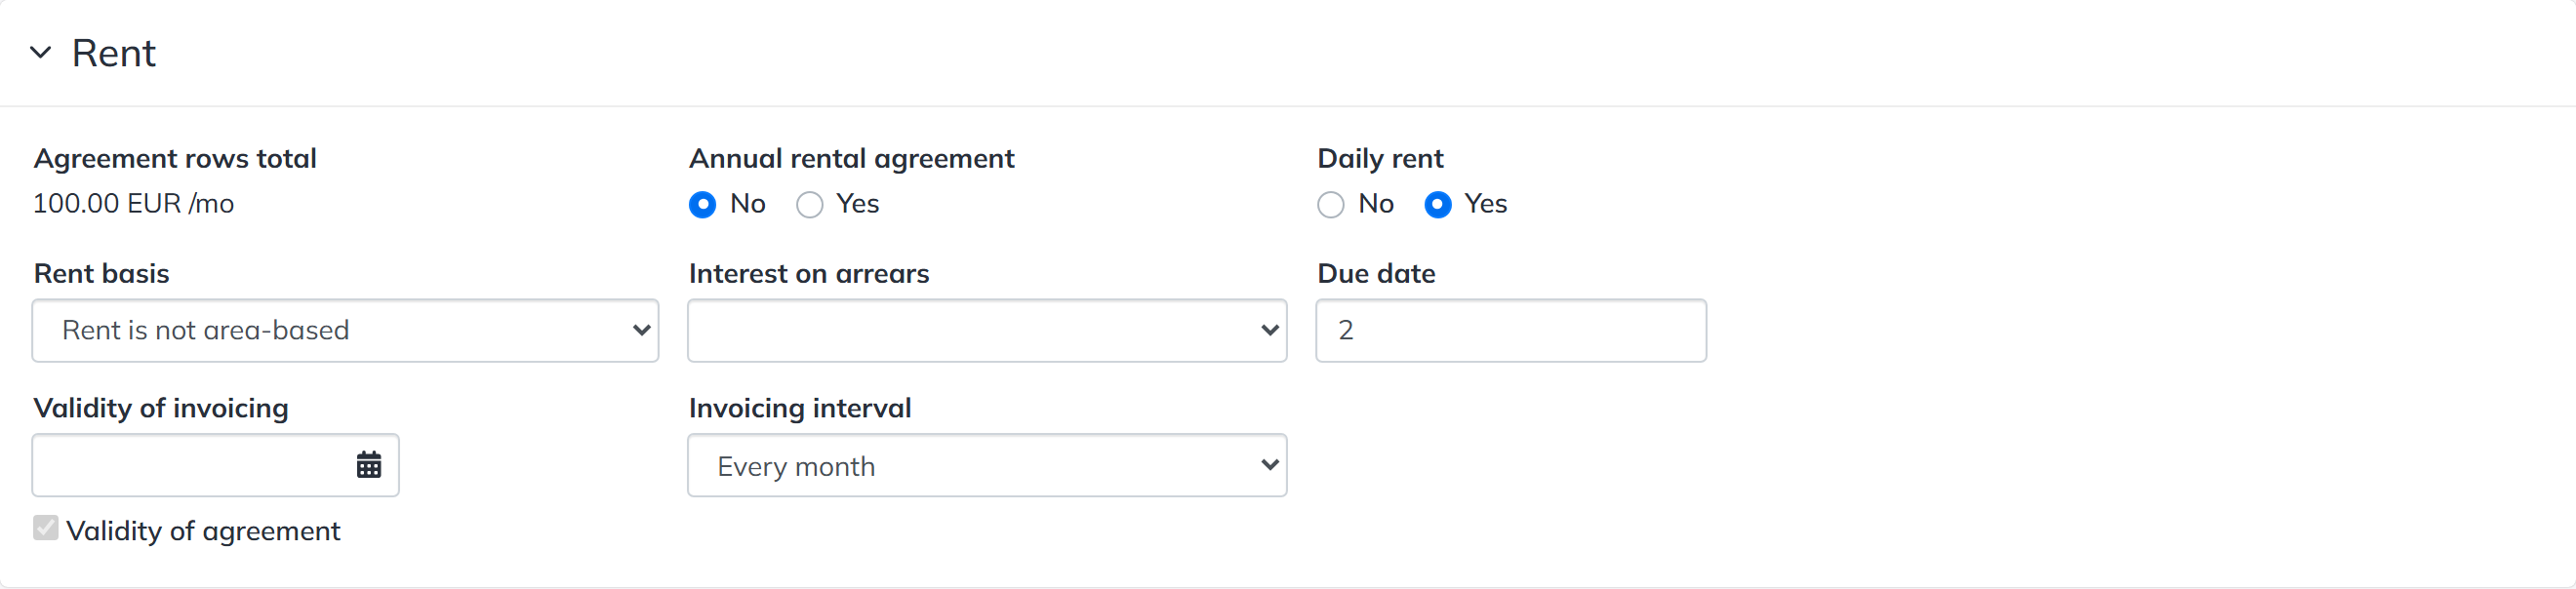
The Rent panel defines the details related to rent payment and invoicing. It is worth entering the interest on arrears and due date in the lessor’s party details, in which case they are filled in automatically on a new agreement. By default the invoicing period starts from the beginning of the agreement, but this can be changed, and the invoicing interval can also be adjusted here. If the lease term starts or ends in the middle of a month, the program can calculate a daily rent automatically; in that case select the daily rent option.
Priority premise

If the agreement has several rental products, you can select a priority premise that determines the address details of the agreement. The selection can be made only after the rental products have been added to the agreement.
Rental products
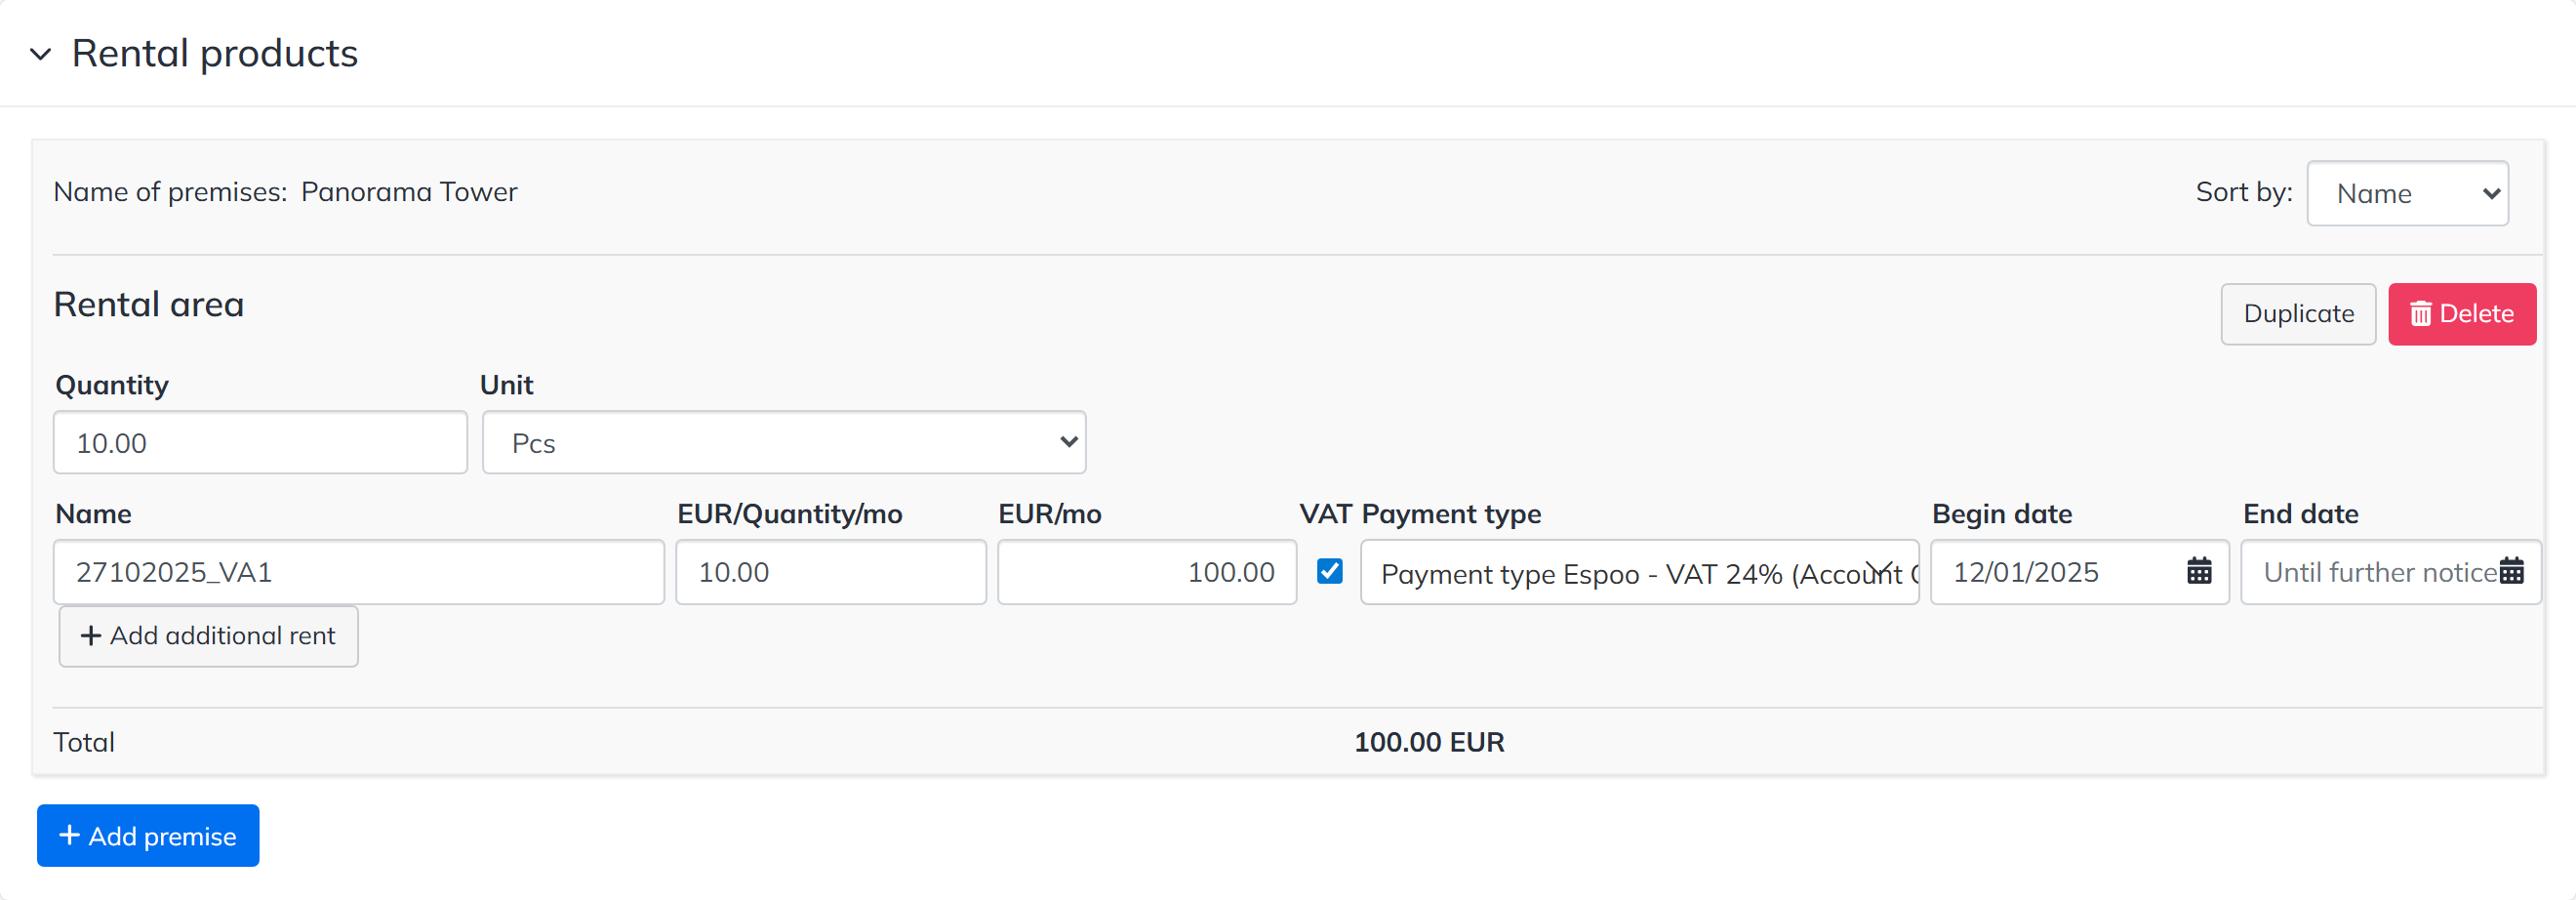
Rental premises are added to the agreement with the Add premise button, which opens the premise selection window.
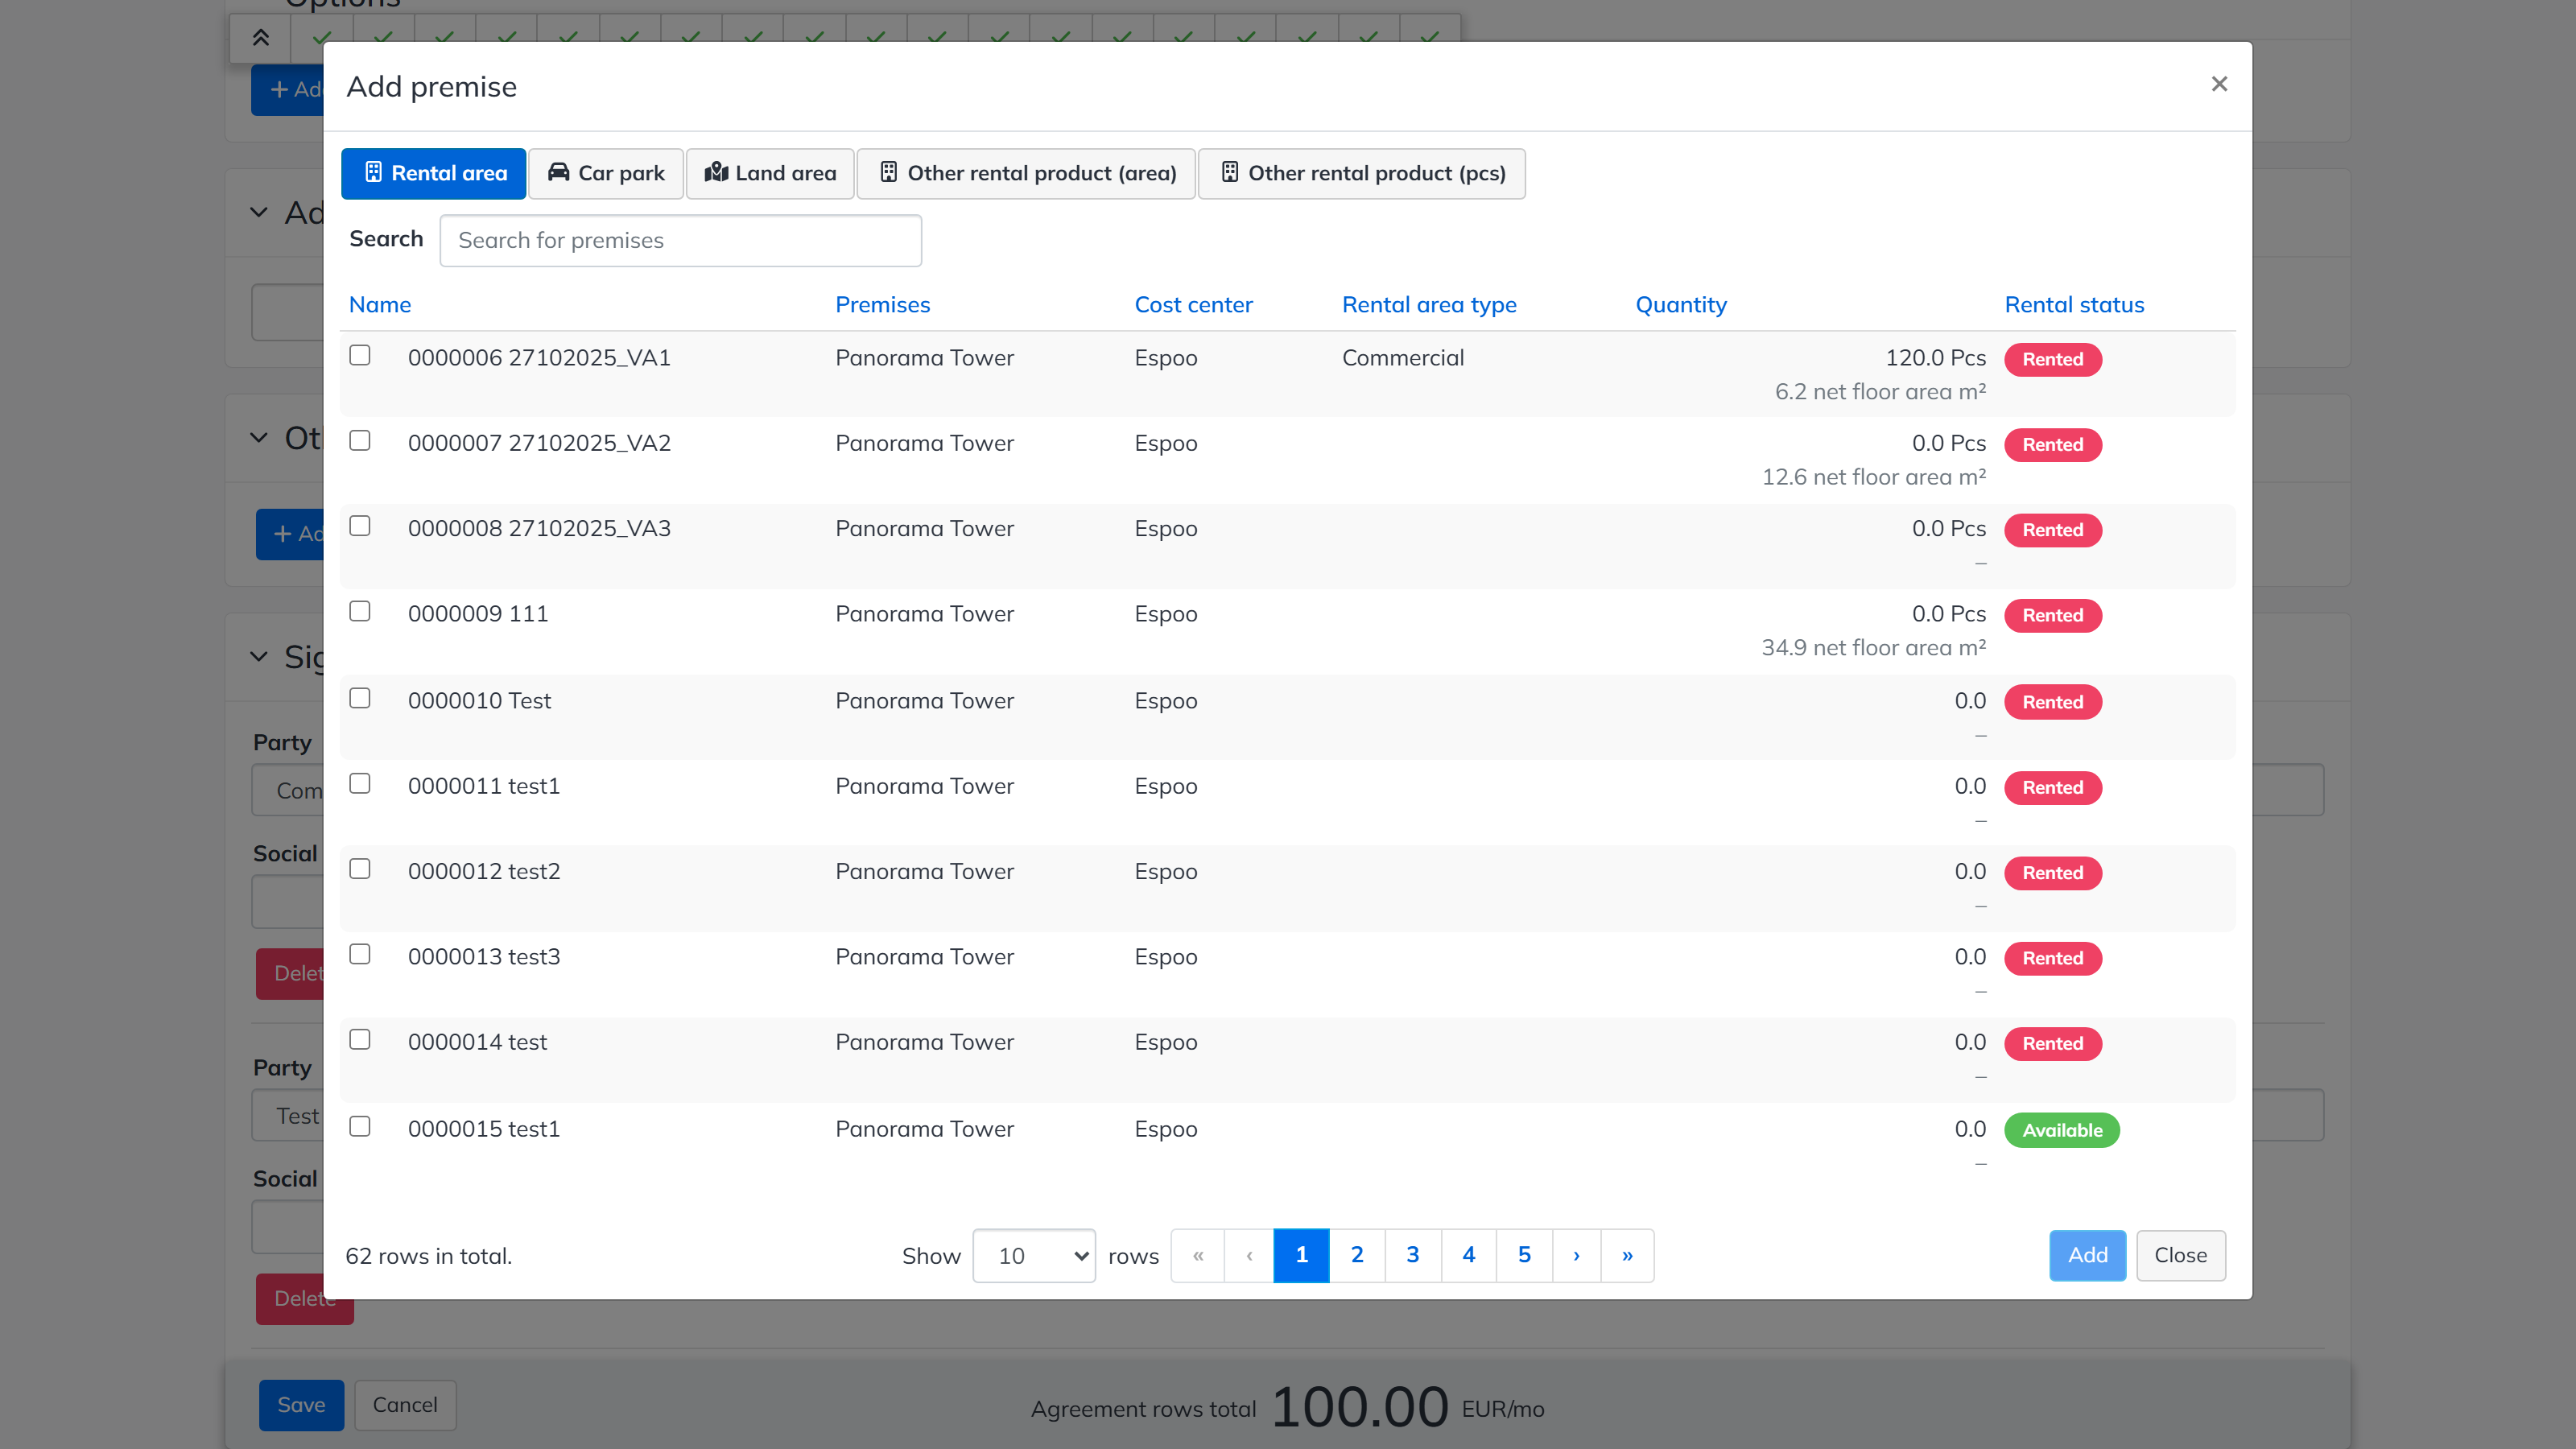
In the window you can either pick the premises directly from the list or use the search. The buttons at the top of the window switch between premise types (rental areas, car parks, land areas, other rental products). Select one or more available premises and click Add. The list can be sorted by clicking the column headers, for example to list available rental areas first.
By default, the surface area of the rental area is the area entered for it. The area coming from the spaces of the floor plan drawings can also be used; the area is selected by changing the unit. If the same rental area is rented on several agreements, enter the rented share of the area manually on the agreement.
If the price of a rental product changes, the row can be ended on a chosen date, and the row can be duplicated to continue from the previous ending date with a new price. Additional rents can be added to a rental product row with Add additional rent.
Separate compensations

One or more separate compensations can be defined for the agreement with Add separate compensation. A separate compensation can be targeted either at the entire agreement or directly at a specific rental product, and a responsible party is always defined for it. On an approved agreement the separate compensations are shown on the Rental products tab together with the other rental products.
Maintenance rent

Maintenance rent details can be defined separately for the agreement. First select which rental product the maintenance rent is targeted at. The maintenance rent can also be targeted at a specific number of square metres, in which case it does not apply to the whole rental area of the agreement. A deviating invoicing interval can be set by selecting the deviating payment months option.
Turnover rent

For agreements where the rent is partly or fully based on the tenant’s turnover, the turnover rent terms are defined in the Turnover rent panel. Turnover figures are updated in the Administration section with the Excel update tools.
Rent scaling

Rent scaling is used when the amount of the rent deviates from the normal rent for some period. Select the rental product the scaling is targeted at; the entire agreement (capital rent) can also be selected, in which case the scaling applies to the whole agreement. Enter the start and end dates of the scaling and the amount of rent during the scaling, or the change percentage.
Deposits

Deposits are defined for the agreement with Create a new deposit. The deposit type is selected from the drop-down list; part of the details are entered immediately and the rest can be completed when the deposit has arrived. An agreement can have several deposits. Deposit types are maintained in the Administration section.
Rent adjustment

The Rent adjustment panel defines how the rent of the agreement is adjusted. Select the adjustment condition with Add condition; it can be index-based, fixed, percentage-based, other, market rent, or index-based with an additional percentage.
Select all the agreement rows the adjustment condition applies to, and the adjustment months. The adjustment can also be made on the starting date of the document — note that when this is selected, the rent is adjusted on the starting date in addition to the adjustment months. Then select the adjustment frequency and the first possible adjustment, and when the rent adjustment notice is sent to the tenant.
For an index-based adjustment, select the index used on the agreement. The available options are the indices in use in your company; options can be added in the Administration section. The point figures of the cost-of-living index, the real estate maintenance cost index and the consumer price index are maintained centrally; other index figures are maintained by the customer.
The base index defines which point figure is used as the starting point for increases. If the base index is variable, you can select that the point figure of the previous adjustment date is used as the new base index. The base index point figure can also be in the future, in which case it is 0 and changes when the figure is published. If the index point figure decreases, define whether the rent is reduced or not. A minimum increase (for example 2%) can also be defined.
Exceptions can be defined for the index adjustment: for example, 50% of the index increase for a certain period and the full increase according to the agreement after that. If an additional increase percentage is wanted, select index-based + additional percentage as the adjustment condition.
Field | Description |
|---|---|
Rent adjustment months | The month(s) in which the rent is increased. |
Adjust rent on the starting date of the document | The rent is adjusted immediately on the starting date and the next time at the normal adjustment time. |
Adjustment frequency | How often the rent is adjusted (every year, every 2, 3, 4, 5 or 10 years). |
First possible adjustment | The first possible adjustment date of the agreement (when adjustment on the starting date is not selected). |
Notice to be sent to the tenant | When the rent adjustment notice is sent. Rent adjustment notices become available for generation according to this setting. |
Index | The name of the index used in the rent adjustment (for example the cost-of-living index). |
Base index point figure | The base index used on the agreement. |
If the index point figure decreases | The rent is not reduced / the rent is reduced. |
Minimum rent adjustment | The minimum percentage of the rent adjustment. |
Adjustment index months | The months whose index point figure is used in the adjustments (always before the rent adjustment). |
Index consideration | A period during which the index adjustment is multiplied by the given percentage. |
Additional percentage | Adds the given percentage on top of the index-based rent adjustment (also on top of the minimum increase). |
If the adjustment condition is percentage-based, select the adjustment frequency and months and enter the increase percentage. If the condition is a fixed sum, select the frequency and months and enter the total increase amount. If the condition is market rent, the rent is adjusted according to the market rent: define the frequency, adjustment month and first adjustment date; additional details can be written in the free text field. The market rents are updated in the Administration section under Market rent update.
If the adjustment is not based on a predefined condition, select other rent adjustment as the condition. The adjustment itself is then made manually on the agreement’s Changes to rent tab. In that case it is worth recording the terms in the Other terms and conditions panel so that the condition is visible on the agreement.
Options

Add an option with Add option and select the option type from the drop-down list. Each option has a first and a last exercise date, which define the date limits for approving the option: the option must be approved within this period for it to take effect on the defined effective date. The responsible party can be the tenant, the lessor or both. Costs caused by exercising or not exercising the option can be recorded for all options; these payments are not transferred to invoicing.
When the agreement has been approved, the options are shown on the agreement’s summary on the Options tab, where an option can be approved or discarded. Its status can also be set to under negotiation if the decision is still open. The status of an option can be: available (initial status), under negotiation, approved, discarded, ended (the exercise period has ended) or blocked (an approved option prevents it, for example because of overlapping dates).
The agreement printout only shows the information that the agreement has options. To show the option details on the printout, add them to Other terms and conditions or attach a screenshot of the Options tab as an appendix.
Renewal option and automatic renewal option: renewal options give the agreement one or more separate validity periods, either fixed-term or valid until further notice. An automatic renewal option is approved in connection with the approval of the agreement, in which case the agreement continues automatically after the ending date (on the agreement printout, the lease term changes from fixed-term to valid until further notice). A non-automatic renewal option renews the agreement manually after the agreement ends. A continuous fixed-term renewal is also available, in which case the option is valid for a fixed period at a time and always continues with a period of the same length. A renewal option valid until further notice requires a termination clause; if the clause is a notice period, enter the notice periods of both the tenant and the lessor.
Premise addition and reduction options allow rental areas to be added to or removed from the agreement during the lease. Approving the option does not itself add or remove rental areas — the changes to the rented premises must be made separately.
Dissolution option: an option for ending the agreement earlier. The effective date defines when the agreement is to be terminated. Approving the option does not end the agreement; the actual termination must be done separately.
Purchase option: approving a purchase option marks the agreement as terminated, so only one purchase option can be approved at a time.
Other options can be entered and named freely, and there can be several of them.
Additional products

Additional products defined in the Administration section can be added to the agreement in the Additional products panel.
Other terms and conditions

Other separate terms can be added to the agreement as free text in the Other terms and conditions panel.
Signed parties
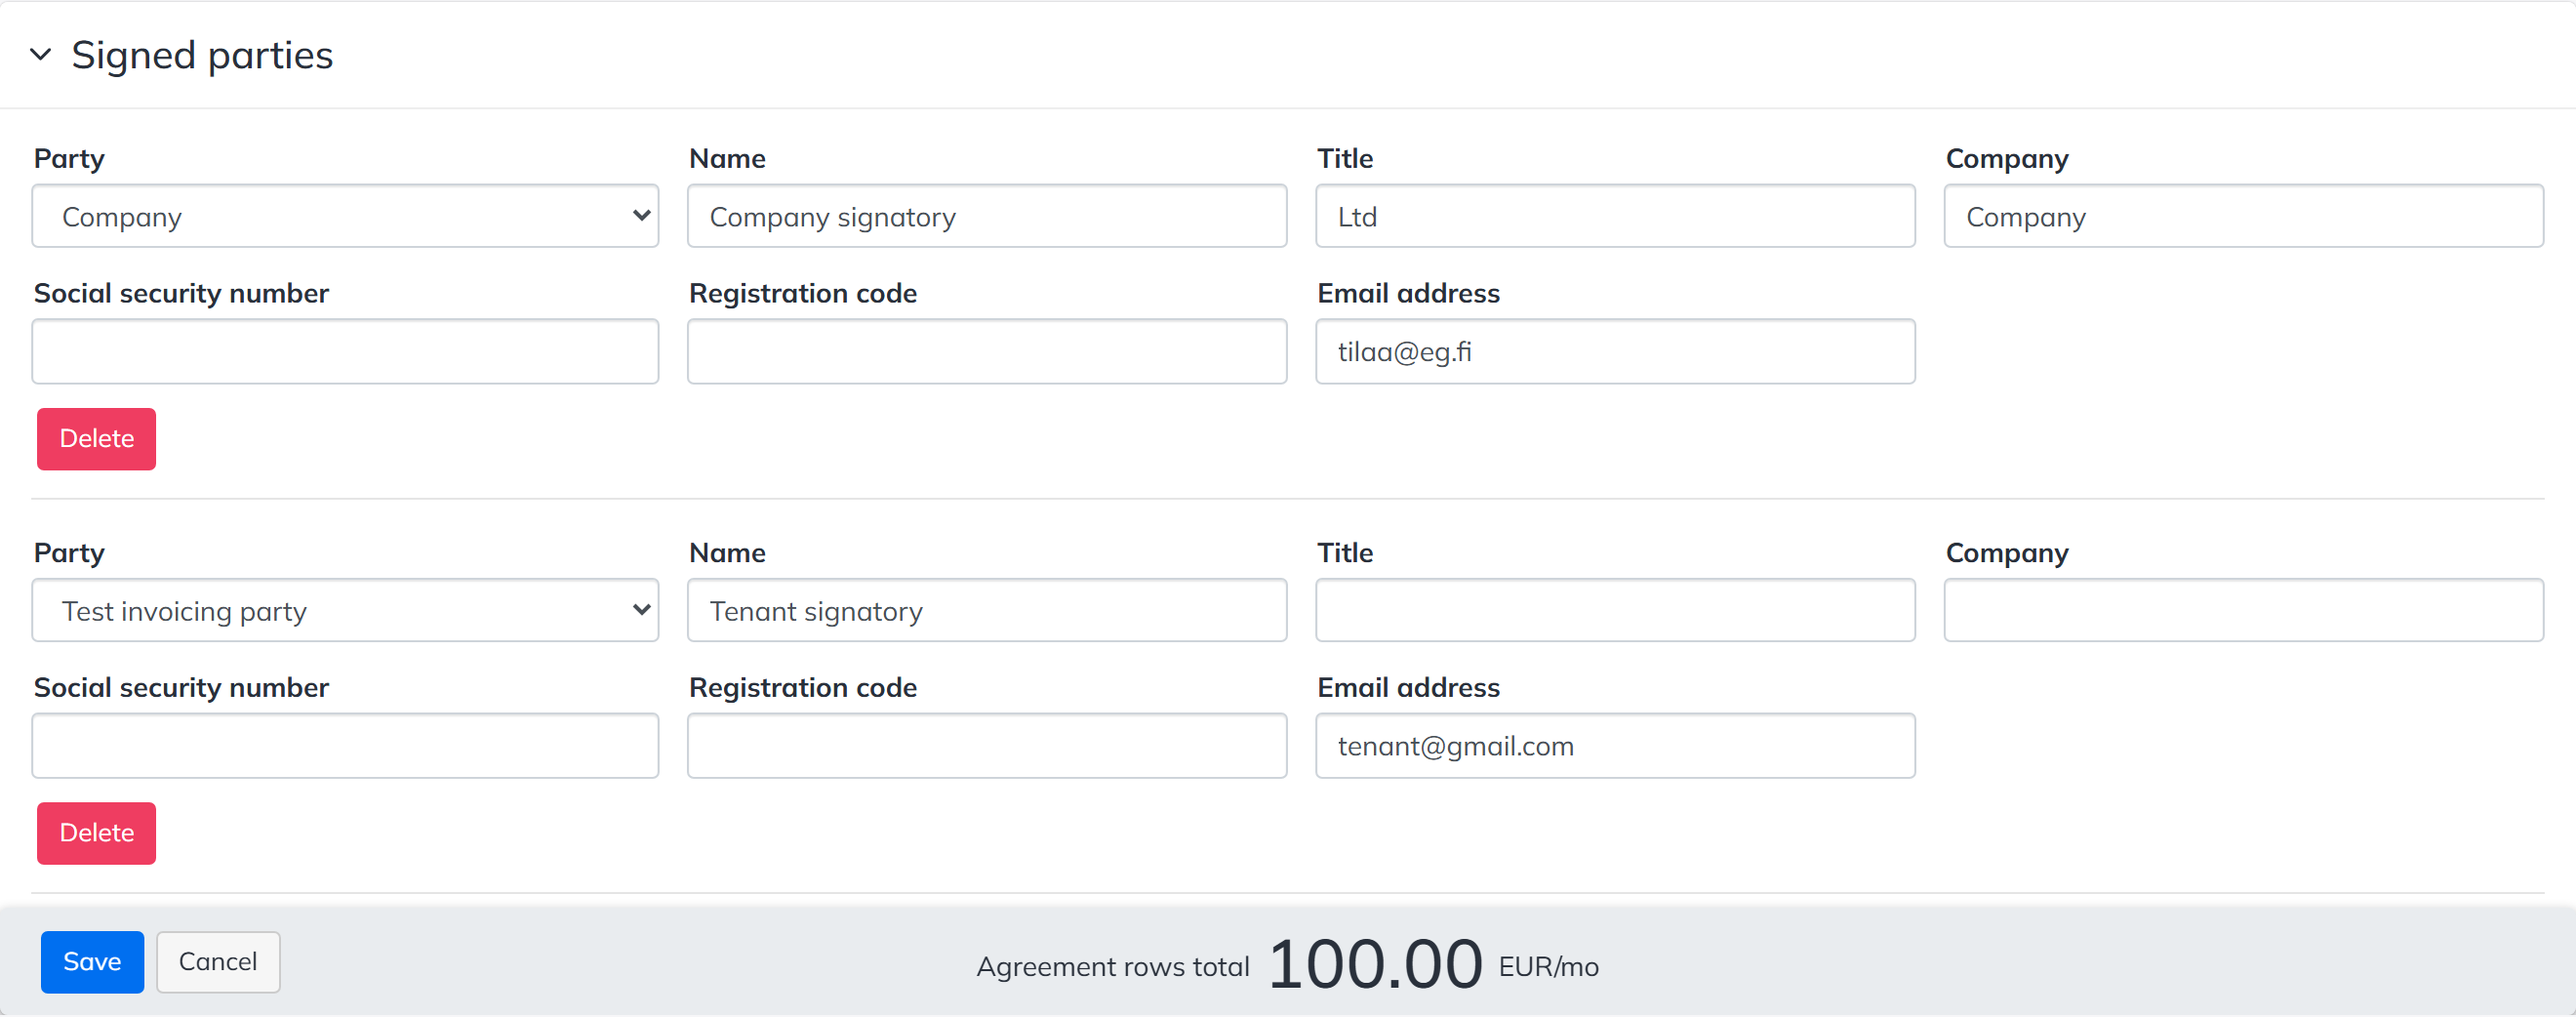
The signatory details are formed from the agreement’s tenant and lessor details, and they can be overwritten if needed. More signatories can be added with Add signing party. On the agreement printout the signatories are always listed in alphabetical order by party, lessor first. In connection with the approval (signing) of the agreement, the program asks for the signing date and place, which are transferred to the agreement.
