Creating, editing and deleting a car park
From the Rental area management, open the summary page of the building for which you wish to create a car park. For more information on how to find the building summary page, see above.

From the right of the building summary page, select Create car park... A new page for creating a car park will open up.
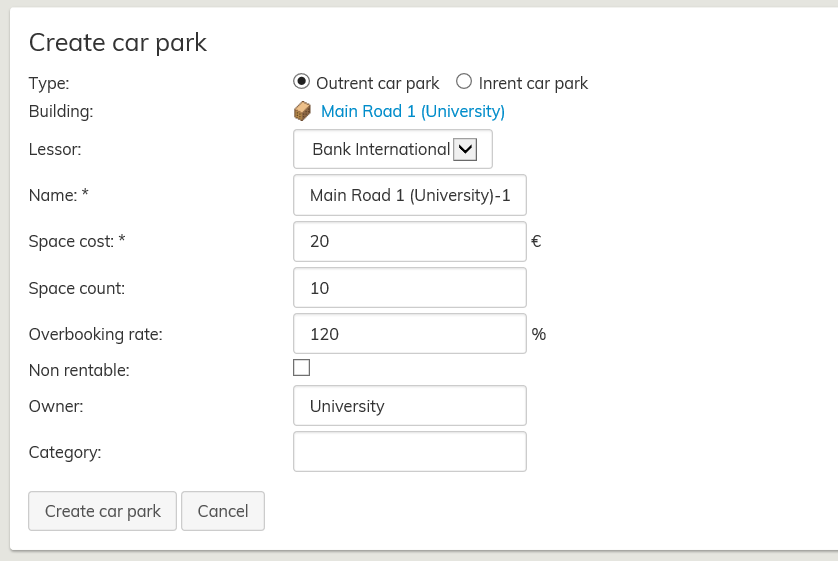
Fill out the required fields to create the car park. Fields that are marked with an asterisk (*) are mandatory.
Overbooking rate means that it is possible to assign 15 users for 10 parking spaces, for example. Once finished, click Create car park.

Created car parks can be seen in building summary page, in the Car parks section.
In addition, car parks can be created directly from the floor plan.
If you want to create a car park in the floor plan, read the instructions under Help in the upper right corner of the floor plan
Pysäköintialueen luominen, muokkaaminen ja poistaminen
Avaa sen rakennuksen koontilomake, jolle haluat luoda pysäköintialueen. Katso ohje rakennuksen koontilomakkeen löytämiseksi edeltä.
Valitse rakennuksen koontilomakkeen oikeasta reunasta Luo pysäköintialue... Työikkunaan avautuu pysäköintialueen luontilomake.

Pysäköintialueen luomiseksi täytä tarvittavat kentät. Tähdellä (*) merkityt ovat pakollisia kenttiä.
Ylivarausaste tarkoittaa sitä, että esimerkiksi kymmenelle autopaikalle voidaan merkitä 15 käyttäjää. Paina lopuksi Luo pysäköinialue -painiketta.
Luodut pysäköintialueet tulevat näkyviin rakennuksen koontilomakkeen kohtaan Pysäköintialueet.
Pysäköintialueen luonti on mahdollista myös suoraan pohjakuvassa. Jos haluat luoda pysäköintialueen pohjakuvassa katso ohje pohjakuvan oikean yläkulman ohje painikkeesta.